
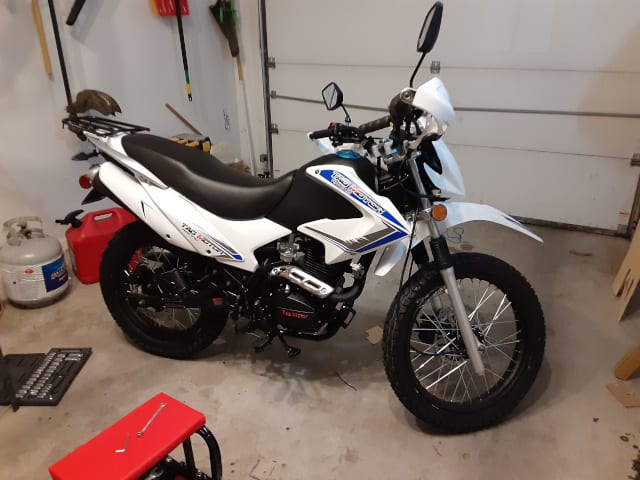
I removed the factory stickers from my TaoTao TBR7 dual-sport motorcycle’s plastic fairings. The dirt bike stickers were the generic no-frills type of decals that mimic what more expensive bike makers use. Some dirt bike manufacturers put bright stickers on their bike’s fairings to make them stand out in a crowd. Well, these factory decals were too cheap to keep on the bike, and I told myself I would remove the stickers from my dirt bike, plastics and all.
So crated this post as a more detailed post from the original de-badging of the TB7 motorcycle last year. Hope this helps with your dirt bike’s sticker removal from the plastic (including fairings) project.
Removing Stickers From The Bike’s Plastics Project.
I suspected the plastic fairings on my TBR7 motorcycle, like the rest of the bike, aren’t high-quality ( TBR7 Plastic Handguards Are Trash ). So to remove the dirt bike stickers from my motorcycle fairings, I wanted to move cautiously and take my time during the process.
Safety First, Work Safe Because Safety Is NO Accident!
The steps I used involved using heat and solvents on a heavy machine(the motorcycle), balanced on only a couple of points, containing highly flammable gasoline.
This sounds like an opening scene to some Public Safety Announcements. 😀
But seriously, garage safety is essential. So follow common sense ( My Motorcycle Garage Safety Rules – FAQ ) and remember to take your time and plan out your actions before you move forward.
Depending on the sticker removal method or products you use, air quality might be an issue. Be sure to work in well-ventilated areas using chemicals or heating processes to remove the dirt bike decals.
Steps I Took To Remove Stickers From The Bike’s Plastics?
It seems drawn out, but these steps were quick and easy, just listing them out in detail, so there is no confusion or damage to the plastics while removing the stickers.
1.- Collect Your Sticker Removal Tools And Materials.
Tools I used:
Author’s Notice: This page contains affiliate links, for which I may earn a commission by their use. Also, as an Amazon Associate, I earn from qualifying Amazon purchases.
a. Plastic scrapers
I had a few plastic scrapers left over from a plumbing job, but I figured I could use old credit cards or those fake ones you get in the junk mail.
I keep those fake junk mail credit cards as ice scrapers on old mornings. Get them, and toss them in my glove compartment, and they are always ready when I forget a real ice scraper.
b. Safe Heat Source
A hairdryer might be enough, but others have recommended using a real heat gun.
I do not have a heat gun, but I remember using them in the past and felt just having a hair dryer handy was enough since I felt a heat gun could get too hot and melt the plastics. Up to you if you are careful enough with using a heat gun.
c. Sticker Glue Remover
I’ve used both WD-40 and Goo Gone and say Goo Gone works better, but most garages have WD-40 on the shelves somewhere, and the spray application gets the WD-40 under the sticker edges.
So if you have WD-40, use it.
It does work, but if you have time to get Goo Gone, pick up a bottle for final sticker glue removal for this project and others.
d.- Paper towels, Clean cloth, or better, microfiber clothes.
I pick up these microfiber towels packs at a time. They comes in handy about the shop and works well with getting those little glue globs of plastics.
2.- Test any solvents or cleaners on the bike’s plastics first.
The stuff I Used, WD-40 and Goo Gone, are oil-based but at the same time contain solvents/volatile compounds.
I found an inconspicuous area of the bike’s plastics and tested the cleaners/removal on the surface. I left it on the plastic for a while.
After the removal compound was on the plastic longer than I figured it would be doing the sticker removal, I wiped it off and cleaned the area.
Did the sticker removal compound damage the plastics? Will the dirt bike survive? If so, I felt it was safe for the bike.
3.- Warmed Up The Whole Bike(NOT the Engine).
Our goal is to warm up the dirt bike’s plastics and decals. We are not going riding, just trying to remove stickers. So warm up the bike by warming up the ambient air around the bike.
The bike being warm allows the sticker glue to become warm too. I am making the sticker more pliable and porous, accepting the glue solvent compounds.
So if summertime, work outside where it’s warm. Allow the dirt bike to warm up before starting your sticker removal operation.
If wintertime, allow your garage to warm up and warm up the dirt bike. There is a winter catch; using some glue removal products produces fumes, and working in a well-ventilated area is essential.
So warm up the dirt bike parts, ventilate the area to keep you safe, and preserve the warmth.
4.- Positioned Myself and The Dirt Bike For Comfort.
I wasn’t going to work hunched over the bike and rushed this job, so I got my motorcycle positioned and a stool to sit on comfortably.
I use a roller stool that keeps all my tools in it.
FYI: Building My List of Must-Have Tools For Motorcycle Owners
5.- Examine The Sticker!
Is the dirt bike sticker strong enough to be pulled off in one piece?
Is the sticker made of rigid plastic?
Is the material the sticker made from porous? Since I like to leave the paper, or porous, sticker for last. They require a little extra scrapping.
I asked myself a couple of questions to ensure I was working smarter, not harder.
6.- Attempted A ‘Cold’ Decal Removal.
Some bike stickers weren’t applied very well, or the decal has weak glue.
If I could see air bubbles under the clear decals, there are many NO contact points. I used my fingernail, or scraper, to lift an edge of the sticker. And attempted to remove the decals in one pull.
Like ripping off a bandage.
7.- Attempted “Warm/Hot” Plastic Sticker Removal.
If the adhesive was too good in areas where the ‘cold’ pull method didn’t work, I apply a little heat. Like I said, a hair dryer on high works well for me.
I do NOT use a heat gun on dirt bike plastics.
My TBR7 motorcycle plastics seemed too flimsy for me, so I wasn’t going to chance to bubble or melt the plastic fairings.
A combination of heat and gentile pulling usually removes the plastic decals with time. If not, I will add a little help.
8.- Little Plastic Sticker Removal Help, Chemicals.
If a plastic sticker is difficult to remove, I spray with WD-40 around the edges.
I can use Goo Gone, but that comes in a bottle, and hard to get under the edges without making a mess. So I stick with WD-40 spray application with that little red straw to get under the edges.
Wait and allow the glue to soften, and then if necessary, carefully apply heat and again start pulling the sticker; if the plastic sticker tears might want to use a scraper to help with the removal.
9.- Porous/Paper Sticker Removal.
Now with paper or porous decals, you can’t just pull them up quickly like the plastic decals.
I like to apply heat liberally and peel off the sticker, but this often tears for me.
Instead, I score the surface of the paper sticker and put on my glue-removing agent. Spray with WD-40, or apply Goo Gone to a rag and soak the sticker.
After the decal’s glue is softened with a plastic scraper, I scrap off the decal. Don’t worry about any leftover adhesive. Removing the glue from the bike’s plastics will be convenient later.
10.- Removed The Old Sticker Residue,
I was impressed with the adhesive that TaoTao used on my TBR7 motorcycle, and it resisted the initial attempts to remove it. Knowing this, I figure your dirt bike should have tough glue on your stickers.
Often the old sticker glue residue is left on the plastics, but their removal can be easy and time-consuming.
Soak the rag(paper towel, microfiber cloth, etc.) with your glue removal computer(WD-40, or for this step, my favorite Goo Gone) and wet and wipe off the sticker’s glue.
The glue will soften and get stuck to your towel. Fold the towel and give a clean surface for the residual glue to transfer to the towel. With time, all the glue will be gone.
To clean up the oily residue the sticker removal compounds leave, I used a glass cleaner and wiped down the bike.
After all these steps, any dirt bike has earned a good cleaning. Break out the brushes and hose and shine up those naked plastics!
Remove Stickers From Dirt Bike Plastics FAQs
1.- What Worked Best For Sticker Removal WD-40 Or Goo Gone?
I Have to say WD-40 was the handiest.
I know WD-40 had multiple uses, and because of this, everyone usually has a couple of WD-40 cans in their garage. So WD-40 was pretty accessible and plentiful in my garage.
WD-40 is pressurized and can be applied close to the edges of the stickers with that tiny red straw.
Goo Gone was the most effective at residue sticker glue removal.
Now Goo Gone couldn’t be easily applied to the sticker cleanly but could be applied to a cloth to be used. This kept the mess down, and for some reason, the Goo Gone had one job, remove the Goo, and it did better than the multi-tasking WD-40.
So for the final clean-up of old sticker glue, Goo Gone worked the best.
2.- Cleaning The Dirt Bike’s Plastic Surfaces Necessary?
WD-40 and Goo Gone seemed to leave an oily residue on the bike’s plastic fairings. This ‘oil’ can get on your clothes or collect dust/dirt.
It’s an easy fix. So I gave the plastics a good wipe down with some glass cleaner and clean towels.
This post is based on experiences I learned while de-badging my TaoTao TBR7, a street legal dirt bike, or just a dual sport motorcycle. Removing the stickers on this bike was concerning since I felt the bike’s plastics wouldn’t handle a heavy-handed approach to decal removal.
Hope the lessons I learned help you safely remove your dirt bike’s decals and create nice clean surfaces for fresh new stickers. 😉
If you have any questions, tips, or suggestions, please leave a comment below.
Ride Safe, Ride Clean, Ride Fun!
