
Are you tired of cars pulling in front of you and ignoring your stock motorcycle horn? Well, my tiny Boom Vader horn sounded more like an excited buzzer than a real horn.
One guy was looking right at me and turning in front of me, ignoring my horn. Instead of continuing to use my horn, I had to switch to almost locking up my brakes. Stock Boom Vader horn no more.
Looked For Easy (Loud) Motorcycle Horn Upgrades.
I wanted a simple drop-in solution for my horn upgrade, and the first indication that I could do it myself was looking at the horn’s electrical connection.
It’s weather resistant; slip on the connector. The stock horn has male connections, while the wire harness has female connectors. I found a few snips, and I could take the stock horn connector and set it up for a simple horn upgrade.
Note I Wanted A Motorcycle Train Horn Upgrade.
The dual motorcycle train horn upgrade sounds the best; I’ve heard it’s like the dual car train horn upgrade.
However, my Boom Vader only has a little room under the body panels for this dual horn upgrade, but I am already thinking about a fork-mounted option. So remember to check back later to see when I do the upgrade.
I have been eyeballing the dual-track Motohorn motorcycle dual-tone horn upgrade. Would that be ironic sounding coming from such a small motorcycle? 😀
The Motorcycle Horn Upgrade I Ordered.
The goal was to find the best motorcycle upgrade I could fit under the Boom Vader motorcycle body panels, and as I mentioned, a single-horn solution was the result.
A little trivial, considering the new horn was going to be mounted in the exact location as the stock horn, under the body panels, but I was looking for something the same color as the motorcycle, blue.
Author’s Notice: This page contains affiliate links, for which I may earn a commission by their use. As an Amazon Associate, I earn from qualifying Amazon purchases.
I found it:
Current Prices: Snail Air Horn Electric Motorcycle Horn.
This new motorcycle horn looked like a simple drop-in upgrade, the motorcycle upgrade I have liked lately. Enjoy riding this bike and instead spend time riding than tinkering recently.
How I Changed My Motorcycle Horn.
The nice thing about my Boom Vader, it’s easy to work on the bike, and even better, even the best upgrades are usually cheap/low-priced.
However, we have not considered any motorcycle upgrade, especially a safety upgrade, a joke. This horn improvement is a safety upgrade.
Now Let’s get down to business.
1.- Prep The Motorcycle And Garage For Work.
Garage safety is a priority for any project—safety glasses, fire extinguishers, first aid kits, etc.
Make the motorcycle safe to work on, turn off electrical circuits to prevent short circuits and sparks, etc.
My Motorcycle Garage Safety Rules – FAQ
2.- Disconnect The Stock Motorcycle Horn.
The stock motorcycle horn connector on the Boom Vader was a slip-on and, in this case, a slip-off.
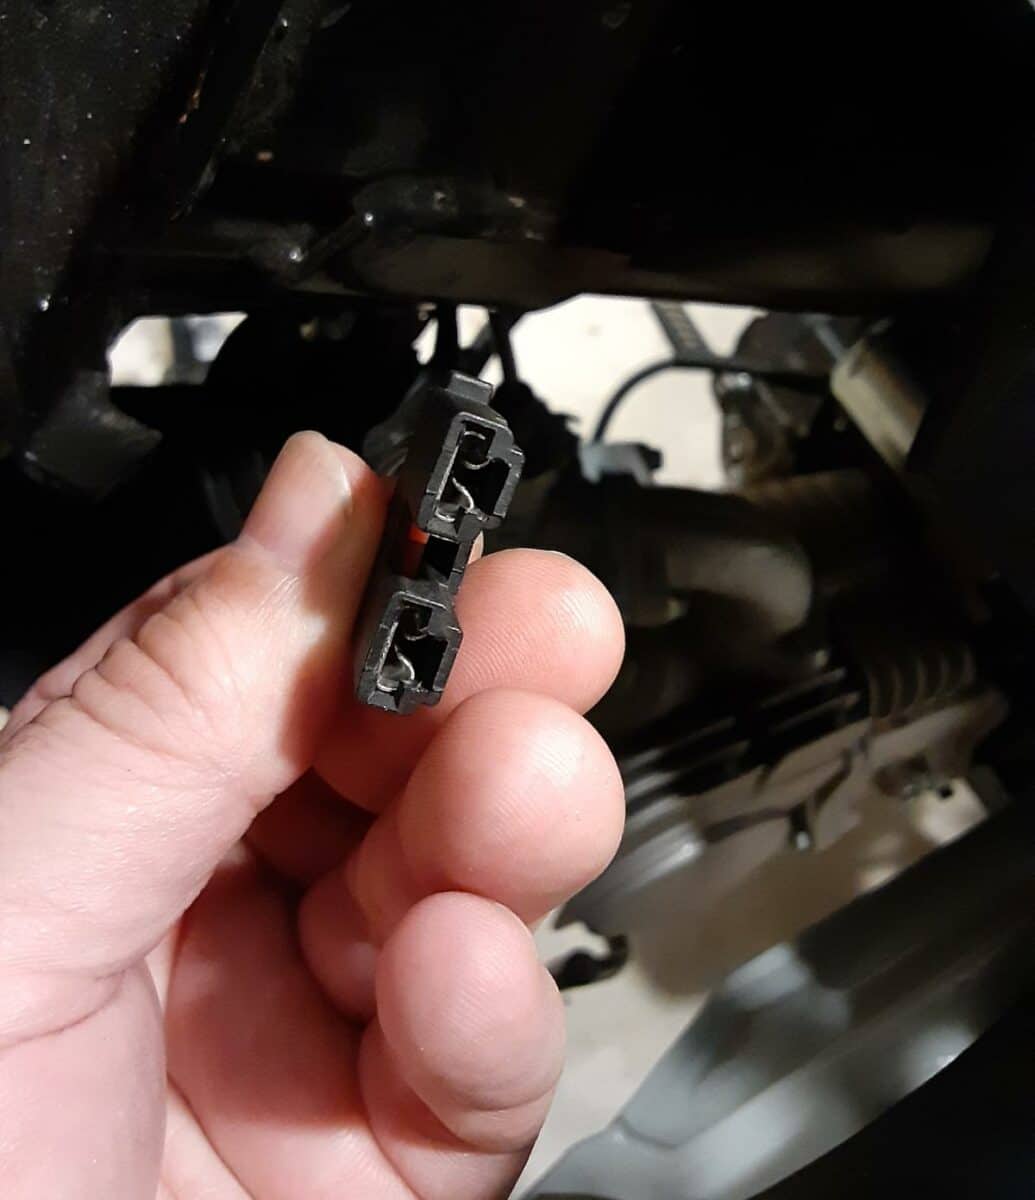
Move the connector and wiring out of the way to prevent damage.
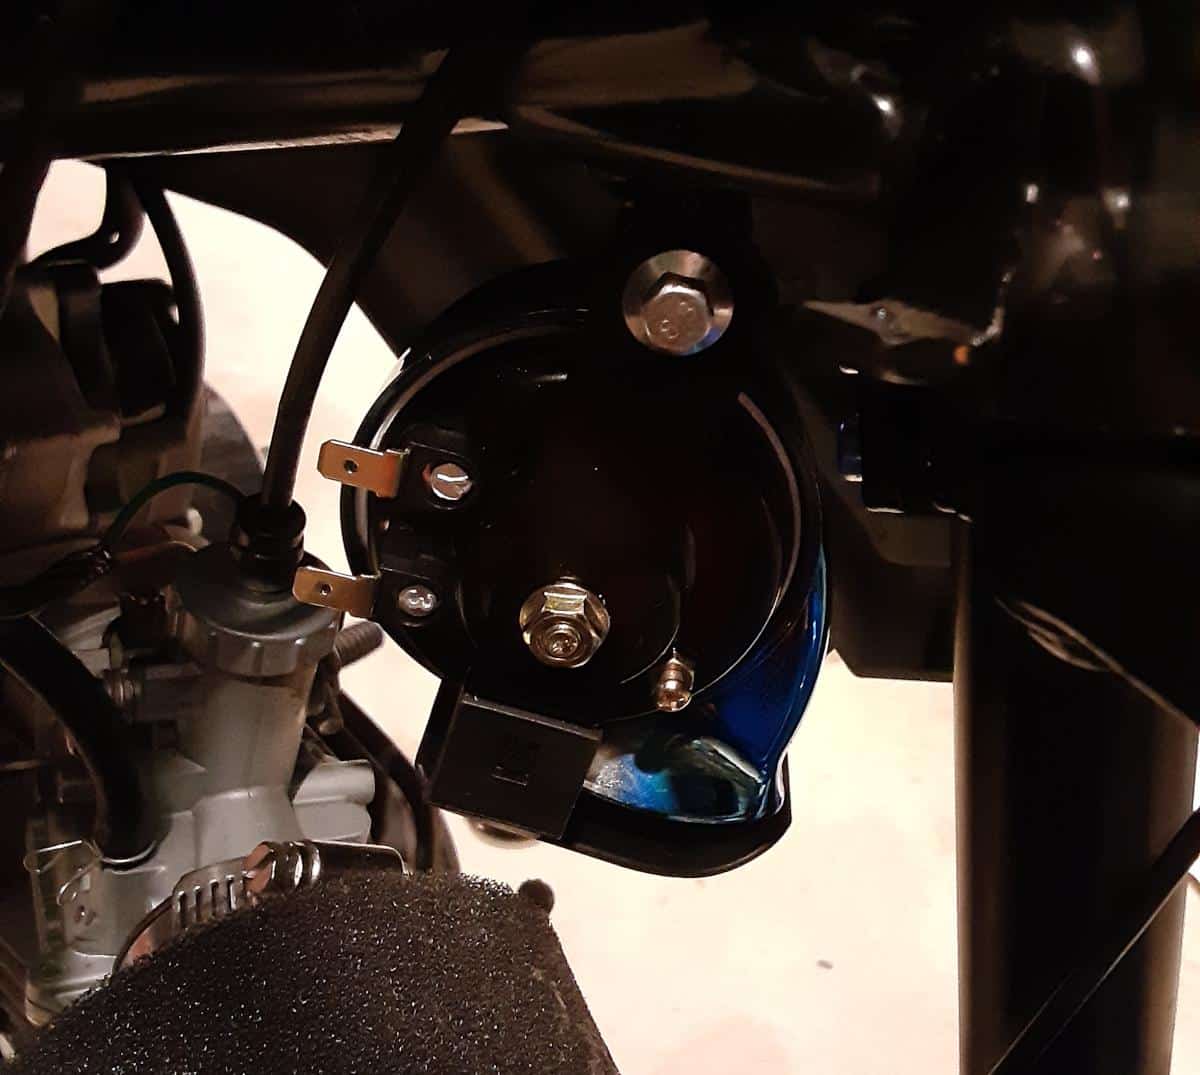
3.- Remove The Stock Motorcycle Horn.
My stock Boom Vader Gen 2 motorcycle horn is held on by a single nut and bolt. A couple of wrenches ( Must Have Tools For Motorcycle Owners ) and the horn came off with no problem.
Weird how the stock horn looks like a noisy flying saucer.
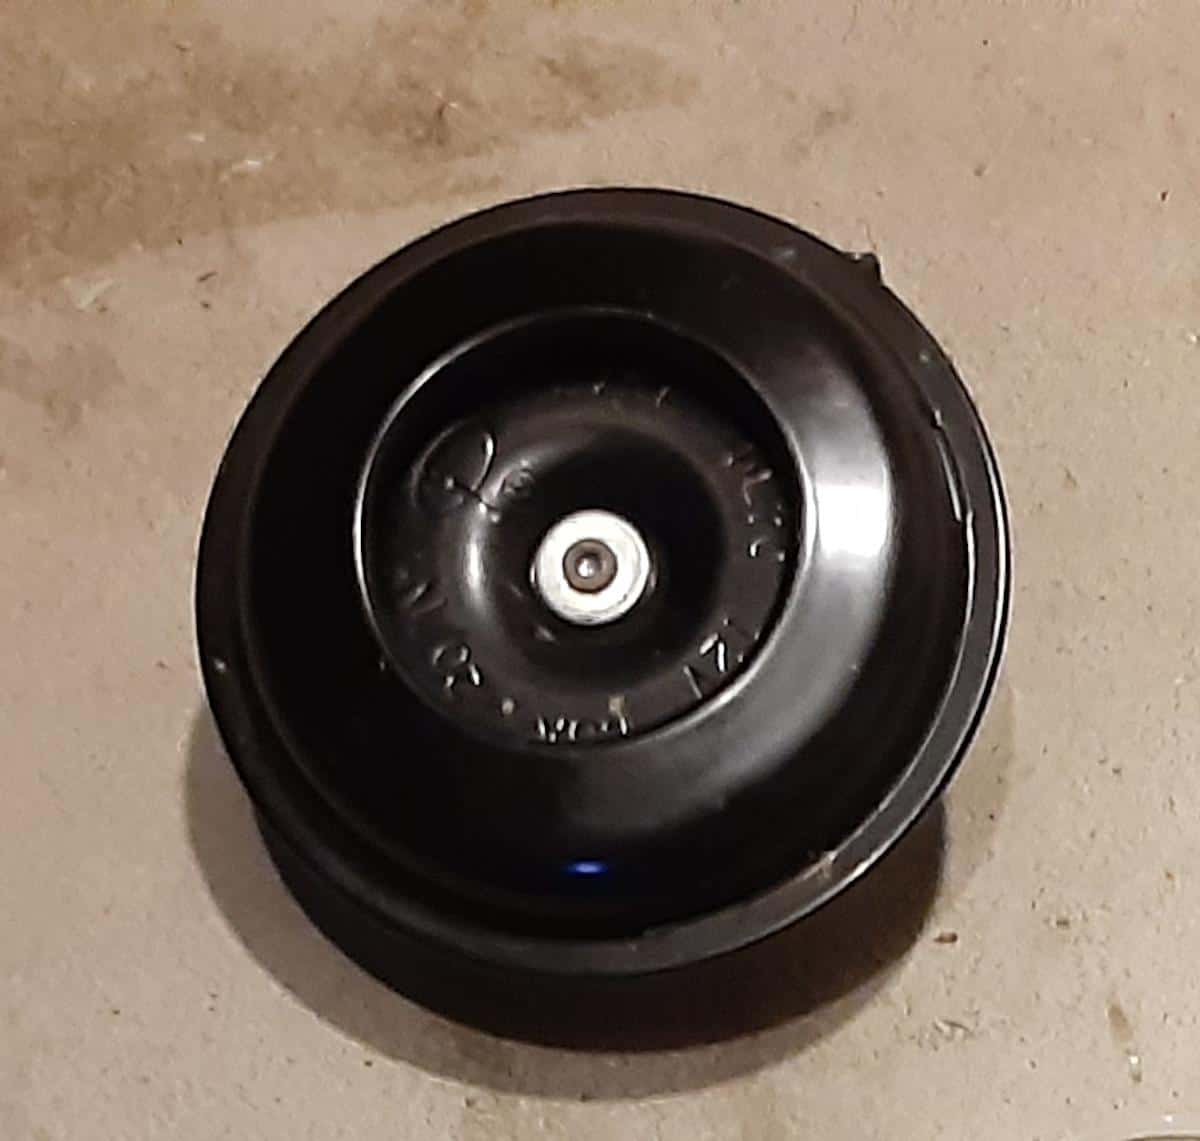
Remember to keep the bolt you removed from the stock horn mount; it will be re-used later for the new motorcycle horn.
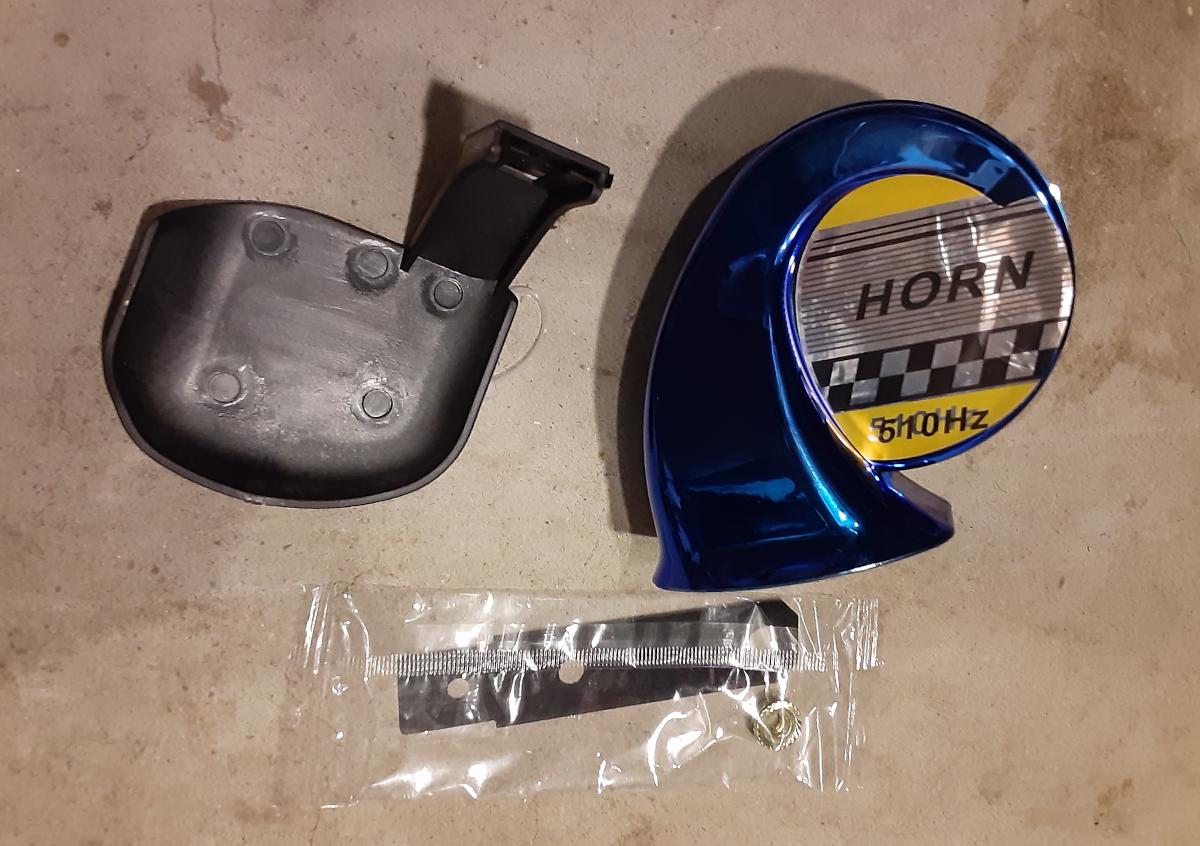
4.- Assemble The New Motorcycle Horn.
Assembling the new horn I bought was easy.
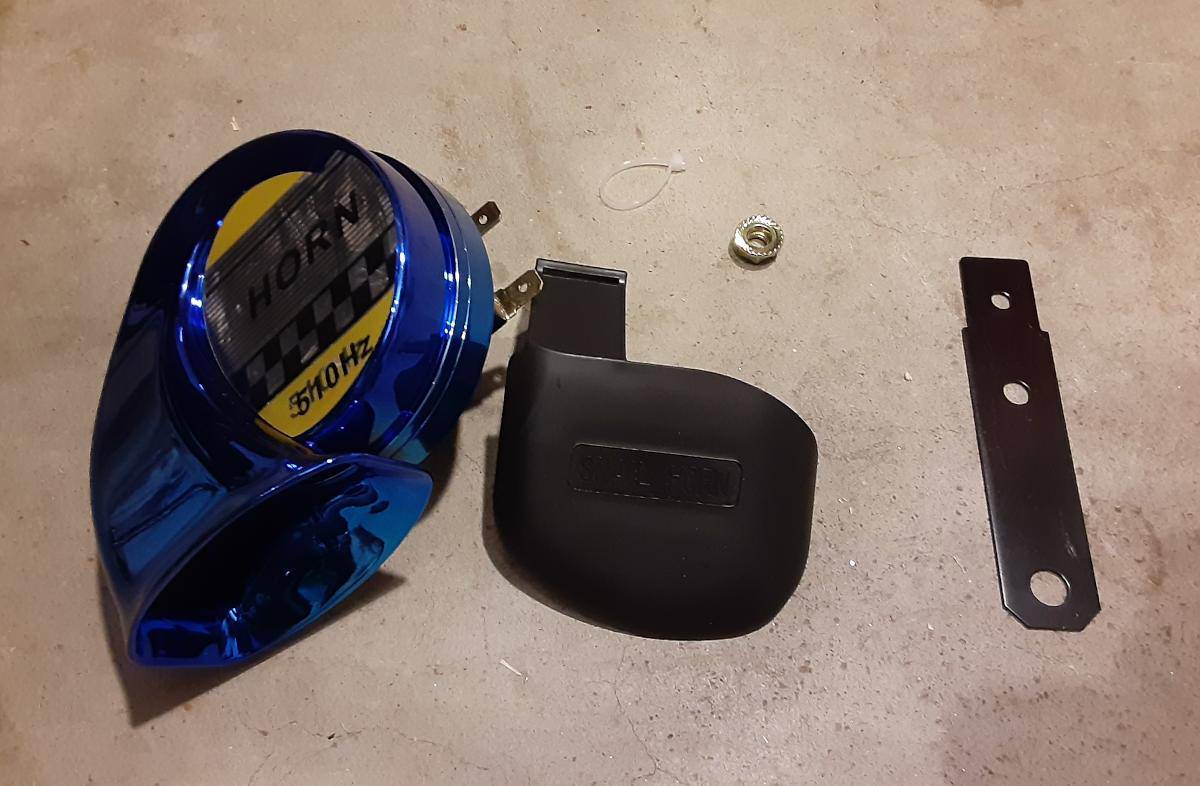
There is a splash guard that slipped on the new metal mount.
After that, the new horn was attached to the metal mount with the nut provided. FYI, thread-locker is your friend; I use the blue type.

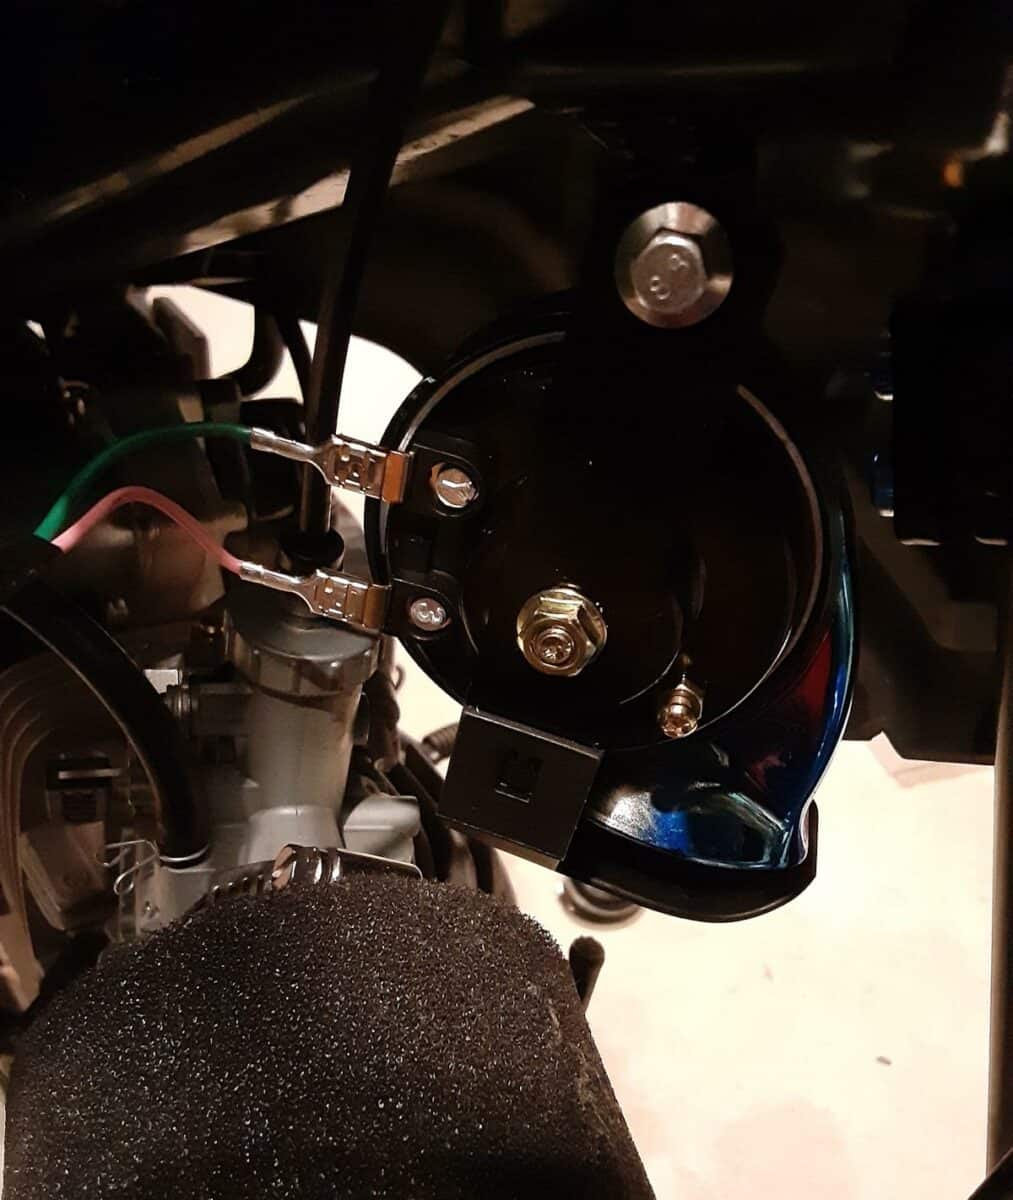
5.- Mount The New Upgraded Motorcycle Horn.
I mounted the new horn where the stock horn was mounted—re-using the mounting bolt from the stock horn.
Again, thread-locker is your friend; I use the blue type.
6.- Modify The Horn Electrical Connectors(if needed).
Now the stock motorcycle horn electrical connectors didn’t fit over the new motorcycle horn, and this was because the connectors were mounted in a plastic housing.
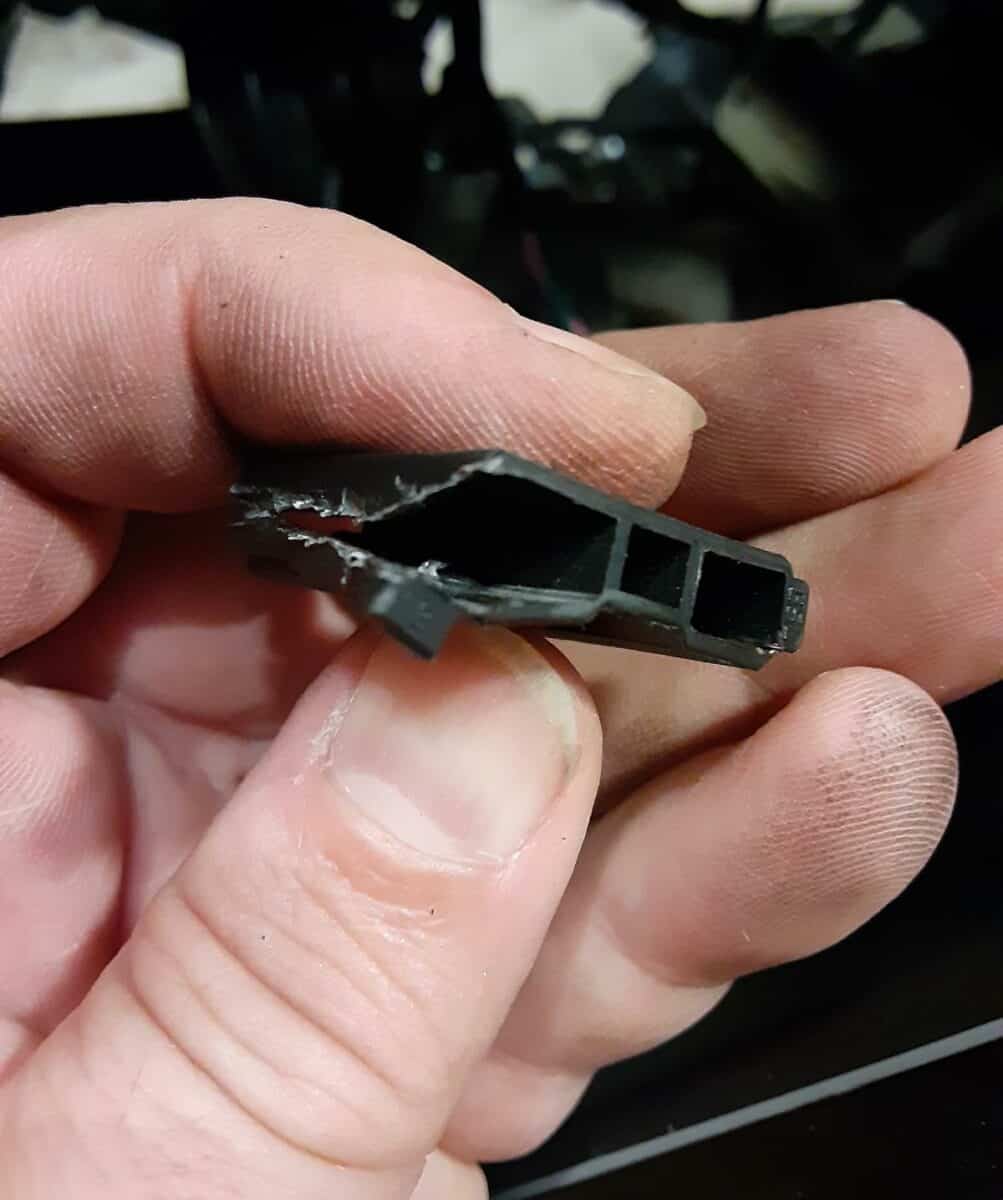
I used wire cutters to snip the plastic around the electrical connectors. These cuts freed up the horn’s connectors and made them ready for mounting.
7.- Install The Electrical Connectors.
A simple push on connectors.
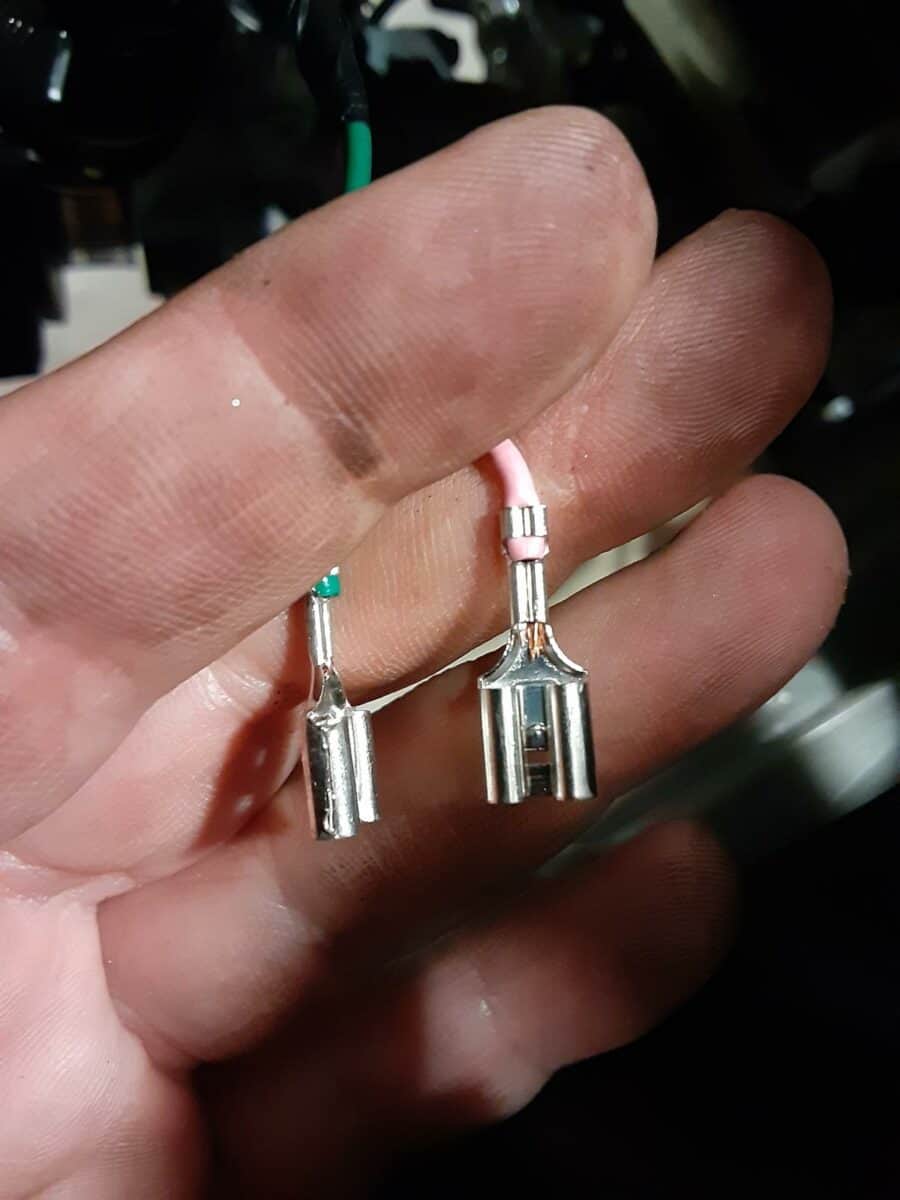
Some people recommend a little DI-electric grease for any electrical connectors that could become exposed to the elements.
It’s a good idea, but you can do this later since we want to test the new horn immediately.
8.- Test New Motorcycle Horn Upgrade.
Meep, Meep, has now become much louder.
Sounds like a real horn now. 😀
9.- Make Connectors Water Tight.
Now you ensured the connections are good and the new motorcycle horn works, time to secure your work.
Now you can disconnect each connector, slip over some heat-shrink tubing, dab on a little di-electric grease on the male ends, reconnect, and shrink the tubing once over the connectors for weather tight seal.
Repeat for the second electrical connector.
10.- Clean Up And Ride The Motorcycle!
After a lifetime of being told I need to clean up and do my chores before going out to play, I still don’t do it.
Current Prices: Snail Electric Motorcycle Horn.
My garage is a mess, but for cleanliness and safety, clean up before you go out to play.
Ride Safe, Ride Fun!
Click To See My Recommended
Boom Vader Gen 2 Upgrades

Hi I’m Tom, A New Motorcycle Rider and Blog Author.
I am a new rider(Pa Learners Permit at the end of 2020, and I received a Pa Motorcycle License in 2021 after passing a Motorcycle Safety Course).
I bought my first motorcycle, a TaoTao TBR7, at the beginning of 2021 and have been doing upgrades on that motorcycle since.
I added to my motorcycle collection by buying a Boom Vader Gen 2 in 2022, and that Grom-Clone motorcycle has been upgraded by me as well.
I continue to ride my Boom Vader Gen 2 motorcycle as well as my TaoTao TBR7 dual-sport bike.
Read more on my About Me page.
Fun Fact: I’ve only been on one group ride.
