
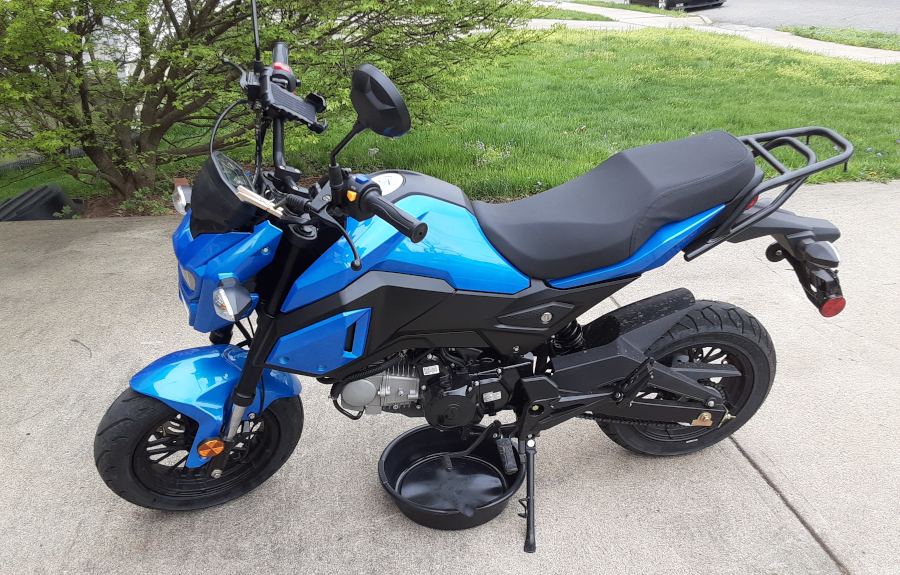
I plan on upgrading my little Boom Vader 125cc motorcycle by doing the typical Grom-Clone upgrades. For now, I have the stock 125cc engine and sad stock exhaust system.
The stock exhaust blocks the oil drain plug, which makes Boom Vader Motorcycle Oil Changes different and difficult. So, I will cover how I do a Boom Vader 125cc oil change, with a stock exhaust.
I’ll keep this simple and easy to change the oil more frequently during the motorcycle’s break-in period.

After the motorcycle’s break-in period, I typically don’t go longer than the manufacturer’s recommended oil change intervals. That is the maximum I will allow the oil in the bike. However, I also do oil changes more frequently based on how the bike is ridden or behaves.
I talk more about this in: How Often Do You Need to Change Your Motorcycle’s Oil.
My Stock Boom Vader Oil Changing 10 Steps:
1.- Ensure Motorcycle and Safe Motorcycle Work Area.
FAQ: Motorcycle Garage Safety Rules
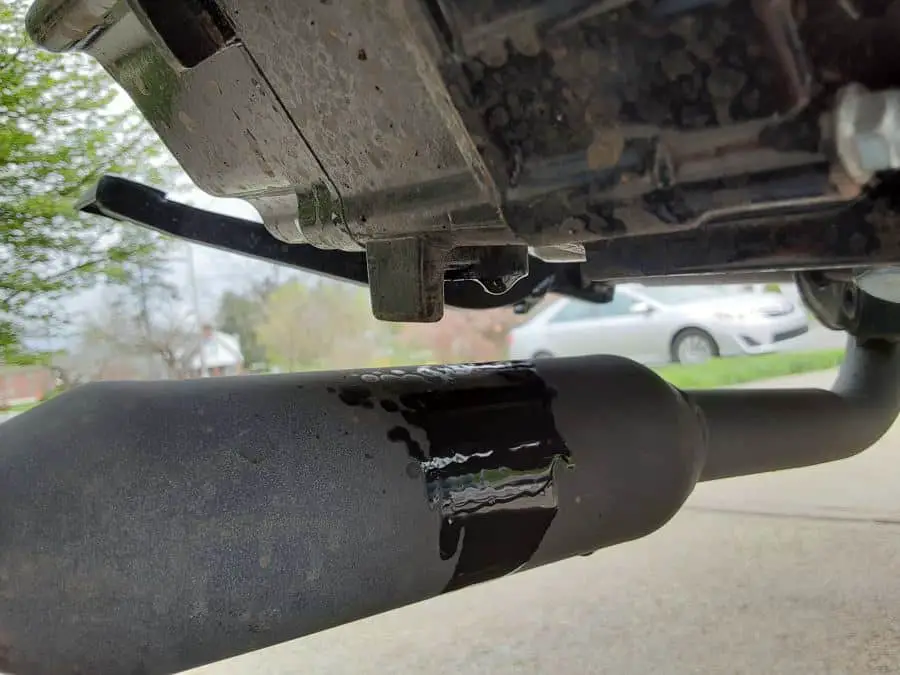
This stock exhaust setup on the Boom Vader motorcycle causes a real safety problem. The exhaust piping goes right under the crankcase oil drain, and this design problem causes the possibility of burning yourself and pouring used engine oil over a hot exhaust.
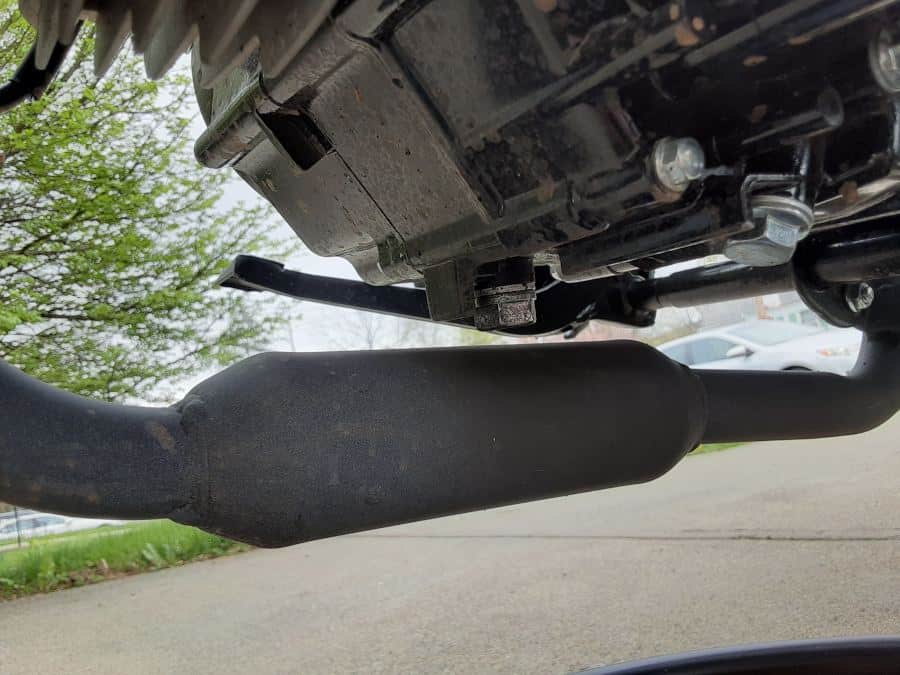
So for the Boom Vader 125 motorcycle, I don’t change the oil until the exhaust piping is cool. Other people say only change an engine’s oil with the oil hot, I agree, but this exhaust design is a real risk.
So again, I do not change the Boom Vader’s oil unless the exhaust piping is cool to the touch.
2.- Stage The Tools Needed.
FAQ: Must-Have Motorcycle Tools.
a. Metric combination wrenches.
b. long neck funnel
c. Oil collection pan/container.
d. Oil drain crush gasket(s).
3.- Stage The Oil Change Materials Needed.
a. Right type of motorcycle oil for the Boom Vader ( FAQ: Boom Vader Oil Type ).
b. Shop rags for oil spillage clean-up.
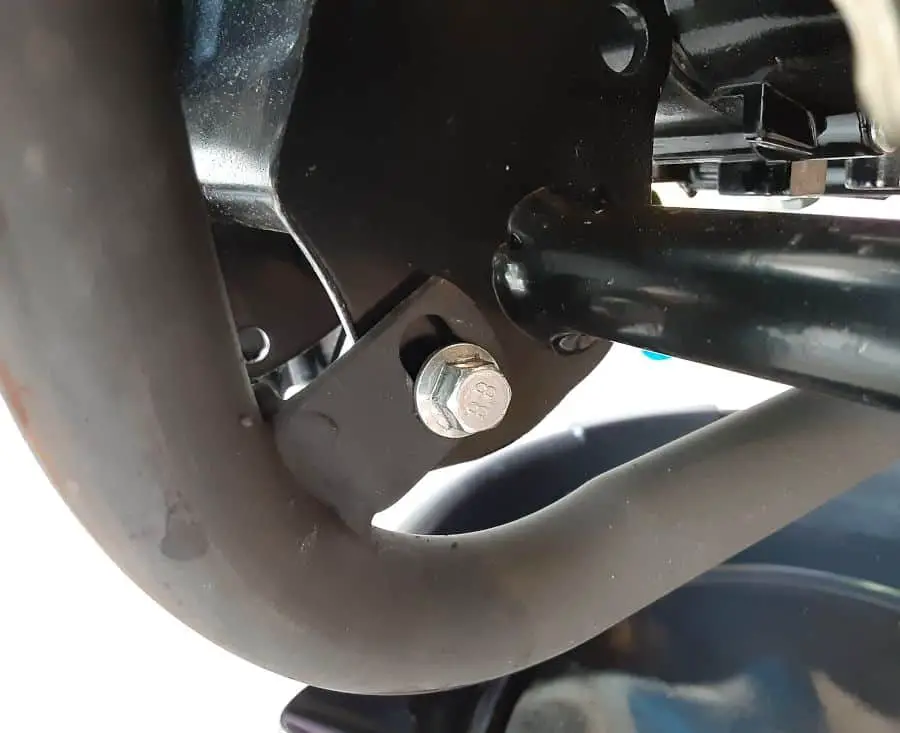
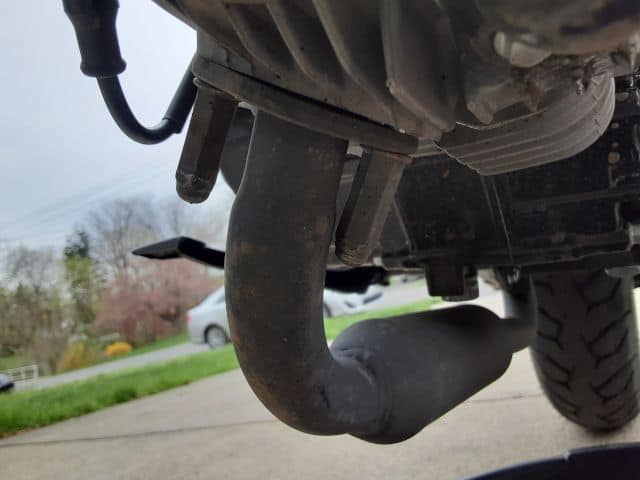
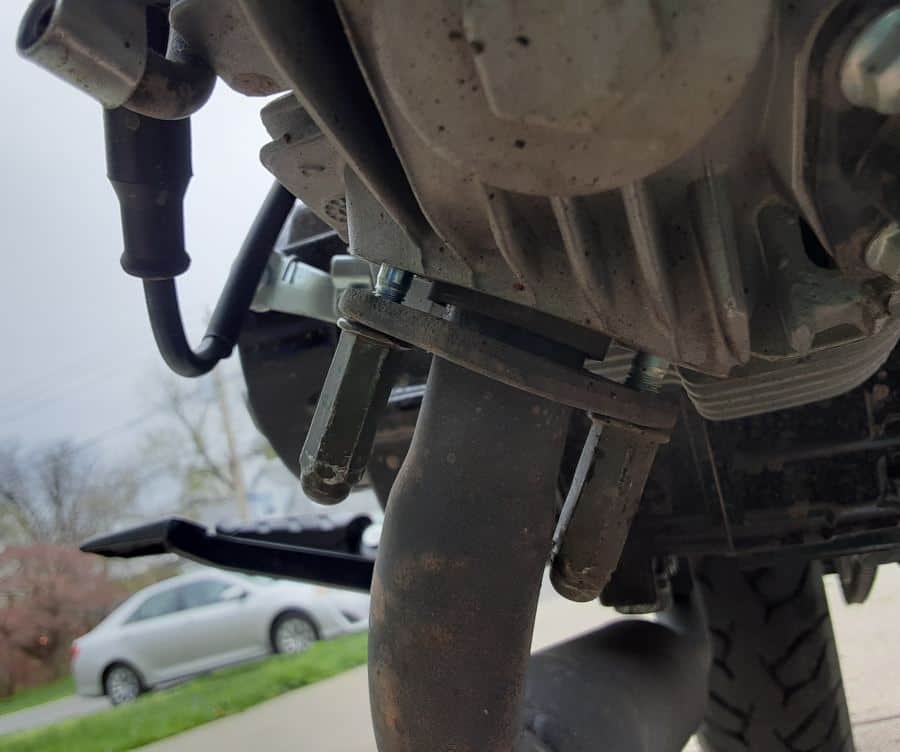
4.- Loosen the exhaust piping.
a. Loosen the midway nut and bolt mount.
b. Loosen the exhaust flange nuts.
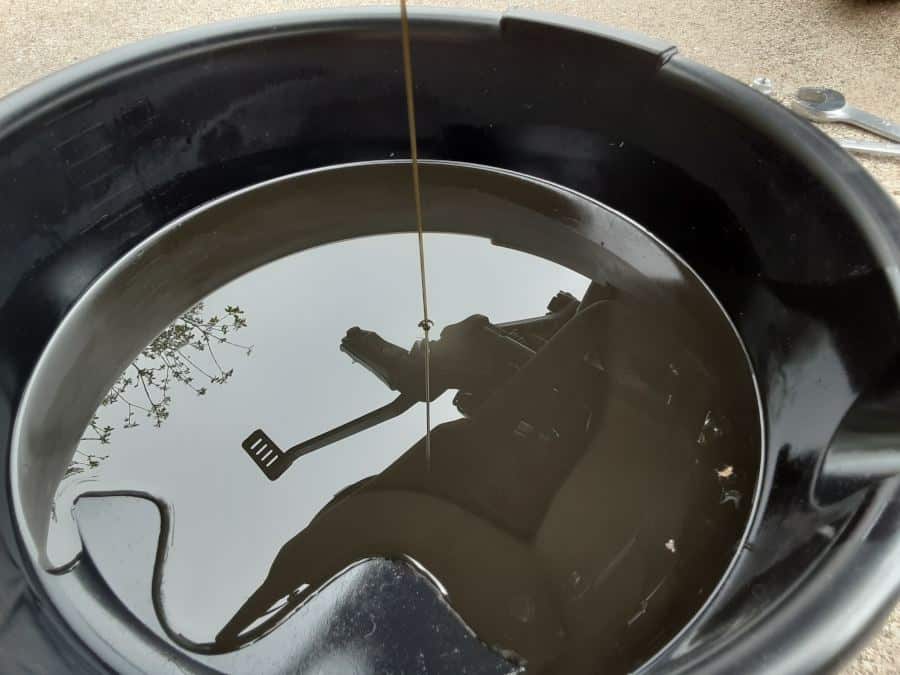
5.- Drain The Engine Oil.
a. Pan/Container Under the motorcycle engine crankcase drain.
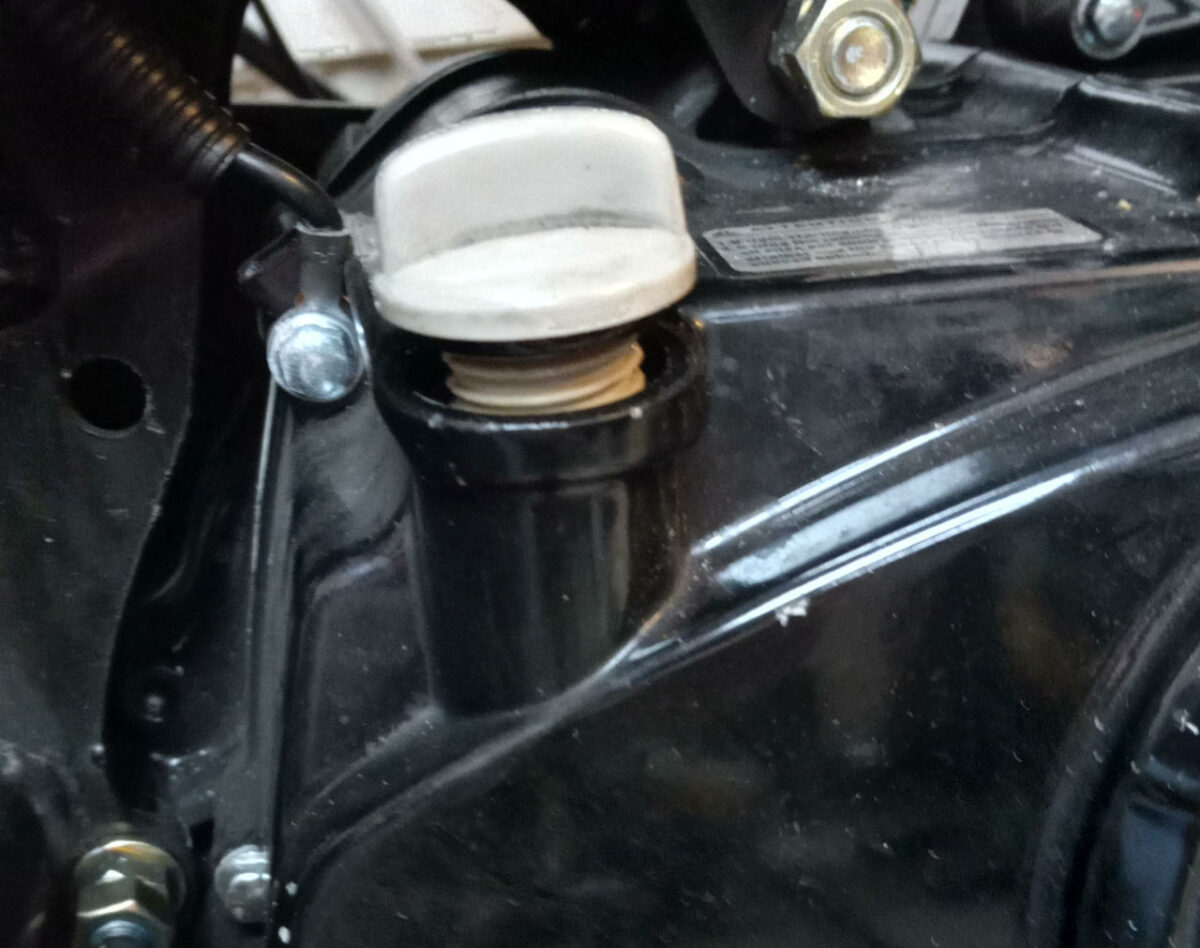
b. Remove the oil drip stick(or leave loosened to allow more air into engine crank case area), check the oil level for a mental note of how much oil is in the engine, and identify any engine problems early.
c. Using a wrench, loosen the drain bolt.

d. Once loosened, using your fingers, simultaneously hold the bolt to the crankcase drain and loosen the bolt. Once you feel all the treads fully disengaged, in one motion, pull the bolt away.
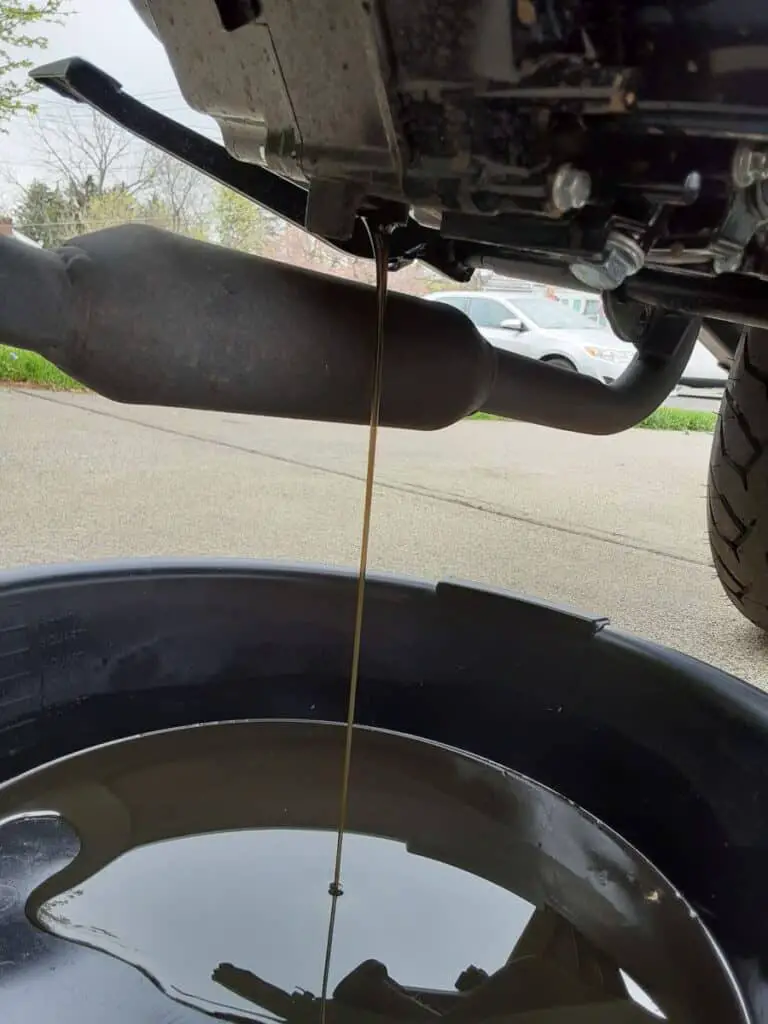
e. Allow oil to drain completely. The motorcycle is usually on the kickstand when doing oil changes, which tilts the motorcycle to the left. If you like, you can position the bike more upright to help additional oil drain faster. Careful of doing so, don’t let the motorcycle roll away or drop the bike.
6.- Replace The Crush Gasket And Reinstall The Oil Drain Bolt.
a. Find Oil Drain Crush Washer. Sometimes it’s on the oil drain bolt; sometimes, it’s pressed on the crankcase. Carefully remove the old crush washer and recycle it as necessary.
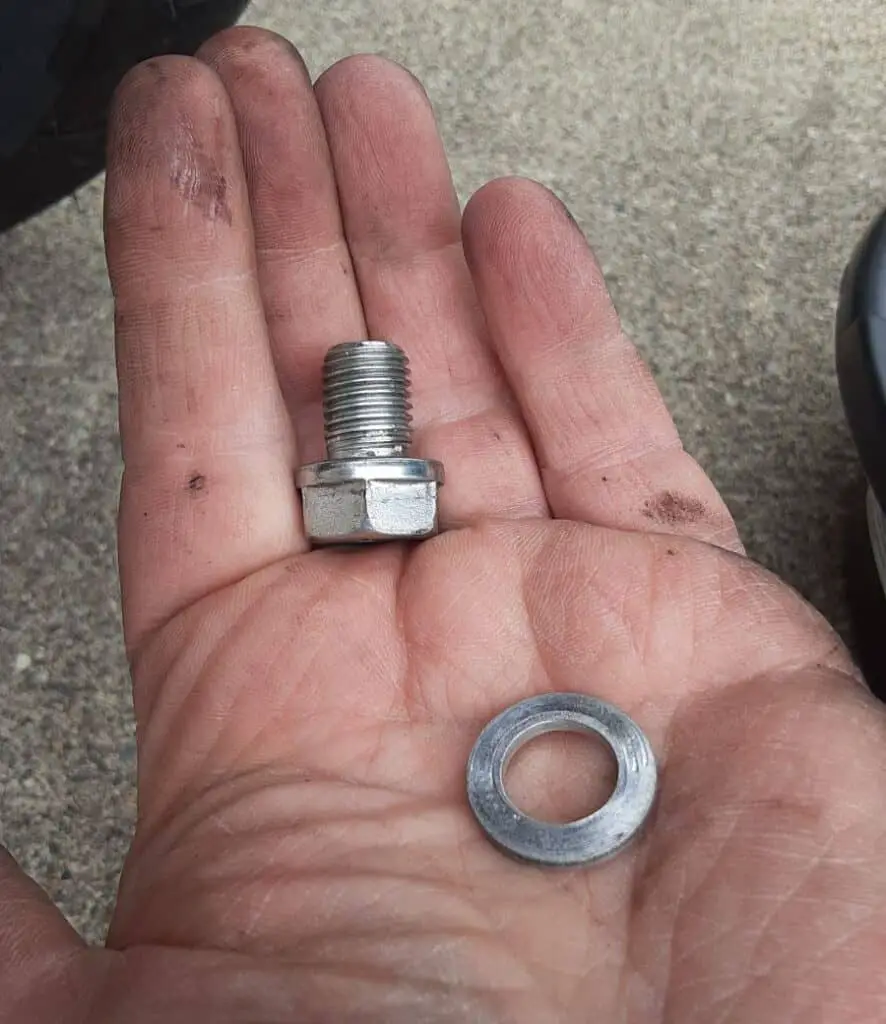
b. Place a new oil drain crush gasket on the bolt.
c. Finger thread the drain bolt into the crankcase drain hole, carefully preventing cross-threading.
d. Once the finger is tight, use a wrench to tighten and compress the crush washer.
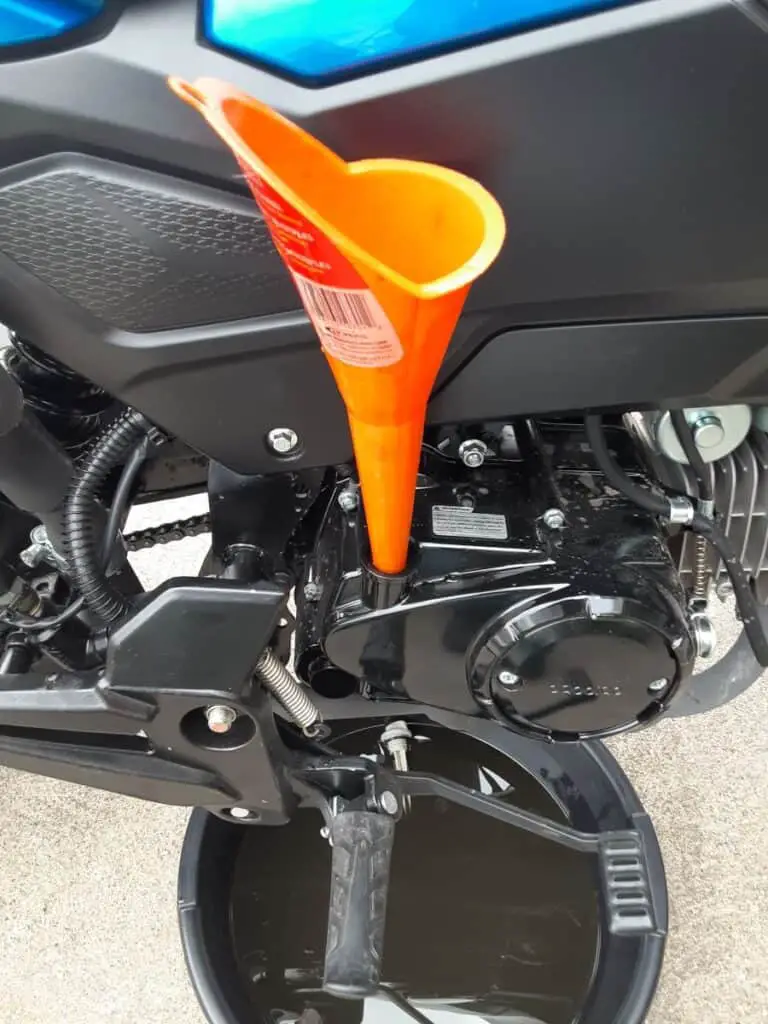
7.- Add Fresh Motorcycle Oil
Note: Add Oil before you re-tighten the exhaust system, so if you overfill, you can quickly release a little oil to correct the engine oil level.
a. Using a long-neck funnel, place in oil fill/dipstick hole. Using a funnel will minimize oil spillage. Also, keeping the oil drain pan/container under the motorcycle will collect any accidental spills from the funnel.
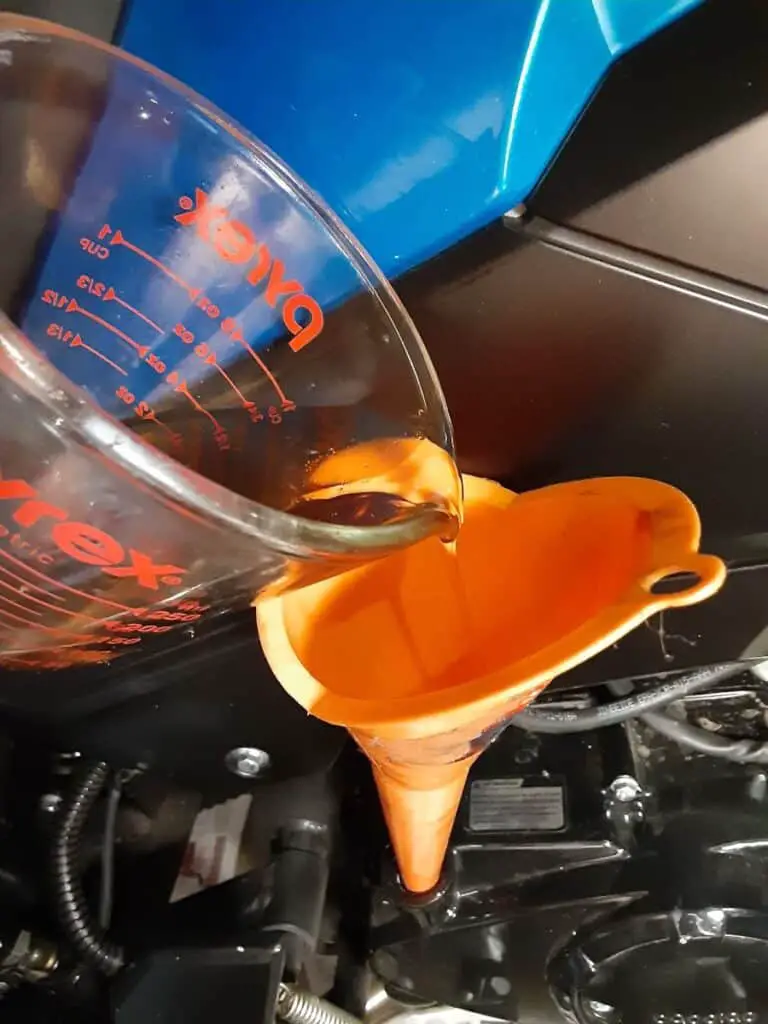
b. Using a measuring cup, pour 850mls of fresh motorcycle oil into the funnel. ( FAQ: Boom Vader Oil Capacity )Sometimes air escapes through the oil being poured in, and these bubbles can splash oil and pour slowly.
c. Check oil level. After adding the new oil, remove the funnel, clean the dipstick, and put the dipstick back into its hole. Do not thread it. Remove the dipstick and check the oil level on the checkered band. If too low, add a little more. If too high, you need to drain some oil out.
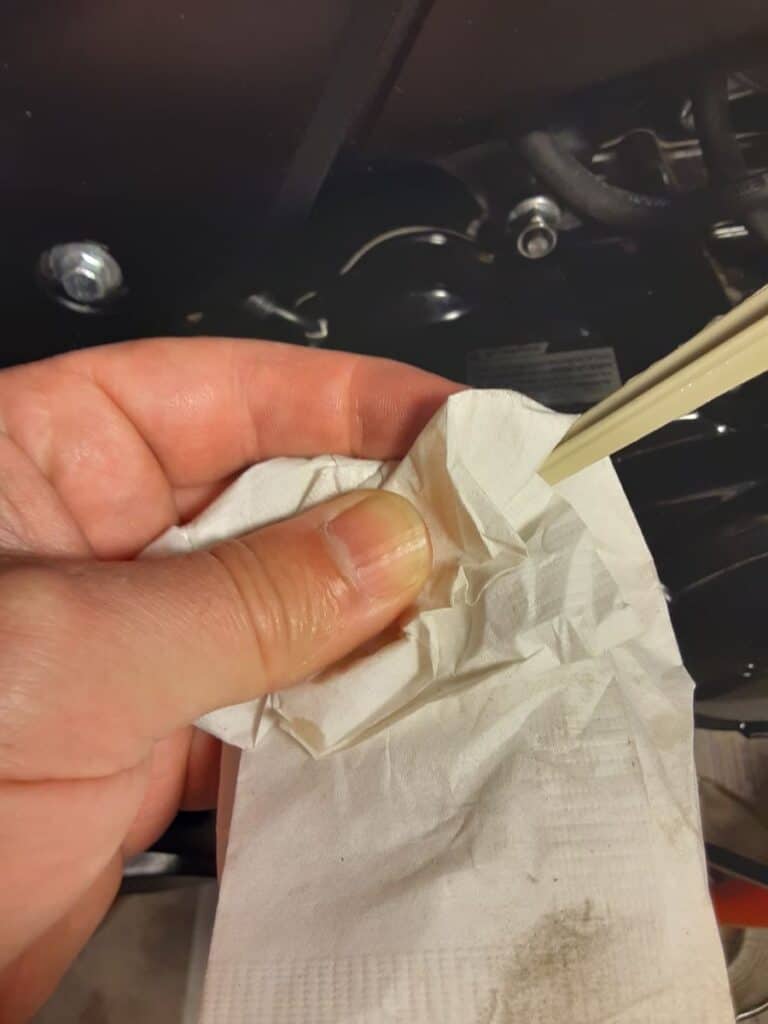
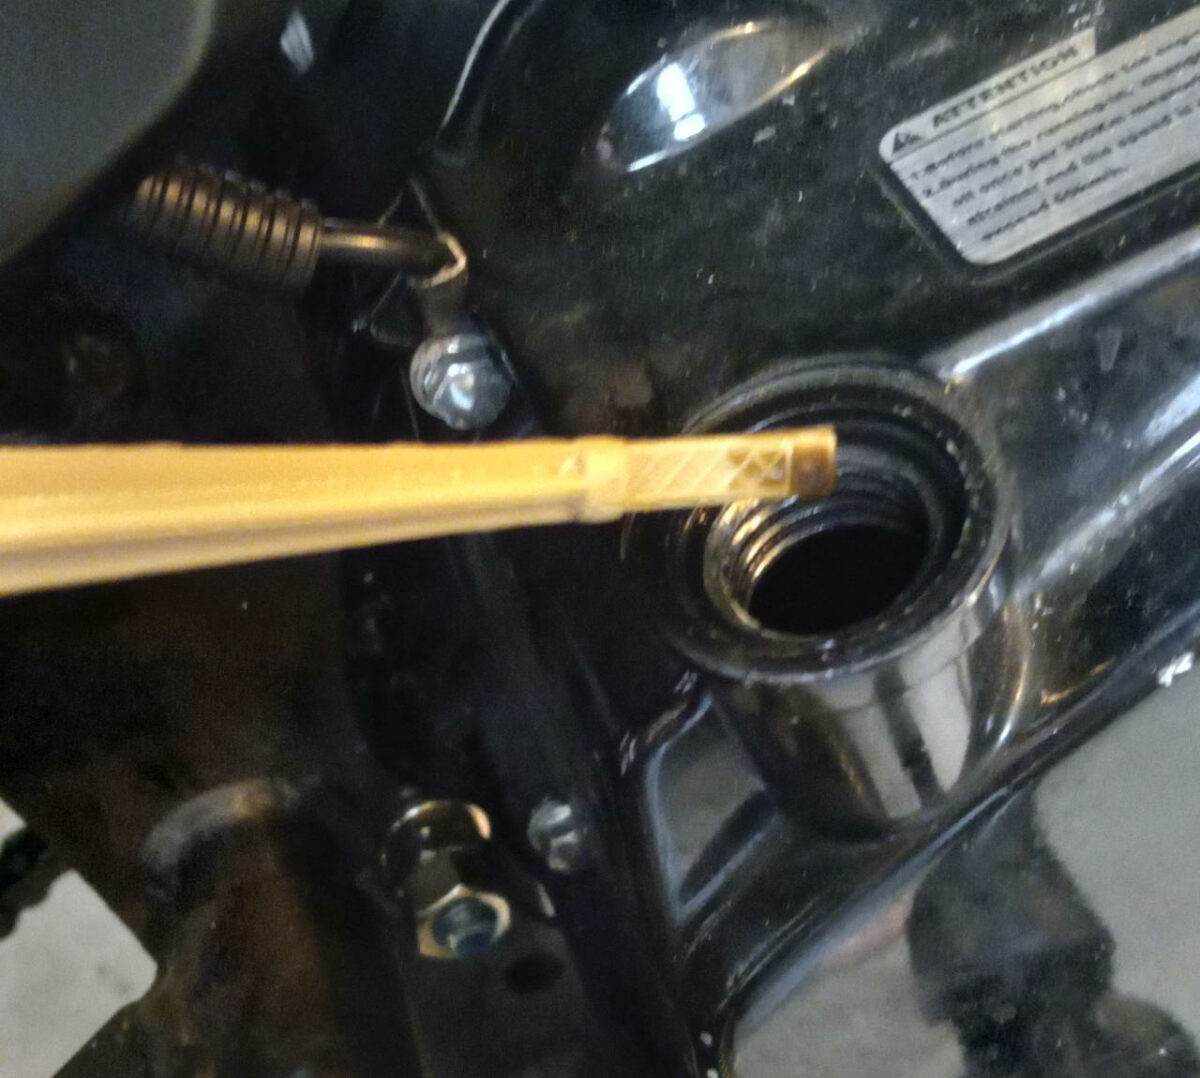
d. If the Oil level is correct, insert and thread the oil dipstick.
8.- Reattach the Boom Vader’s Exhaust System.
a. Re-tighten the exhaust bolts.
b. Remount the mid-section of Boom Vader’s exhaust system.
9.- Start, Run, Recheck Oil Level.
This extra step confirms that your Boom Vader has no leaks. All done before the final stage of cleaning up.
While the engine is running, check your Boom Vader for any oil leaks. Since we loosened and re-tightened the exhaust system, check for any exhaust leaks or rattling exhaust parts.
After a couple minutes of run time, you can recheck the crankcase oil for peace of mind. Remember, always in the future, before you start the Boom Vader’s engine, you should be checking the engine oil level ( FAQ: How To Check Motorcycle Oil Level On The Boom Vader ).
10.- Clean Up Used Motor Oil and Materials.
a. Contain used motor oil and recycle as needed.
b. Wipe up any spilled oil and dispose of rags/wipes allowed.
Final Boom Vader 125cc Oil Change Step: Go For A Ride!
Unless you are winterizing your Boom Vader motorcycle, you should be joying the fruits of your work, giving your Boom Vader a fresh batch of clean motor oil.
I hope this helps; Ride Safe, Ride Fun!
Click To See My Recommended
Boom Vader Gen 2 Upgrades

Hi I’m Tom, A New Motorcycle Rider and Blog Author.
I am a new rider(Pa Learners Permit at the end of 2020, and I received a Pa Motorcycle License in 2021 after passing a Motorcycle Safety Course).
I bought my first motorcycle, a TaoTao TBR7, at the beginning of 2021 and have been doing upgrades on that motorcycle since.
I added to my motorcycle collection by buying a Boom Vader Gen 2 in 2022, and that Grom-Clone motorcycle has been upgraded by me as well.
I continue to ride my Boom Vader Gen 2 motorcycle as well as my TaoTao TBR7 dual-sport bike.
Read more on my About Me page.
Fun Fact: I’ve only been on one group ride.
