
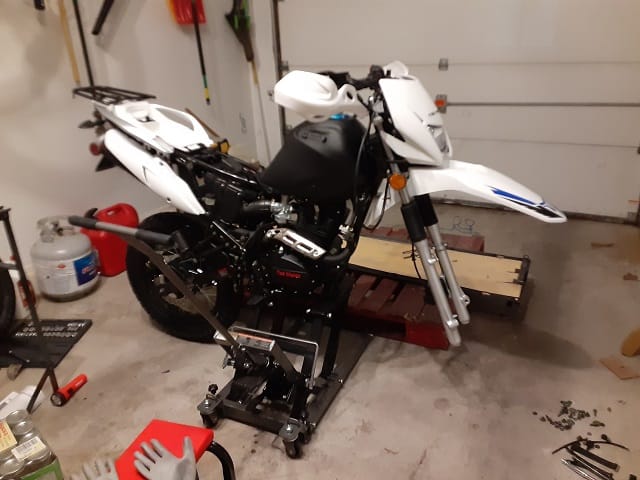
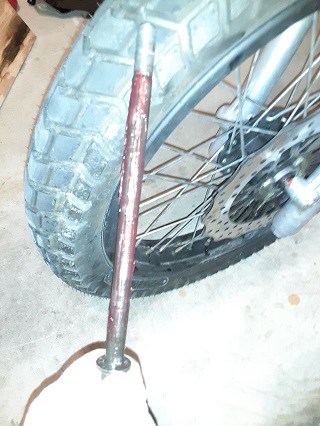
To get myself ready for installing the TBR7 wheel, after the unboxing(See TBR7 Unboxing Post), I removed the bolt holding the forks to the box’s base frame. This bolt, and nut, are to be saved. These pieces are the front axle bolt for the wheel. I then had assistance and moved the TBR7 off the box on a lower motorcycle lift jack. After ensuring the bike was stable, I pumped the jack foot pedal lifting the motorcycle. Careful with any lifting operation, be sure your motorcycle is stable, and the jack isn’t going to roll anywhere. Lift the motorcycle high enough to mount the front wheel. The front wheel was removed during the unboxing and safely placed to the side. Use the wheel as a height gauge to test the motorcycle fork’s position.
Ready The TBR7’s Brake Pads For The Wheel’s Brake Disc.
Once the TBR7 motorcycle is high enough, you can prepare the motorcycle and wheel for installation. The front brake pads are held apart by a plastic spacer. Remove the spacer and, using a screwdriver, separate the brake pads further to allow the brake disc to slide in with minimal effort.

Find And Prepare The TBR7 Wheel Spacer.
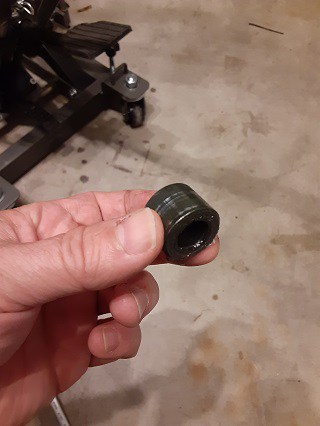
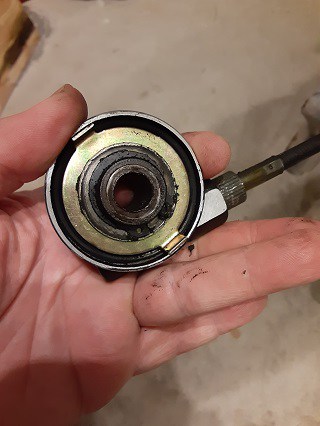
Once the motorcycle is in position and the brake pads are set, time to move over the wheel and axle prep. On the disc side of the wheel, you will see the wheel bearing, and it’s recessed. Part of the pile of parts you have been collecting from unpacking is a spacer. The spacer looks like a very short pipe or metal donut. The spacer is to be inserted into the recess. I used grease to help the spacer stay in place as I move around the wheel. See here:
Install The Wheel Spacer And Get Speed Sensor In Position.
Now with the greased wheel spacer, I insert it into the wheel’s disc side recessed space. Holding the wheel and holding the speed sensor of the speedometer, I moved the wheel into position, allowing the brake disc to move between the brake pads. The wheel spacer should have no problems due to the grease holding it in place, but the speed sensor will have to have the tabs aligned for proper wheel placement. Look at the tabs on the speed sensor and recesses of the front wheel.
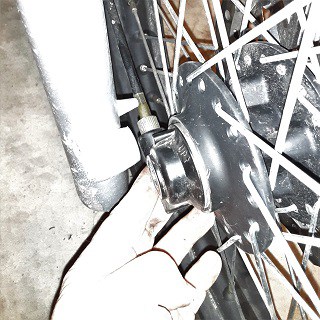
While still holding the speed sensor (Remember to move the speedometer cable under the lug on the right fork), keep the wheel in position to insert the axle bolt.
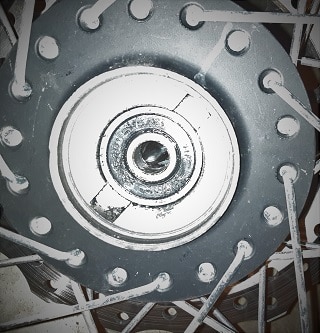
Line Up Axle Holes For Installing the TBR7 Wheel.
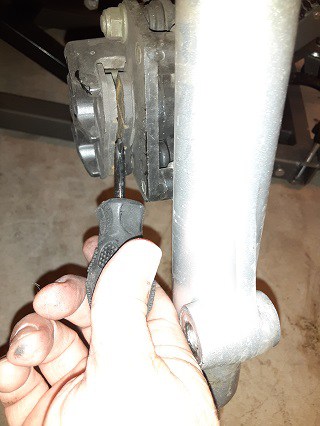
If the wheel spacer is fully seated, you are trying to line up the axle holes and find no space on the right side of the bike; the speed sensor might not be fully seated. The speed sensor’s tabs need to be inserted into the wheel hub’s recesses to create the room to line up the axle holes. Rotate the wheel in hand while lining up the speed sensor tabs into the recess spaces. Look at the photo and see how the sensor almost fits into the wheel’s recessed space.
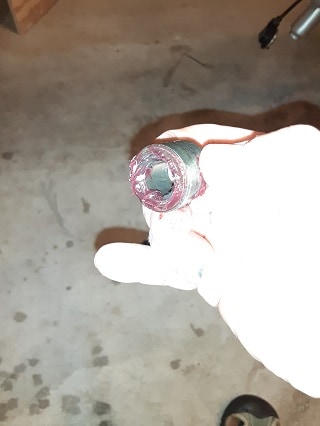
Now with the axle bolt, clean it free of any foreign material. I also opted to lube the axle with grease, although there are differing opinions. Since the TBR7’s front wheel revolves around wheel bearings, the axle doesn’t contact rotating parts. I used grease for peace of mind, and it provides some form of corrosion resistance. Anyone who has owned a TBR7 longer than 5 minutes can hear it rusting. Caution, do not force the axle; you can tilt and move the front wheel to align the holes better.
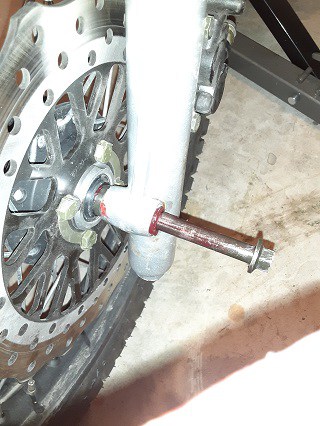
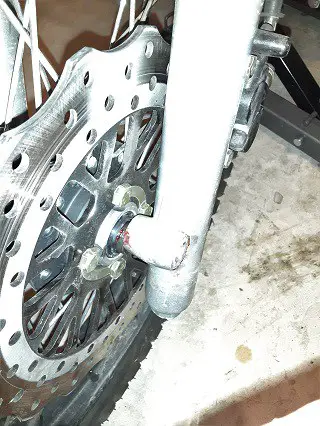
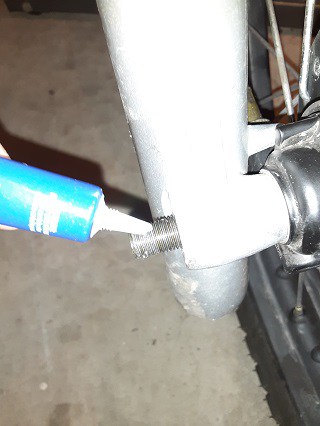
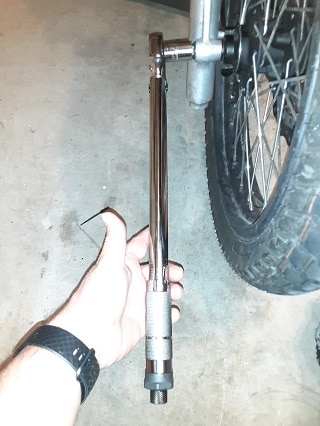
Once fully inserted, wipe off excess grease from forks and the axle bolt threads. Some people recommended cleaning with a brake cleaner, but I am working in an enclosed garage, so I settled for denatured alcohol. Once the threads are clean, I added thread-locker, blue type, to ensure the nut remains installed. Install the nut hand tight, and using a torque wrench, torque the nut. What torque? Good question; the consensus among different sources is 35 ft-pounds, but if wrong, please comment below.
The TBR7’s Wheel Is Installed.
Once installed, I clean up the TBR7’s Wheel Disc Brakes(Ensure the discs/pads are free of grease.) and test the free spin of the wheel. There should be no binding or wobbliness off the wheel. This TBR7 is still a new bike, so a gross defect like a warped wheel or disc brakes should not exist. Being that, still check. Now test the front brakes. Due to spreading the brake pads, it might take a few brake lever squeezes to get the pads back into the correct position; this appears normal.
Spin the wheel by hand and test the front brake. Should stop immediately. Remember to try the brakes again once the wheels motorcycle is on the ground before riding the bike.
Remember, motorcycle riding and repair can be dangerous. This post documents the steps I took to installing the TBR7 wheel and is posted for your entertainment purposes only. Don’t Try This At Home; get professional assistance first. Thank you.
