
Out of the box( My TBR7 Unboxing Post), you will most likely need to make a TBR7 chain adjustment. The consensus chains are tighter than guitar strings, and riding with the chains improperly adjusted can lead to premature driver train failure for your TBR7.
FYI: Much of the information I am posting is from my personal experience. However, it’s based on information I learned online. The RPS Hawk 250 community is large, and since the TaoTao TBR7 is one of its Chonda-Cousins, this chain adjustment post can also apply to the Hawk 250. We are all Chonda Family. 😀
The TBR7 motorcycle owner’s manual states there should be an upward/downward total deflection of 20-30mm per TBR7 Manual. This deflection can also be called chain-slack. For us non-metric people, 1 inch is right between the 20-30mm range.
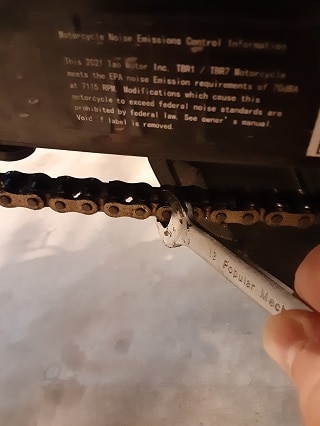
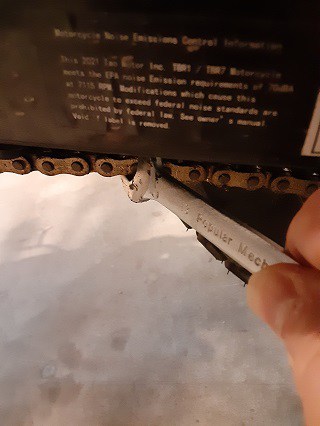
Go midway along the lower chain side, push up till tension, and then down till tension, and this difference in distance traveled should be about 1 inch(20-30mm). If not, and most likely coming from the factor it’s too tight, you can adjust the chain to meet the owner’s manual specifications. TBR7 Motorcycle Loose Chain Symptoms.

My TBR7 Chain Adjustment Process.
1. Position the motorcycle to adjust the chain.
Tip, to adjust the chain properly, the motorcycle rear wheel must be on the ground and bearing weight. You can adjust the chain while the bike is on the kickstand, but since I have a nice motorcycle lift jack, I will use that to keep the TBR7 perfectly upright while the weight remains on the rear wheel. Feel that having the lift jack placed, such as partially supporting the bike, should I make a mistake adjusting the chain is safer than letting it sit on the kickstand.
Just me overthinking things, but I paid for the lift jack, so using it. However, you can check your chains tension any time, even while keeping your hands clean. I use a open wrench.
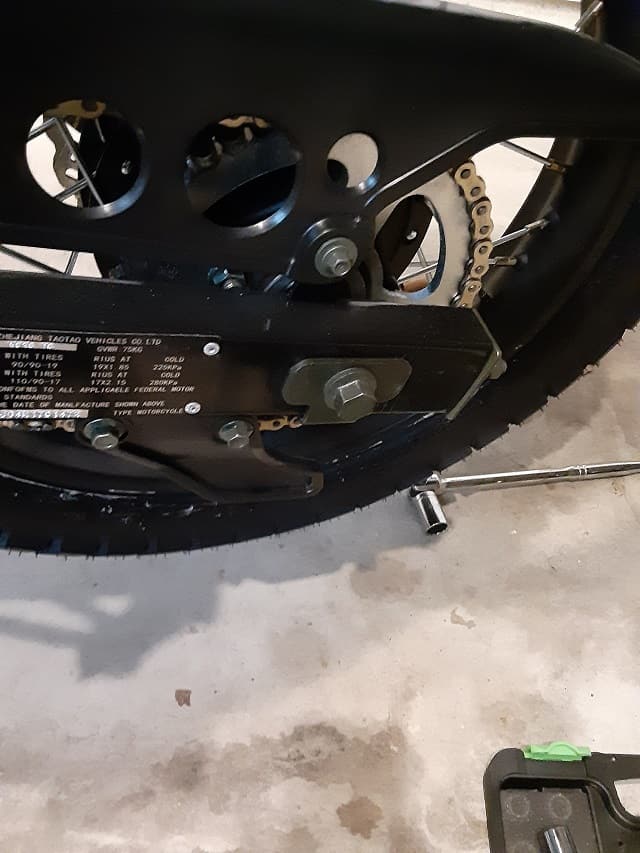
2. Loosen the rear axle. Hold the bolt with a wrench on the left side facing forward and loosen the nut on the right side facing forward; I like using a ratchet on the right side. These are torqued down well and might need extra help to loosen.
Be prepared for the nut to break free, and don’t smash your knuckles or make the motorcycle unstable. Once loose enough that it can slide forward and back by the chain adjusters, stop.
A good indication the rear axle is loose is it can be wiggled by hand, and the axle slides, metal between the bolt head and swing arm (and nut and swing arm) wiggles as you wiggle the axle.

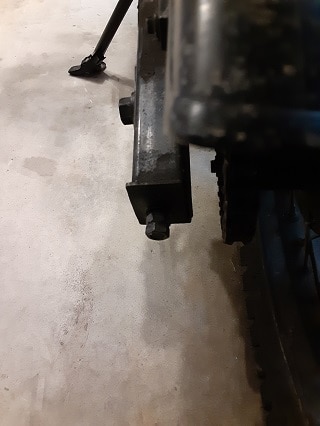
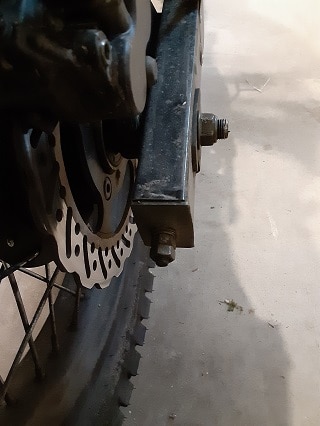
3. At the end of each swing arm are the chain adjuster and the lock-nuts. You should see two nuts; remove the outer, most rearward nut. These nuts act as lock-nuts. Keep the nuts in a safe place?
4. Time to adjust the TBR7’s driver chain. Now the nuts closer to the swing arm end is used to adjust the chain by allowing the rear wheel to move closer(less tension) and further away(more tension) from the engine(drive sprocket).
- If your chain is too tight, you increase the chain-slack by loosening(counterclockwise turns) the adjusting nut.
- If the chain too loose, you can reduce the chain slack by tightening (clockwise turns) the adjusting nut.
That is the big picture; how do I loosen both sides(thereby increasing the chain-lack) and slowly pull the adjusting nuts equally. Turn on the left, then a turn on the right, while testing for free play in the chain. Once I get to the tension I want, I stop about 1-inch free play(20-30mm).
5. Now quick alignment checks. Visually check front of tire, is it pointing straight forward? Is the wheel crocked? Visually check the front edge of the rear tire; is it pointing straight forward? Is the wheel crocked?
If so, adjust the chain adjusting nuts to correct any axle misalignment. The ease of inspecting a straight wheel is why I like having the motorcycle partially weight supported in an upright position. I can better see any wheel misalignment when the bike is completely upright.
6. Now check your work by having the TBR7 bear her weight and then check the chain tension/slack. I adjust my TBR7’s chain while held upright on the lift jack for safety reasons, and as the swing arm moves, it changes the chain’s tension.
I lowered the lift jack till the bike is back on the kickstand, and then I balance the bike upright, and again check the chain tension. Looking for that 1-inch(20-30mm) chain deflection. If the chain is still ‘good,’ I then pump up the motorcycle lift jack, to stand the bike up straight.
7. Time to use the lock-nuts. When you apply the lock-nuts, the adjusting nuts should not move. The purpose of the lock-nuts is to stop the adjusting nuts from moving. As always, I clean threads. A quick wipe with a shop towel or clean rag, and the threads are ready for thread-locker.
I use a blue thread locker. There is disagreement whether lock-nuts need a thread locker, but it’s blue thread-locker and cheap. Again, new motorcycle rider and even more recent motorcycle owner. Once lock-nuts are tight, lower the motorcycle onto its kickstand.
8. Now I secure the axle by tightening the axle nut, this might be wrong, but the information I keep finding is to torque the rear axle nut to 35 foot-pounds. Also, I never took the nut off completely, so getting a thread locker under the nut. Once I’m at the proper torque, I put a dab of blue thread-locker on the threads next to the nut. This precaution should prevent the nut from backing out.
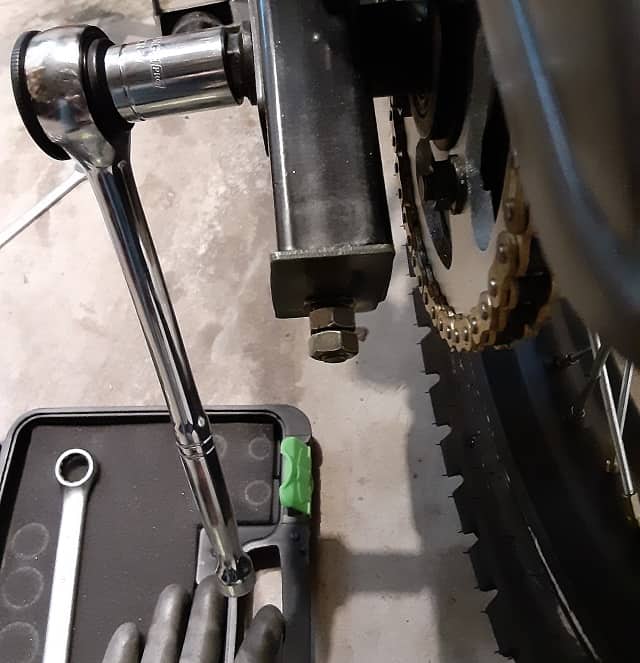
Please buy a couple of torque wrenches; I have both a 3/8ths and 1/2 inch pair. These Chinese Motorcycles are made of mild steel and don’t want to gall the thread, or worse, have nuts and bolts work themselves free while riding.
Author’s Notice: This page contains affiliate links, for which I may earn a commission by their use. Also, as an Amazon Associate, I earn from qualifying Amazon purchases.
- Amazon Basics 3/8-Inch Drive Click Torque Wrench (Check for current prices)
- Amazon Basics 1/2-Inch Drive Click Torque Wrench (Check for current prices)
FYI: Building My List of Must-Have Tools For Motorcycle Owners
9. I like to test the TBR7’s chain and wheel movement. I rolled the motorcycle back and forth a couple of times, listening for any weird noises. Is the chain clicking, did I mess up rear disc brake, etc. Then afterward, I recheck the chain deflection(slack) measurement again. Just in case!!! I overthink things and don’t want to get hurt or push the TBR7 home if I pop a chain.
10. Clean up time, and the best part, go riding!!!! Again, a short test ride before heading out for a further away.
Concerns About Doing The TBR7 Chain Adjustment.
Please, I am very new at motorcycle maintenance, and this post is to document when I made a TBR7 chain adjustment. Motorcycling can be a dangerous hobby; seek professional mechanical assistance before attempting any motorcycle repairs or maintenance.
Your Feedback Wanted! Have You Done Your Own Chain Adjustments?
Comment below for any tips or tricks you know about chain adjustments. Feedback, are my steps of using a lift-jack or blue thread-locker overkill? Thank you, and Ride Safe!!!!
Ride Safe, Ride Fun.
