
Author’s Notice: This page contains affiliate links, for which I may earn a commission by their use. Also, as an Amazon Associate, I earn from qualifying Amazon purchases.
Now, as always, much of the installation information I share here about wrapping my exhaust piping can directly apply to many of my TBR7’s Chonda-Cousins(Hawk 250, Brozz 250, Raven 250, etc.) Also, much of the exhaust wrap information here can apply to any internal combustion motorcycle.
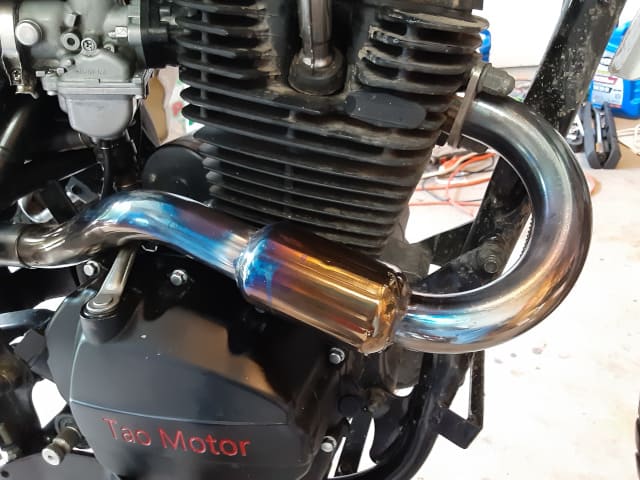
Note: I love the colors on my upgraded exhaust system( My Completed TaoTao TBR7 Exhaust Upgrade. ). However, I feel wrapping my motorcycle exhaust is a necessary step and made it look more zombie apocalypse to me—a nice look for the TaoTao TBR7.
Preparing For The Exhaust Wrap Installation.
Safety First!
Ensure the engine is off for some time and the motorcycle is on a stable surface, preventing it from moving while installing the wrap. Engine exhausts are made of thin metal, so they heat up and cool down fast, but make sure you wait long enough to ensure the motorcycle engine is cool to the touch.
Need Items I Used For Wrapping My Motorcycle Exhaust:
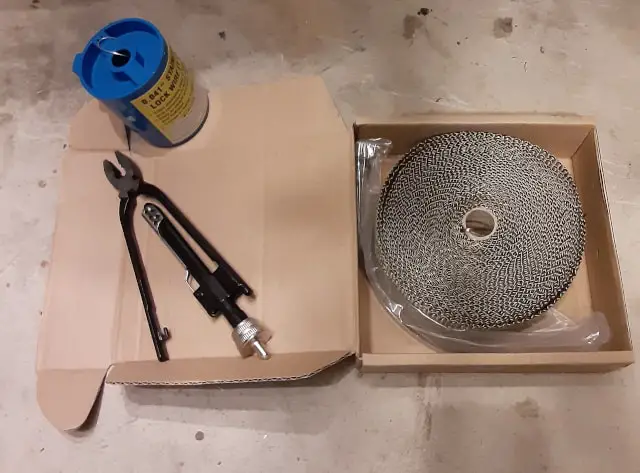
1.- Engine Exhaust Wrap. I used (Amazon Affiliate Link) Titanium 2 Inch x 50 Feet Exhaust Header Wrap Kit
2.-Tools and Materials: Wire-Pliers, Scissors, and Steel wire.
FYI: Building My List of Must-Have Tools For Motorcycle Owners
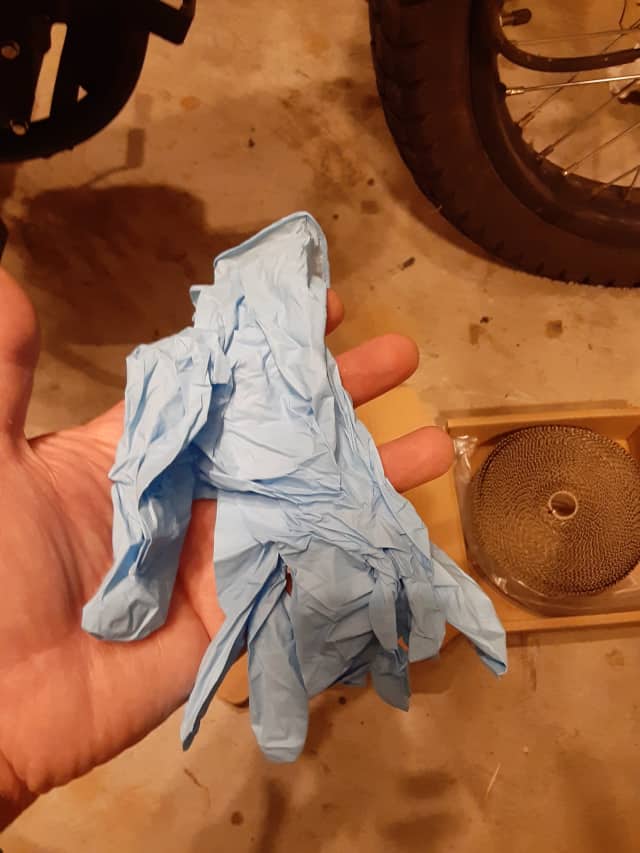
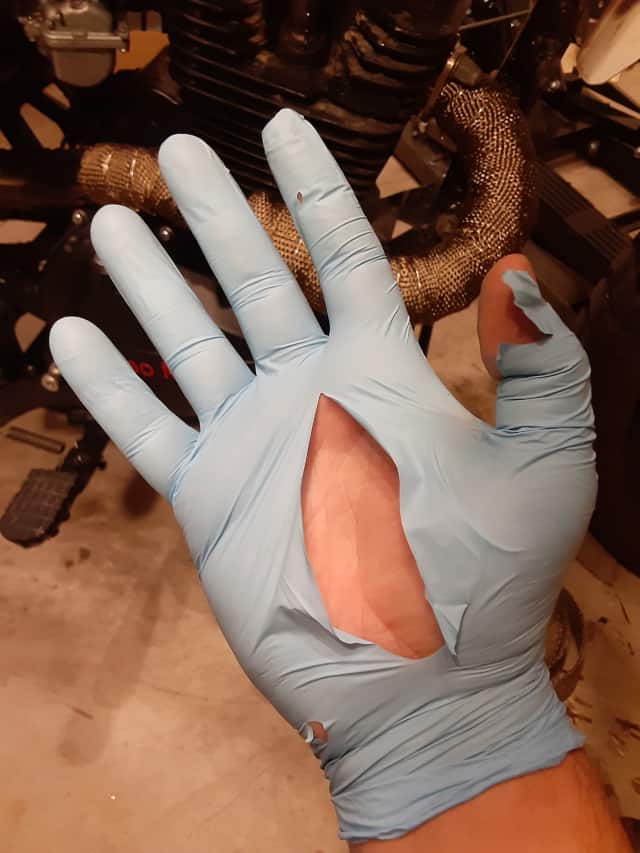
3.-(optional)Gloves.
I say optional since I started out wearing gloves and then did not wear gloves. I used thin gloves, which were torn up quickly by the wire I used. I have these gloves type of gloves, and in hindsight, should have used them(An Amazon Link): Nitrile Work Gloves
Note: I did not remove my motorcycle engine exhaust, which I later regretted(see my previous post: How (Not) To Install Motorcycle Exhaust Wrap, But It Worked.). Not removing it made installing the engine wrap more complex, so in the future, I will remove the exhaust, wrap it, and then reinstall it. However, I did my installation while the engine exhaust was still installed on the motorcycle.
Planning The Engine Exhaust Wrap Direction.
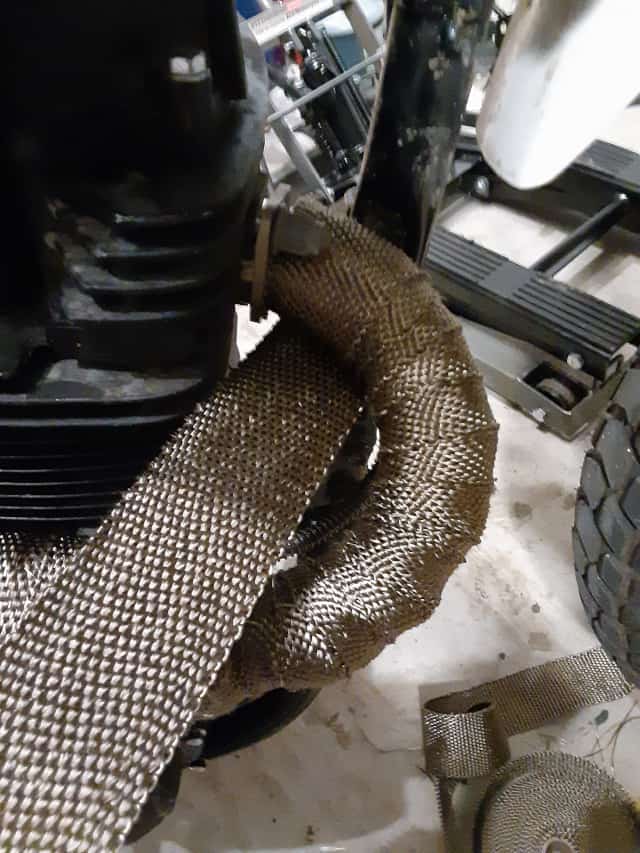
Now I planned the exhaust wrap to overlap so that the airflow wouldn’t try to peel off the wrap. I layered the wrap like you layer shingles on a roof. The rain comes from the sky, but the layers of roof shingles are installed from the bottom up.
I started wrapping my exhaust distal from the engine outlet. From the furthest point, I wanted to have my wrap be. This way, as I wrapped the exhaust, the new layer would partially cover the old layer, and I worked forward.
Wet Or Dry Engine Exhaust Wrap Installation?
I went with wrapping dry. I did like the idea of pre-wetting the engine exhaust wrap to have maybe expanded and shrink dried, leaving a very tight installation, but I read the type I ordered didn’t require it to be pre-wetted. So I went with a dry installation.
In hindsight, I might have lightly sprayed the wrap to keep down the dust levels for my peace of mind. But again, I went with a dry installation.
Installing My TBR7’s Engine Exhaust Wrap.
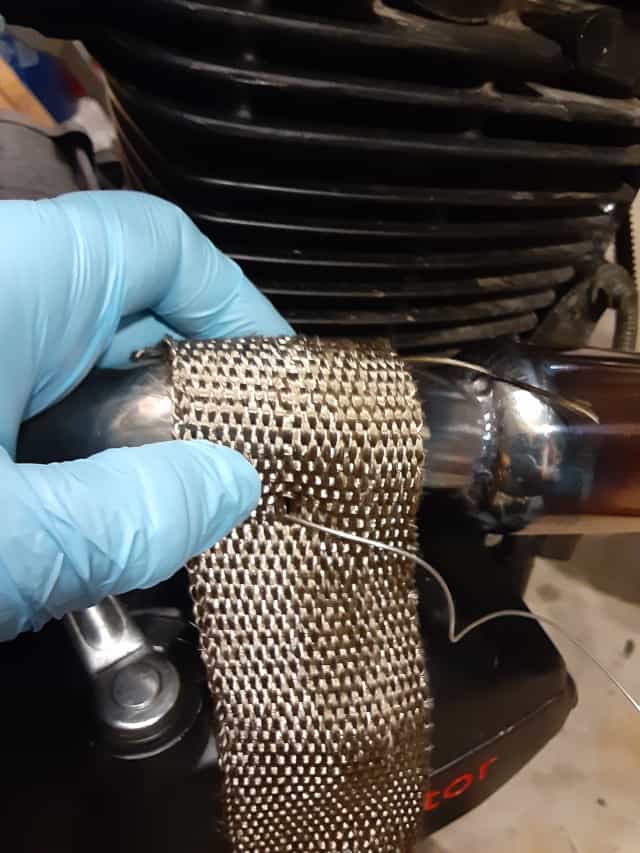
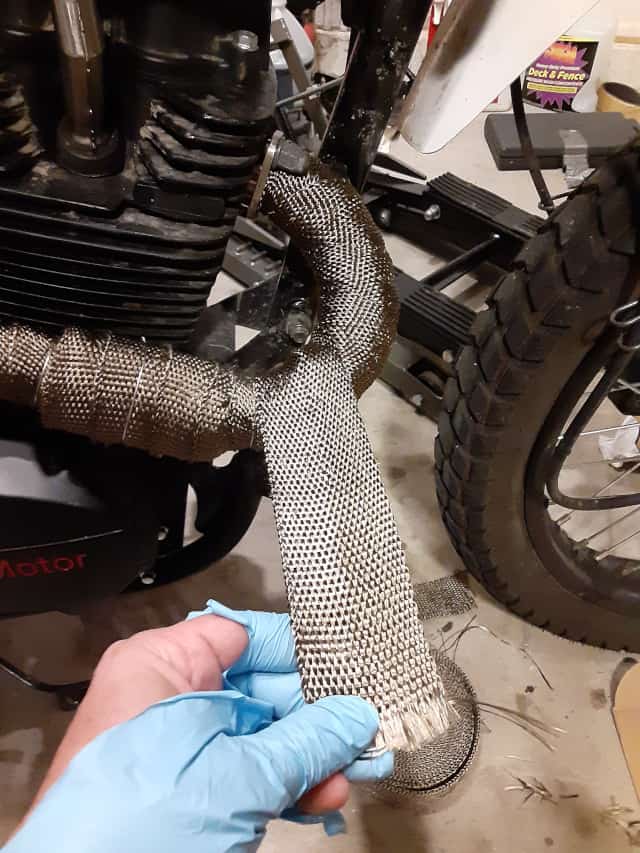
1.- I fed enough wrap loosely around the exhaust. I pulled a lot of wraps and tried to guess the length(loosely wrapping the exhaust and tried to dry-fit it) and then cut the wrap when I reached a point where I was sure I had enough.
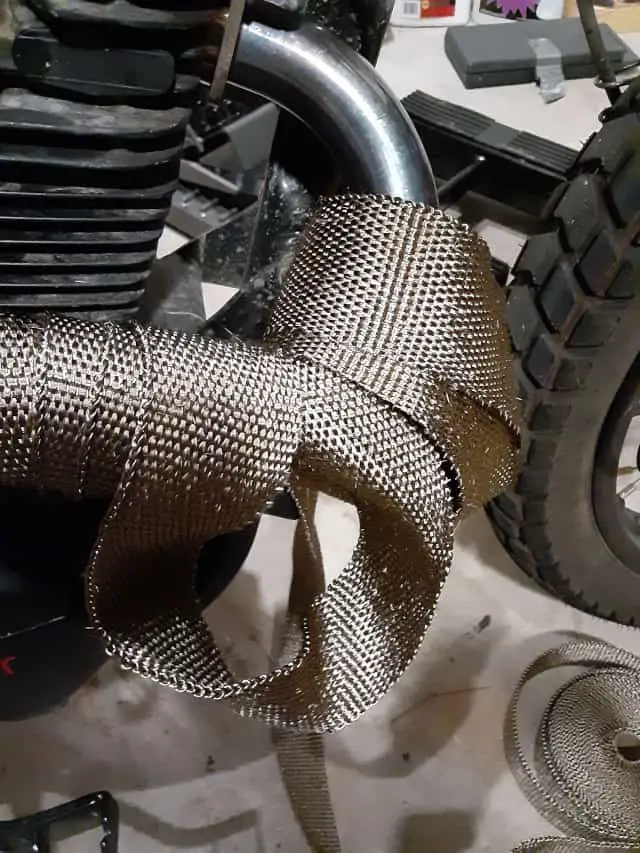
2.- I secured the start of the wrap using the stainless steel wire. I pushed the wire through the wrap, overlapped the wrap over the pipe. I took the two ends of the wire and twisted them tight. The twist wire pliers came in handy, but any pliers could do.
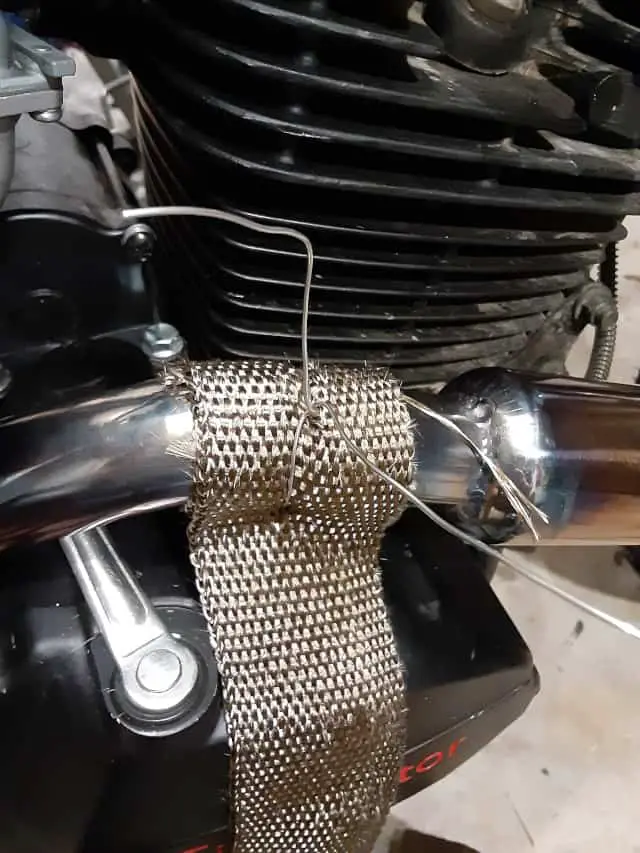
3.- Once my exhaust wrap was secured at the starting point, I slowly wrapped the exhaust piping moving forward. I overlapped about 1/2 of the wrap, pulling it tight.
4.- As I moved along with the wrapping process, I occasionally took a small piece of wire and twisted them over the wrap, holding the coils in place.
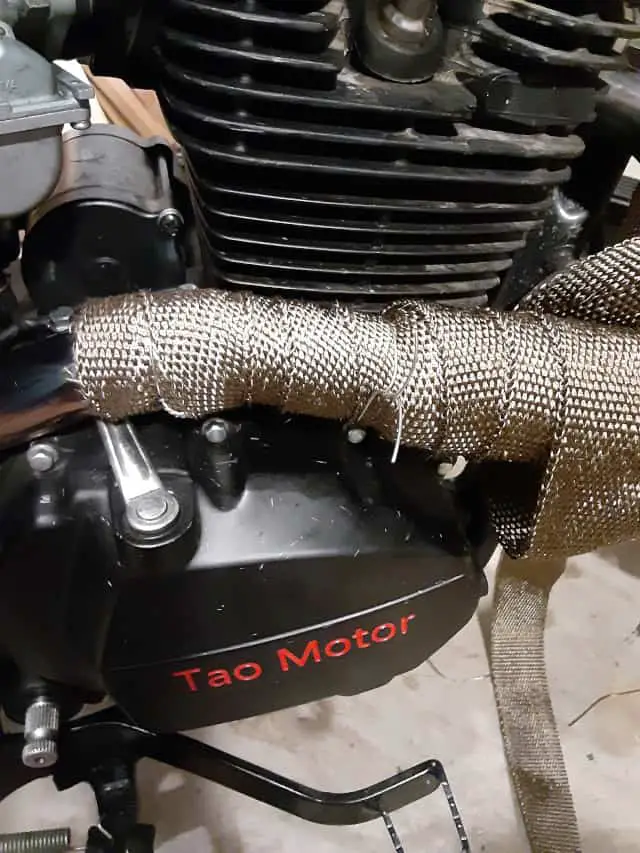
5.- As you reach the end, you have the choice of cutting the excess off and securing the end with wire. I found I had so much wrap leftover; I covered some of the wraps with additional wrap. I was moving back towards the bike’s rear till I ran out of the remaining wrap.
6.- Now, I went back using the wire and secured points along with the wrap that needed to be secured and tidied up. I twisted the wire tight and moved the twisted ends inside toward the engine, and this step prevented snagging the wire ends into my leg. After installing the permanent wire, I removed the temporary wire I used while installing the wrap.
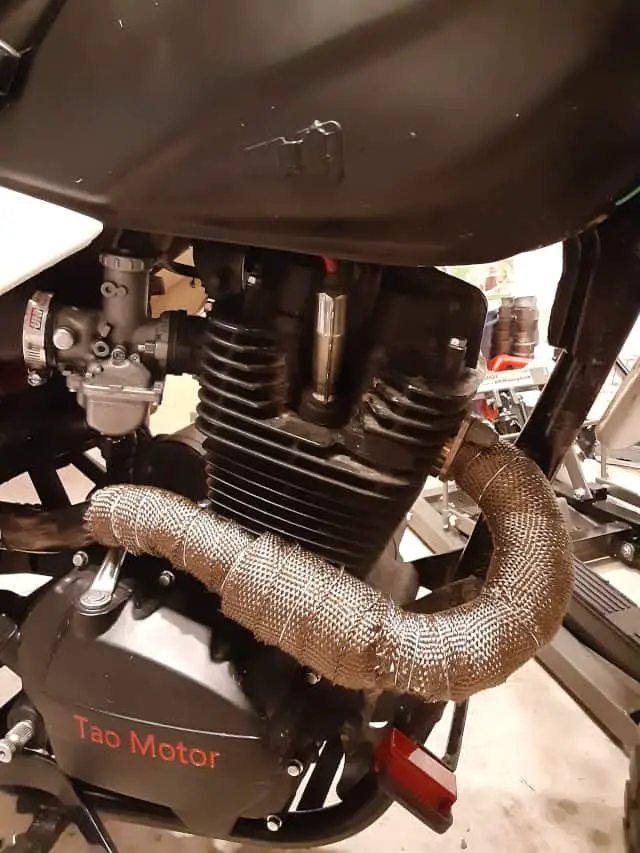
7.- Once completed, I ensured I had proper ventilation and then started the engine. This installation step will generate smoke. Foul-smelling smoke. Yuck. It seemed that each time I ran the motorcycle after the wrap installation, I still had a smoke, but it was less and less till it disappeared.
Last Step, Clean Uptime.
Ensure you secure the remaining wrap; you might want to use it for a later project and get any stray pieces of material off the floor. Wire clippings might cause problems if they end up in the wrong place.
Engine Exhaust Wrap Installation Final Thoughts.
I like it. The final result is a good look. I had very few problems with the installation, other than gloves tearing up, and I made the process more challenging by not removing the exhaust in the first place. But I am hopeful this upgrade will limit the amount of heat radiated to the engine and my leg.
I plan to follow up with this post about whether this upgrade was worth it. Face it; I now covered over that great-looking patina my exhaust had. I did like the blues in the metal.
Thanks for following along, and here is the list of materials I used that you can get from Amazon. Remember, as an Amazon Associate; I could earn fees off qualified purchases. Thank you.
Thank you again, and Ride Fun, Ride Safe!
