
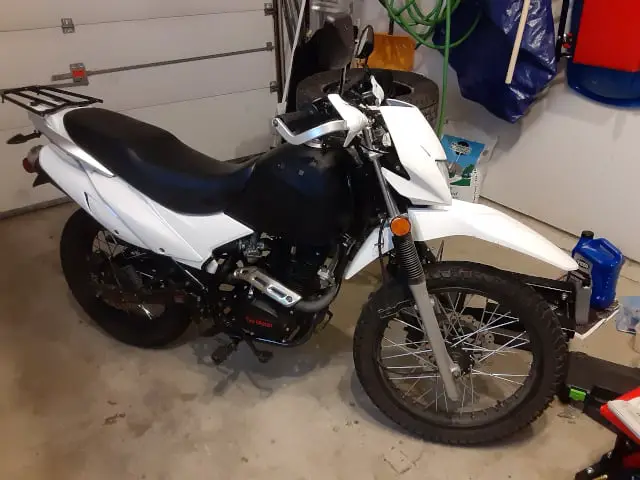
When my TaoTao TBR7 motorcycle’s exhaust parts came in, I was amazed at how the planned TBR7 exhaust upgrade would look in my head. Now it has come down to doing the TBR7 motorcycle exhaust upgrade and seeing if the outcome is the same as I imagined.
My TaoTao TBR7 Exhaust Upgrade Kit.
I ordered the motorcycle exhaust upgrade kit off Amazon, and the price wasn’t bad. This kit was an excellent addition to my TBR7 motorcycle. Previous Post: TBR7 Exhaust Upgrade Parts Arrived!

TBR7’s Exhaust Upgrade Setup
Author’s Notice: This page contains affiliate links, for which I may earn a commission by their use. As an Amazon Associate, I earn from qualifying Amazon purchases.
TBR7 Motorcycle Parts Ordered
- Motorcycle Exhaust Upgrade Kit (Click for Current Price )
- Motorcycle Exhaust Gasket (Click For Current Price ) (See Post: TaoTao TBR7 Exhaust Gasket Mystery)
Shop Tools Needed
FYI: Building My List of Must-Have Tools For Motorcycle Owners
- Combination Wrenches (metric).
- Rubber Mallet, I used this to encourage parts to move and fit. 😀
- Needle nose pliers.
- Scissors(for cutting muffler wrap and plastics).
Shop Material Needed
- Blue thread locker(a staple for China Bike Owners)
- Exhaust Wrap(optional, if you can get clearance from your exhaust piping and the airbox) FYI I later wrapped much of my TBR7 motorcycle exhaust: Motorcycle Exhaust Wrap Installation.
Motorcycle Safety
- Motorcycle secured on a level surface.
- Motorcycle engine parts cool to the touch.
- Fire extinguisher, first aid kit, etc.
- Hand and Eye Safety (My Safety Glasses With Readers) precautions.
- FYI: Motorcycle Garage Safety Rules
The Stock Exhaust Removal Setup Steps:
The TaoTao has decorated the TBR7 with four body panels with one exhaust panel cover. Since we are only working on the right side of the motorcycle, you only have to remove the ones on the right side if you have all the panels installed.
Remove The TBR7 Motorcycle Plastic Body Panels
Remove Stock Plastic Exhaust Panel

Remove The Stock TaoTao TBR7 Exhaust.
The stock exhaust is two sections mounted in three places on the motorcycle: the rear, the middle, and the front. So I followed this order, and there is an extra step too.
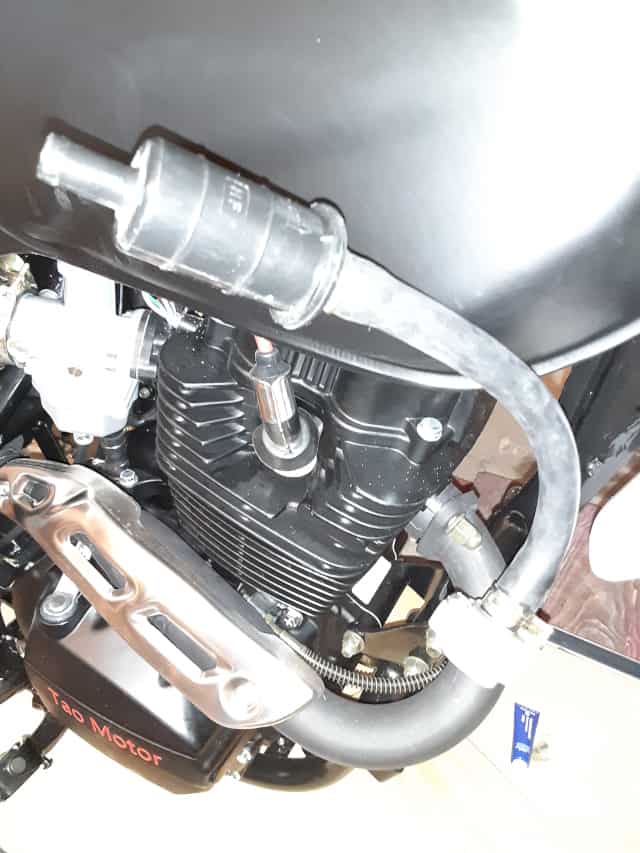
Free Up The Air Inlet Hose.
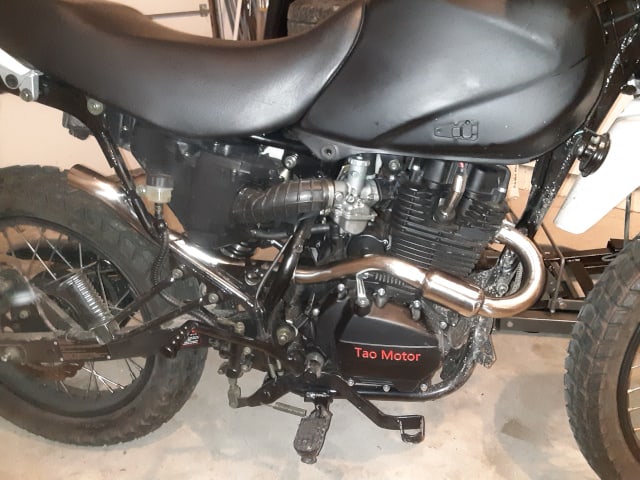
The stock TBR7 exhaust has an air inlet line that looks like a grey box attached to the front of the exhaust with a rubber hose. You will have to un-fish wherever you tucked this hose out to remove the front section of the exhaust.
Remove The Stock Exhaust Rear Bolt.

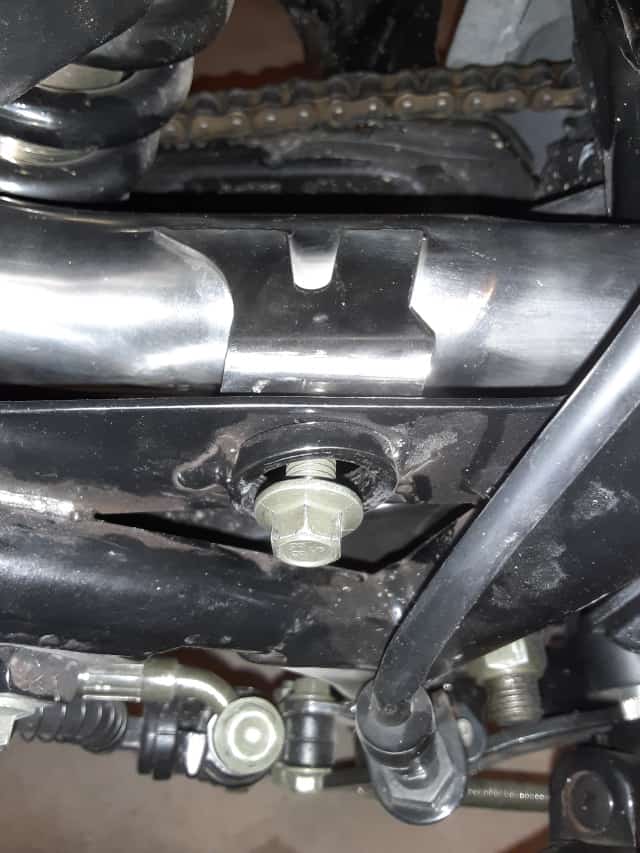
Remove Exhaust Middle Clamp and Mounting Bolt

Remove Exhaust Front Mount On Engine Exhaust Port
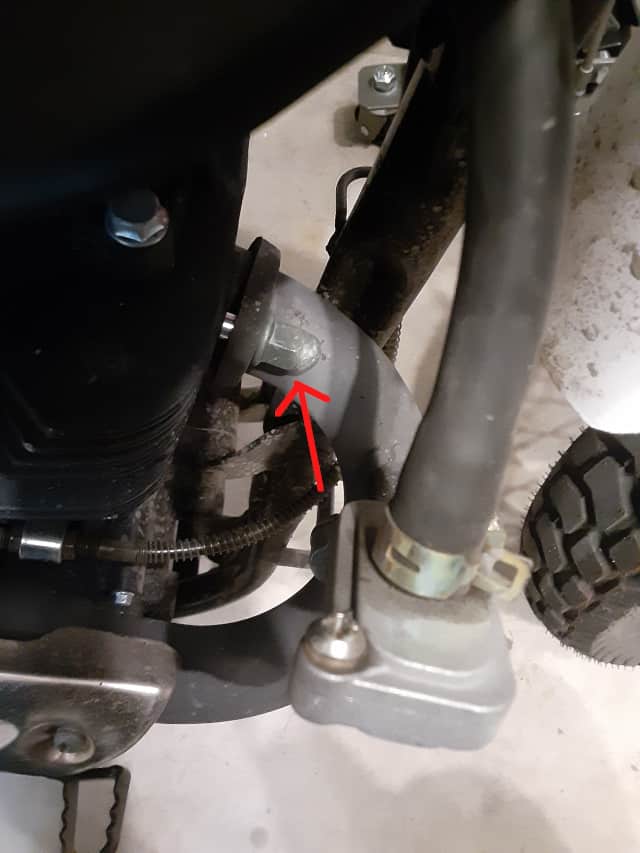
Remove The TBR7 Exhaust Port Gasket
Removing the old exhaust gasket was a pain in the behind, and I had to dig at it with a pair of needle-nose pliers. I managed to ‘damage’ the gasket enough to get a purchase hold of it and pulled the gasket free. Used small screwdriver and needle nose pliers. I have a bag of these exhaust gaskets ( TaoTao TBR7 Exhaust Gasket Mystery. )
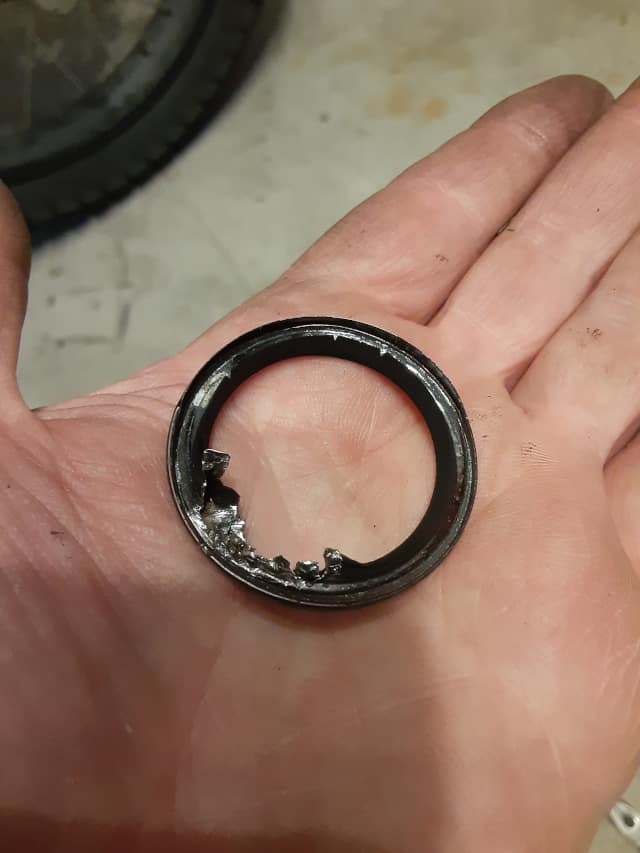
All avoiding damaging the exhaust port sealing surface.
Know Your TBR7 Exhaust Piping Upgrade Parts
The new exhaust upgrade system is separated into three components, with the muffler itself being one. Let’s focus on the piping.
What is critical is to understand the stock exhaust separated into two significant components—separated by a large diameter coupling. The stock exhaust piping is connected via a clamp, the new exhaust has a simple slip-on connection.
The new exhaust has no clamps. The front section (the curved pipe that connects to the engine exhaust port) and midsection (straight pipe) are just slip-on connections held in place by friction. This friction interferes with joint insertion and installation.
This connection is very tight, so it’s better to slip the two exhaust pipes together before fully mounting them on the bike. I will cover this as I go along.
Please pay attention to the dry fitting portion since the slip-on connection is best sized up during dry fitting and then fully inserted after removing it from the bike. You’ll see what I mean.
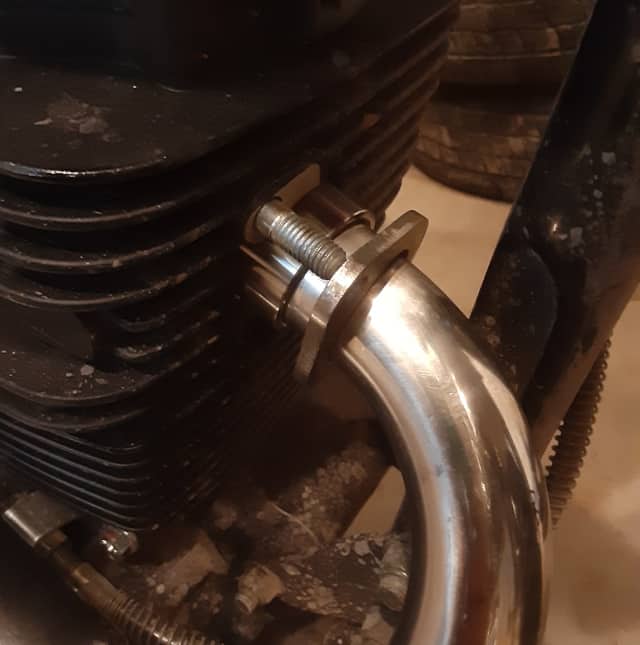
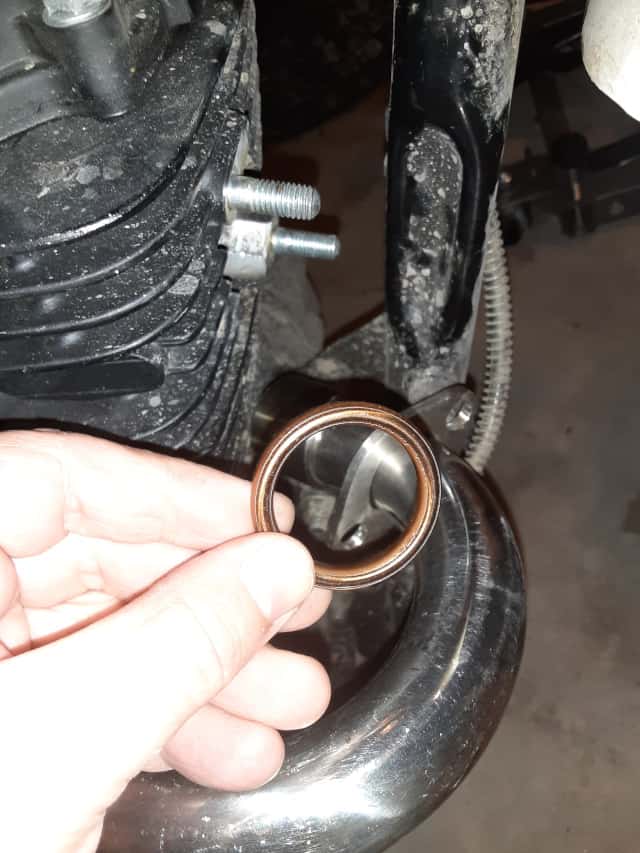
Setting Up New TBR7 Exhaust Port Bracket
My new stock exhaust port bracket did not align with the TBR7 engine exhaust port studs.
So the next steps are to get the exhaust flange setup for the TBR7. I believe this is the same for the Hawk 250 and other Chonda bikes, but check your motorcycle before you make any modifications.
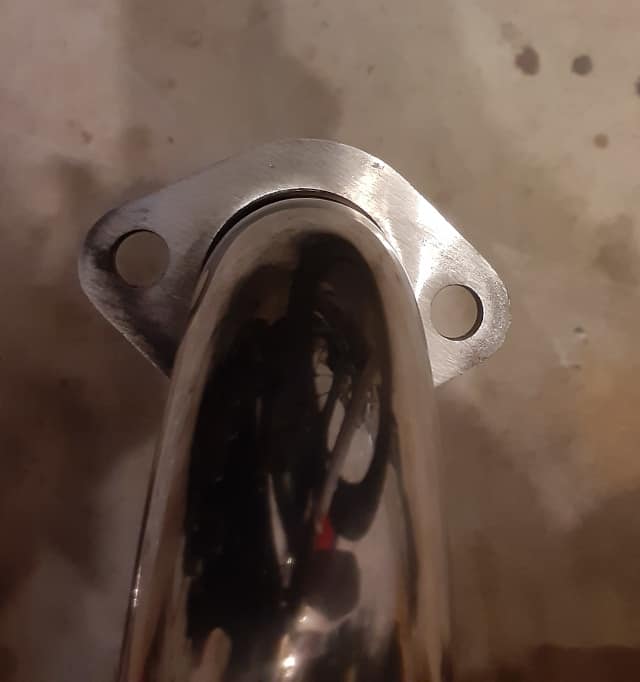
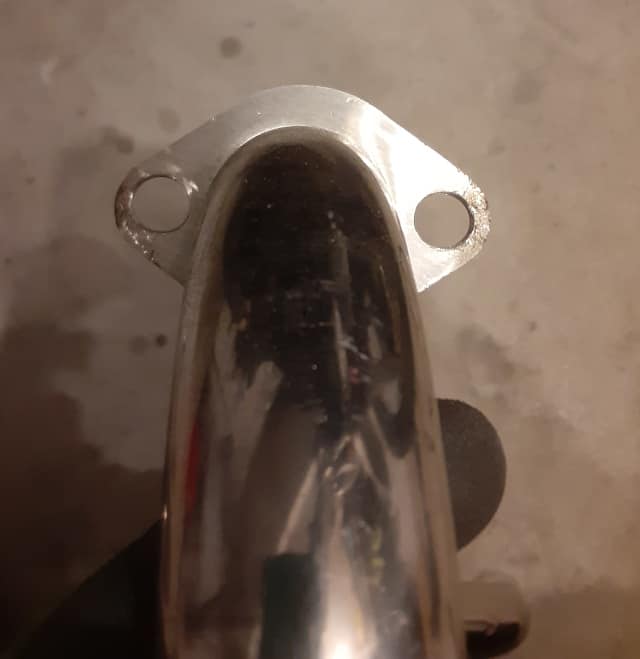
The bracket holes were too close together and needed to be widened to allow for the TBR7 installation.
I used two techniques to widen the exhaust flange holes:
- I drilled the holes with a large drill bit. This drilling was good for gross resizing and removed more material than needed but worked faster than the next step.
- I followed up by using a rotary tool. The rotary tool took longer but allowed me to remove minimal material for final resizing.
Dry Setup Of The New TBR7 Exhaust Pipes.
Note: The muffler can be left off for these dry-fitting steps. The muffler slips on easily and is secured with springs at the end. The muffler connection isn’t a real problem.
The few things I learned while wrestling with the exhaust upgrade, it’s best to dry-fit all the parts and adjust as needed before the new exhaust is installed on the bike.
Loosely, insert the midsection exhaust pipe into the front section, lining up the mounting hole with the bike frame on the midsection. I’ve heard putting grease on this section allows for twisting and insertion during dry fitting, but I didn’t use it. In hindsight, it makes sense since the grease would allow for easier manipulation and would burn off after running the motorcycle.
With the front and midsection combined, fish the new exhaust piping from the front of the motorcycle to the rear, following the original path the stock exhaust took.
Reuse the original exhaust acorn nuts loosely bolt on the exhaust pipe to the engine exhaust port. Do No Use An Exhaust Gasket For This Step.
Now twist and line up the midsection of exhaust piping to line up with the mounting bolt area. I tapped the end of the exhaust pipe with a rubber mallet to line up the connections.
Be careful with tapping the exhaust. You are making gross adjustments to turn the midsection exhaust piping into its mounting hole.
If you successfully line up the midsection exhaust piping, then loosely put in the mounting bolt.
*If not, after lining up the mounts, had to remove the new exhaust piping, fully insert the front section into the midsection by tapping the end with a rubber mallet, then re-dry fitting the exhaust pipe till the midsection mount could be loosely bolted on.
Identifying Exhaust Piping Areas Of Concern.
Three areas I identified could be problems with the new exhaust system installation:
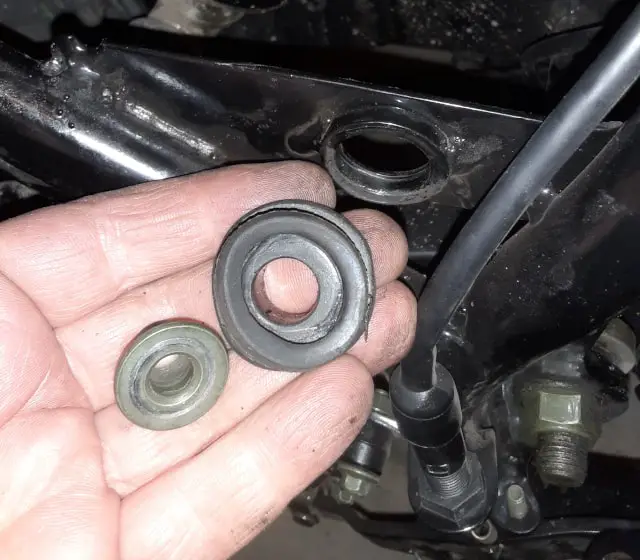
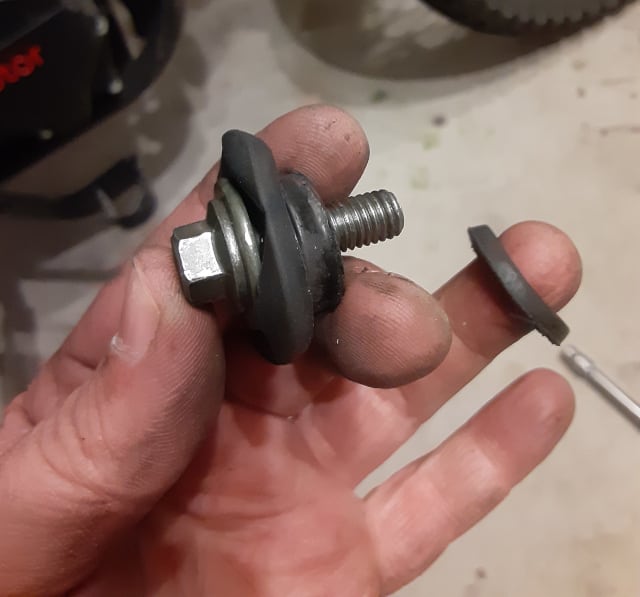
1.- Dry fitting without the Rubber Grommet and its spacing.
The rubber grommet doesn’t allow the new exhaust midsection mount to sit securely against the motorcycle frame. As far right as possible to avoid piping clearance issues. This extra spacing causes slight alignment issues that get exaggerated as the exhaust moves rearward.
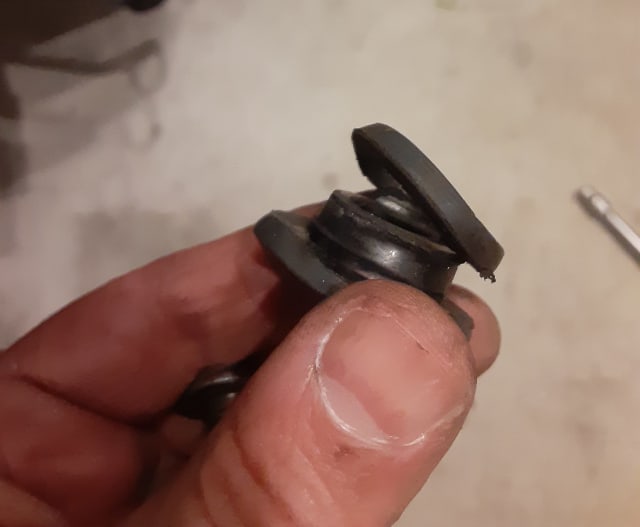
My Solution: Rip off excess rubber material.
This action now allows the exhaust to sit as far-right once mounted, and the grommet can still offer some support to the new exhaust piping.

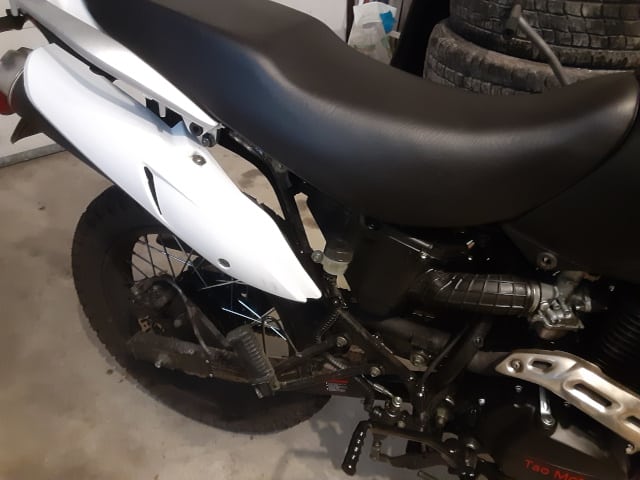
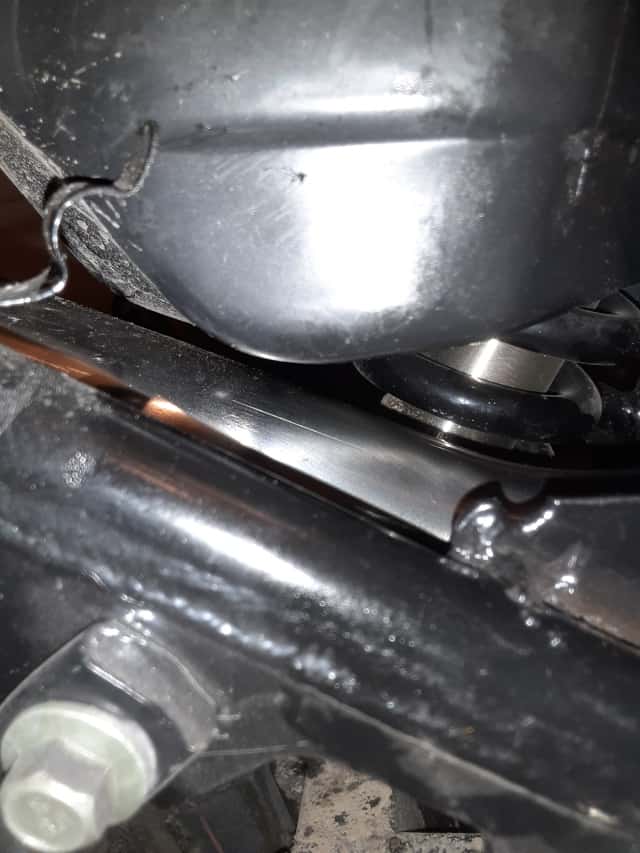
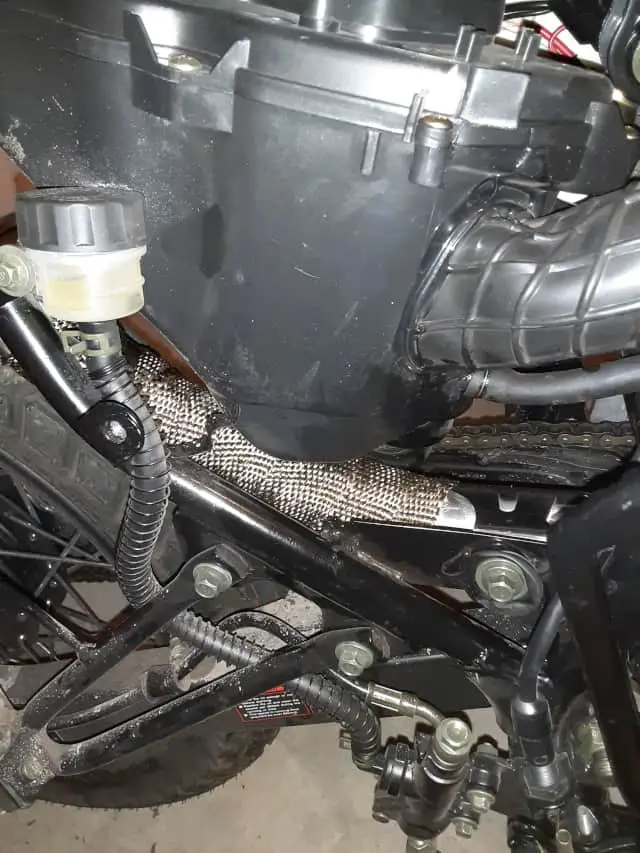
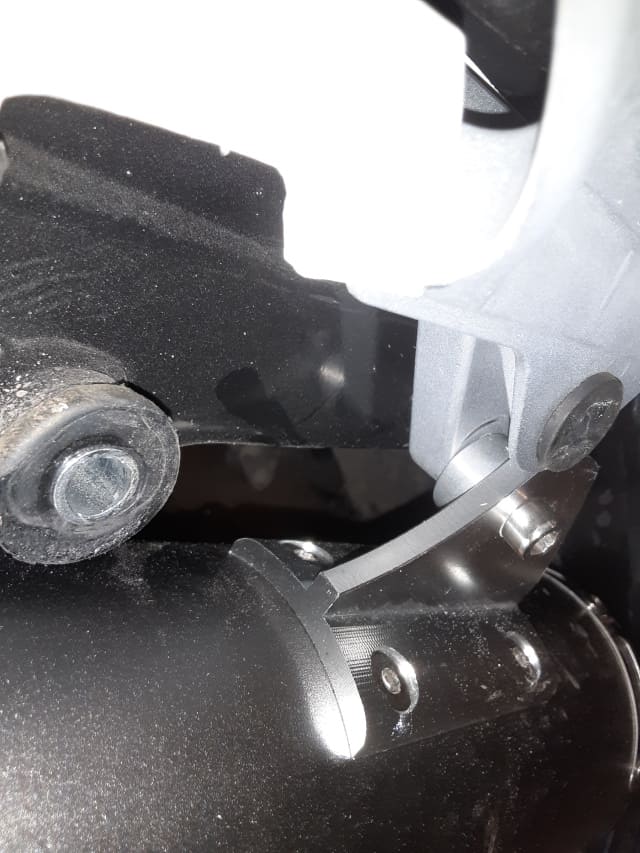
2.- The motorcycle clutch lever.
The clutch lever got close to touching the exhaust piping and felt the clearances would worsen once the piping got heated up.
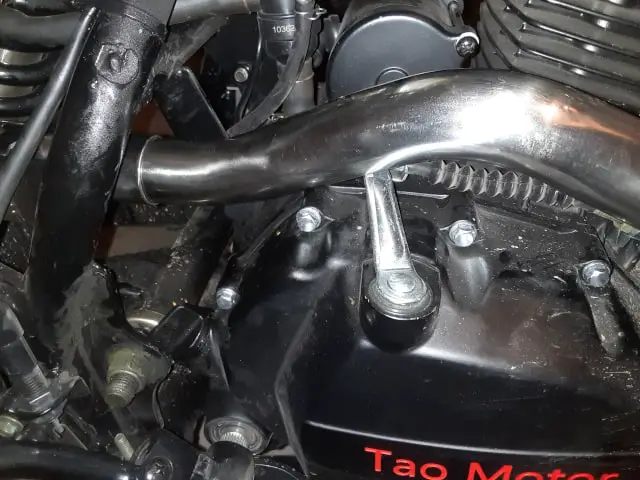
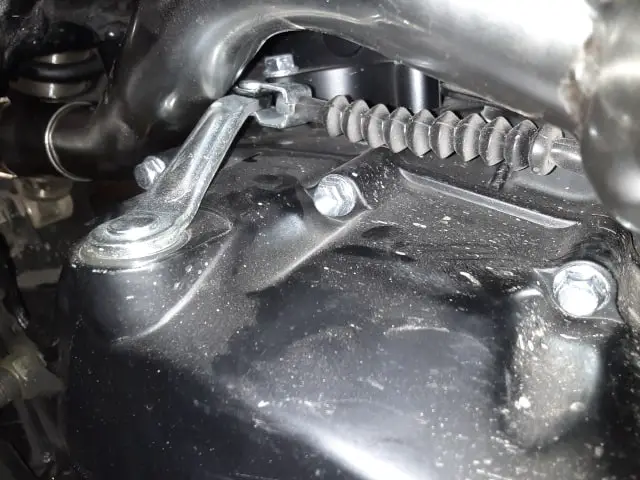
My Solution: A Rubber Mallet.
I used a rubber mallet to tap the clutch lever ‘flatter’ further away from the exhaust piping. This solution worked for me; the clutch lever was flatter and still operated with no problems. Tested by shifting gears on the motorcycle, cold. Remember, I am documenting what I did, not building an actual how-to site. 😀
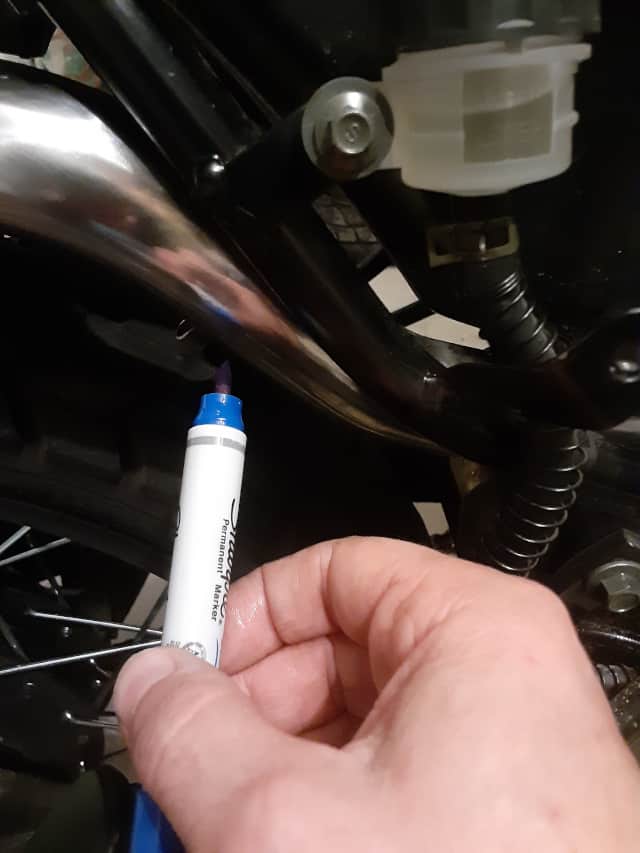
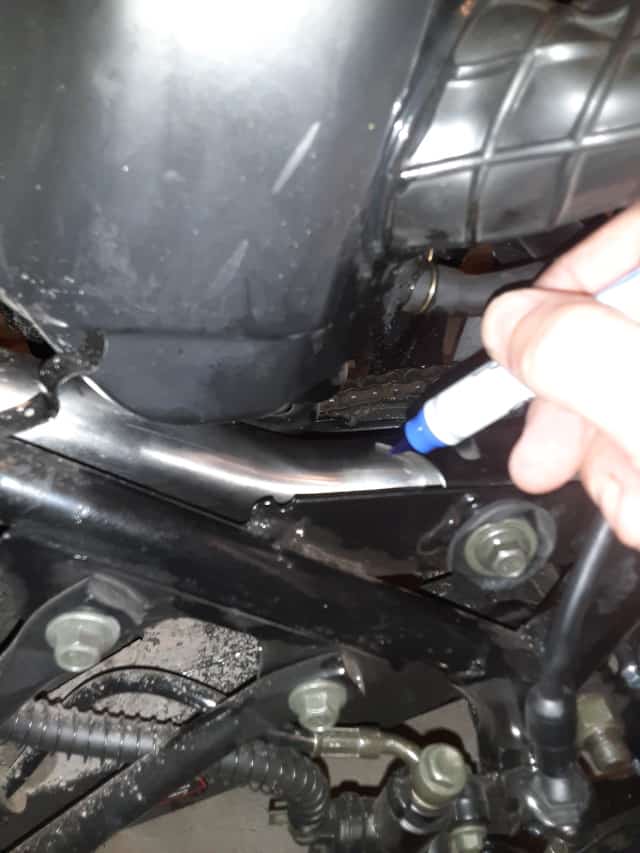
3.- Air Box Clearance.
New exhaust piping gets close to the motorcycle airbox, and there is a gap, but when the pipe heats up, the piping could expand and touch the airbox. I was also concerned about the amount of heat that would radiate towards the plastic.
My Solution: Exhaust wrap.
I marked areas on the exhaust piping, and I felt exhaust wrap would best protect the airbox. With these marks, I wrapped that section of the exhaust piping.
After marking the areas of concern on the exhaust pipe, I removed the pipe and wrapped that section in exhaust wrap.
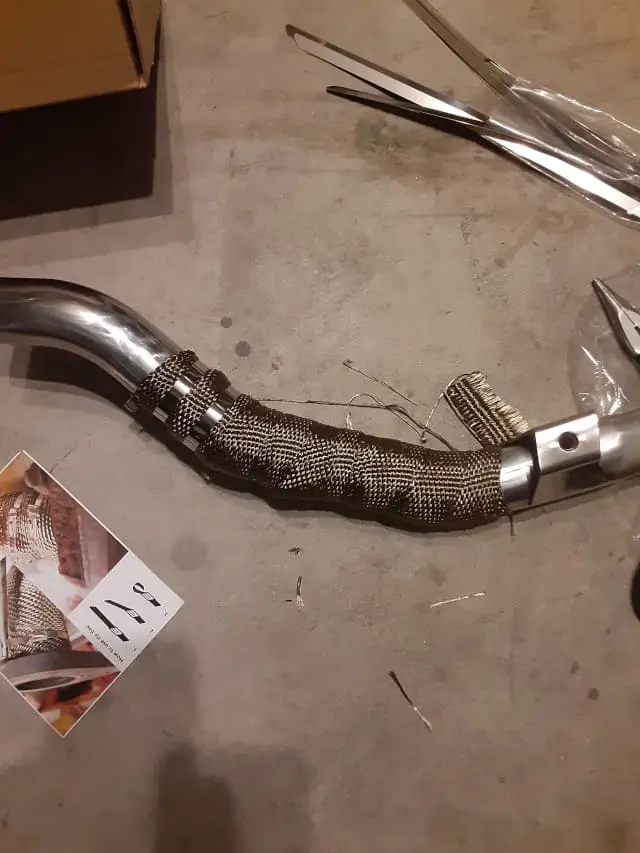
Another exhaust piping dry fit followed to see if I adequately protected the airbox from melting.
Note: I was on the fence about an exhaust wrap upgrade since I heard the new exhaust takes on prettier colors with the heating and cooling process. However, this section of the exhaust I’m wrapping isn’t evident from the side.
Note: later I actually use more exhaust wrap to address some overheating problems with the TBR7 and it looks good too. Read more about this here: Motorcycle Exhaust Wrap Installation.
Dry Fit Complete? Front and midsection fully inserted?
Ready for final mounting? If so, let’s get to actually installing the new exhaust!
-Insert new engine port gasket.
-Fish front and midsection exhaust pipe combination into place.
-Finger-tight exhaust pipe to the exhaust port. Reuse both stock exhaust acorn nuts.
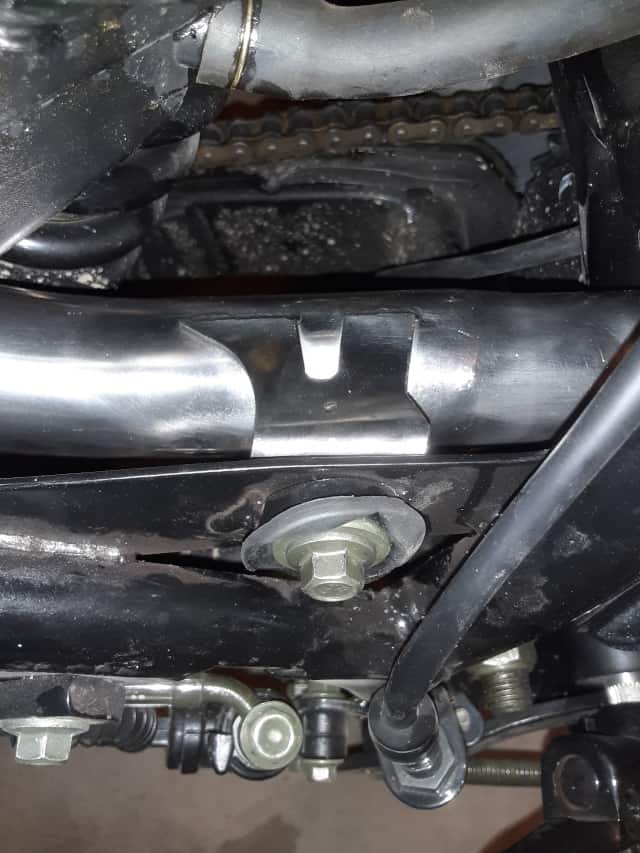
-Finger-tight bolt for midsection to the motorcycle frame. Remember to install the washer and rubber grommet.
-If used exhaust wrap, check again its final alignment to protect the airbox
-If ran into engine clutch lever clearances, recheck if your “fix” allows for safe operation of the lever. I actually cold shifted, toughest shifting for the TBR7.
Once I was happy with the dry fit results, it was time to move on to tightening up the exhaust piping.
Tighten The Exhaust Piping Mounting Hardware.
Note: the engine exhaust gasket is a crush washer, so it’s a use it once piece, so make sure you tighten the exhaust acorn nuts evenly.
The exhaust acorn nuts keep the fire from shooting out of the front of the engine. I tightened these first.
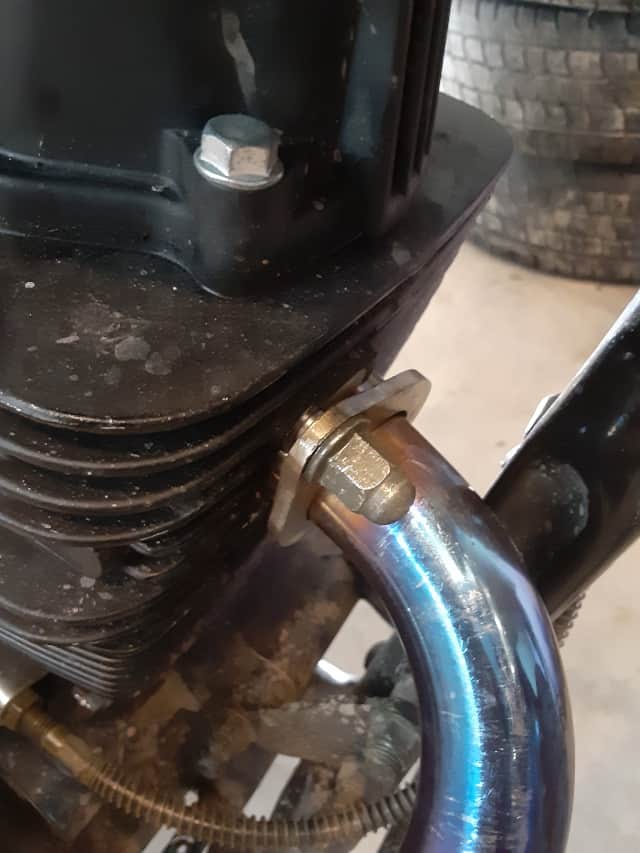
Once the acorn nuts were tight, I moved on to the side bolt. The side bolt that holds the exhaust midsection to the bike frame maintains the piping, and it should line up after the exhaust acorn nuts are fully tightened. The washer and grommet fill the space around the frame hole, pulling the exhaust piping closer to the frame.
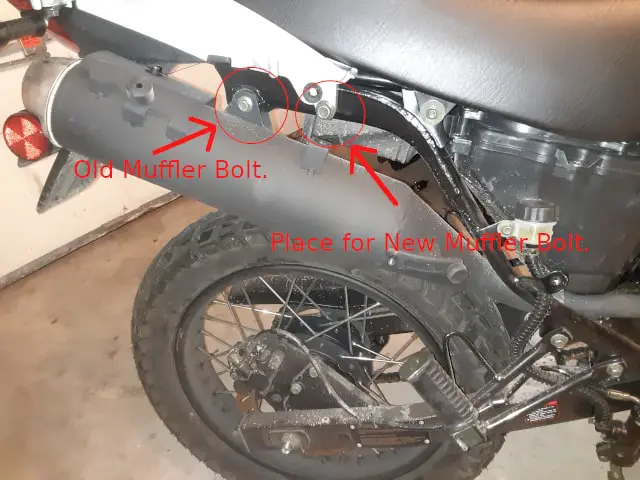
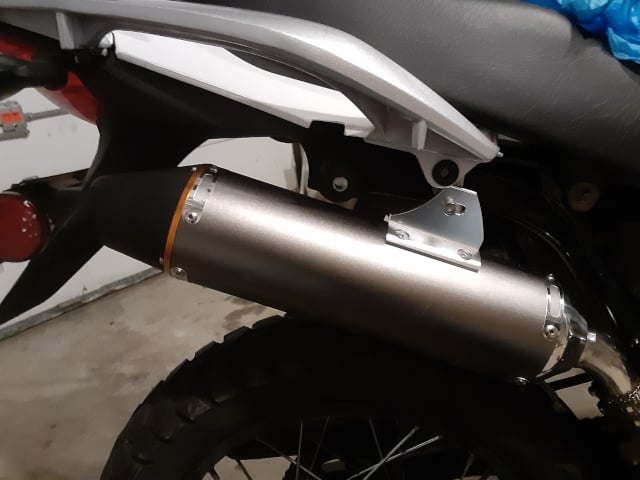
Preparing The New Muffler Installation
This installation step was trial and error for me. The muffler resisted final placement and you will see later I had to modify my whale tail.
The old exhaust muffler was bolted onto the motorcycle frame at one spot, and the new muffler will bolt on at another location. Because of this location change, the existing bolt needs to be removed.
Slip the new muffler onto the end of the exhaust piping. If you want, slip-on retention spring.
Once the muffler is on, see where it lines ups. I initially couldn’t get the muffler mounting and bike holes to line up.
I had to move the muffler around forcibly. To move the muffler around, I stuck the handle of a mallet into the tailpipe and used the head as a handle.
There is a gap between the bike and the muffler mounting hole. There is a provided metal spacer for this gap.
If you didn’t put on the muffler retention spring yet, this is time to install it.
Final TBR7 Motorcycle Modifications.
Note 1: if you did a tail delete, these final steps might not be necessary for you, and skip them.
Note 2: My final cuts/mods were done quickly since I wanted to hear the new muffler roar! Please feel free to do a better job cleaning up the cuts, and I might do a tail delete in the future.
Down To Final TBR7 Modification Business.
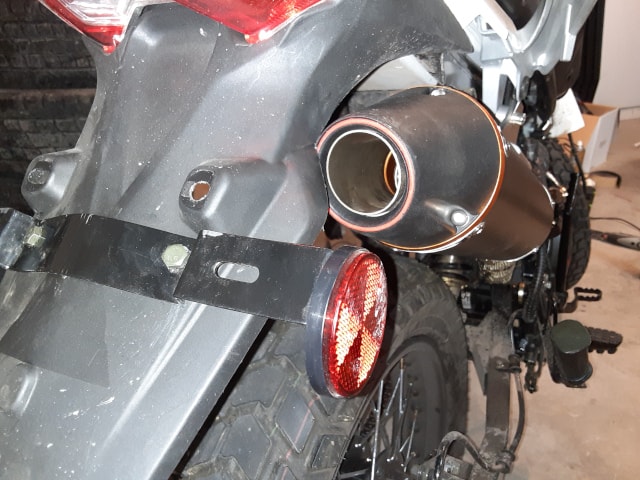
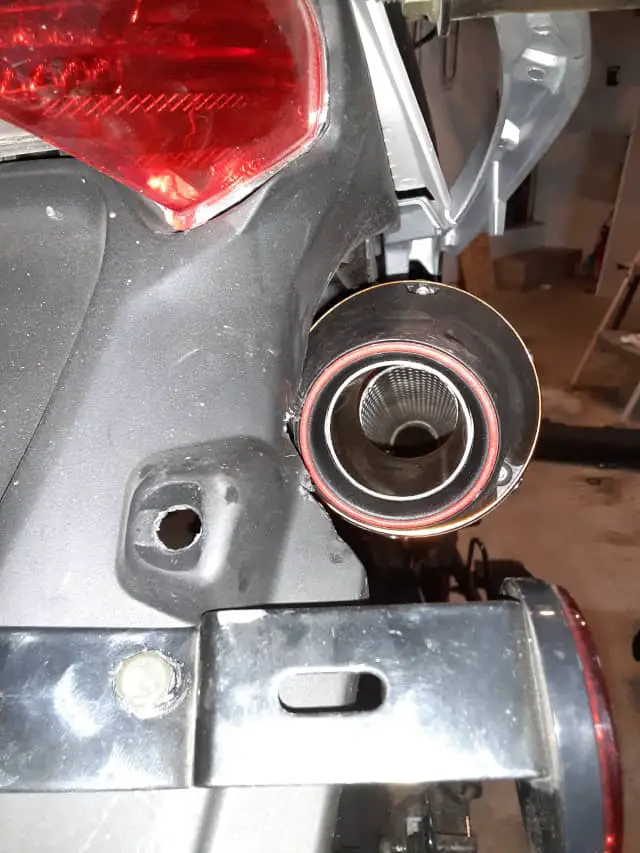
The exhaust of the new muffler, even after much manipulation to get the muffler installed, is still angled towards the license place holder and rear fender. I didn’t want the plastic fender melted and didn’t want to create any unneeded back pressure on the exhaust system.
Related post: TBR7 Fender Plastic Melted? (Hawk 250?)
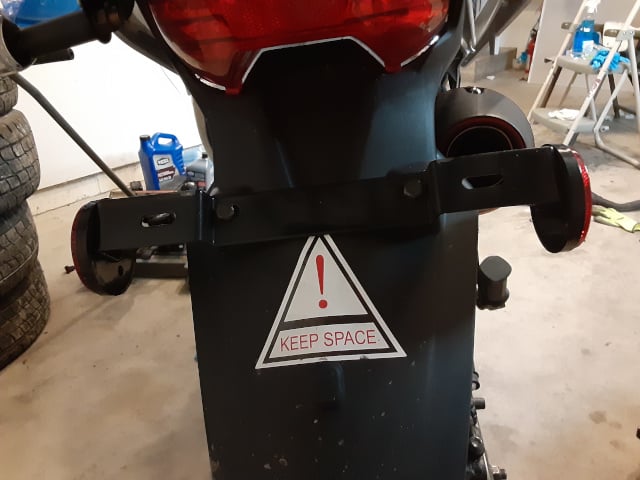
So drilled new holes and moved the license place lower.
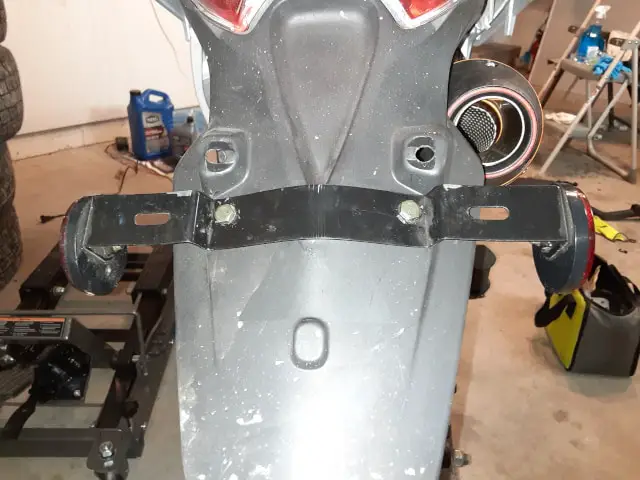
Afterward, I cut the plastic fender allowing the exhaust gases to exit the rear unobstructed. This work was not ‘clean’ work, but it worked.
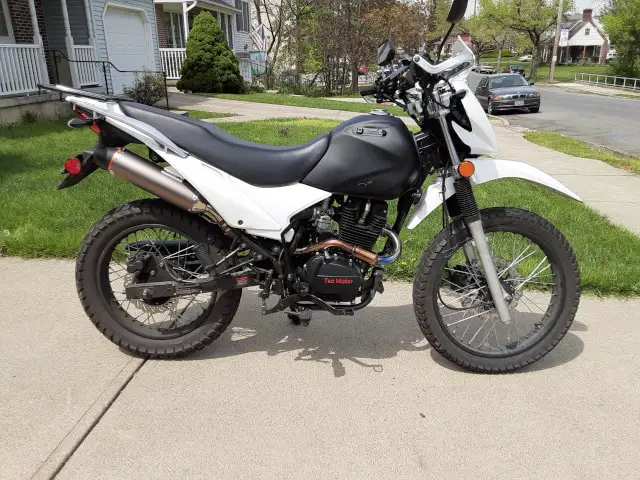
The TBR7 Exhaust Upgrade Is Complete.
Time For Testing The Upgrade.
Go around and ensure all your bolts are tight.
Ensure no loose material was left on the exhaust.
Wipe down the exhaust piping to remove oils from your hands(I thought this was a good idea).
Get Ready For The First Startup.
Take your TBR7 motorcycle outside!!!!!
The exhaust piping is coated with oils, cleaners, etc. The piping will smoke the first time you run it. If you used the exhaust wrap, that too smokes with the first several runs. It all smells and doesn’t seem healthy to breathe in. Go outside!
Get Out And Ride Your TBR7 Motorcycle!
I feel the TBR7 benefited from this exhaust upgrade.
It sounds ‘deeper,’ not like a Harley but like a crazy person yelling into a five-gallon pail.
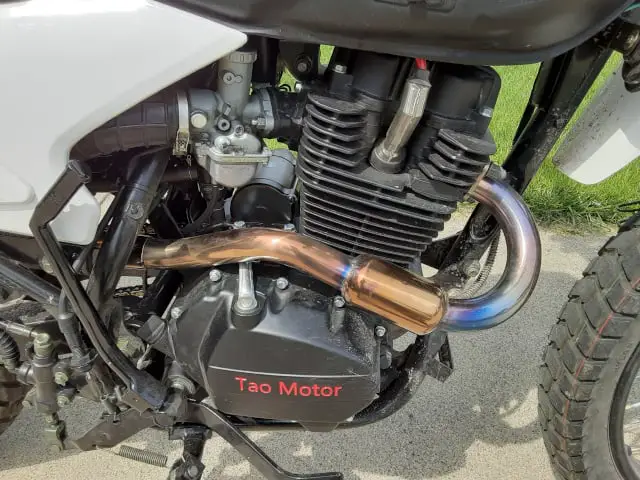
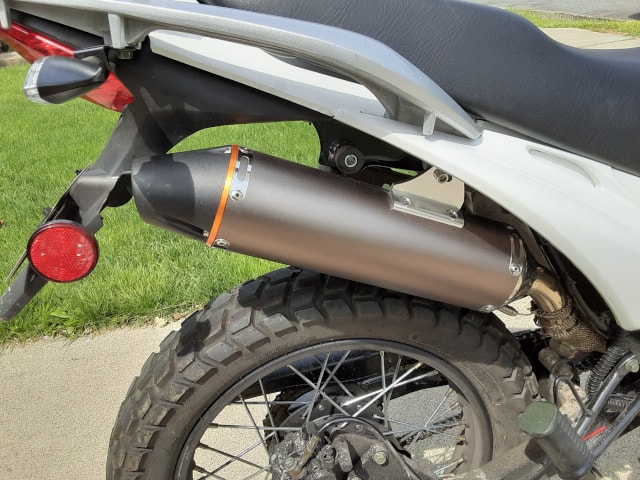
Also, the upgraded exhaust piping metal was originally a shiny silver chrome color; once I road the TBR7 motorcycle a couple of times, the new exhaust took on some rich colors.
My TBR7 With The New Exhaust Pictures
I hope documenting upgrading my TBR7 motorcycle’s exhaust system inspires you to customize and have fun with your Chonda.
I learned much-reading posts and YT videos by Hawk 250 owners and figured I could upgrade my TBR7’s exhaust system. And you saw the results. It’s sweet.
Ride Safe, Ride Fun!
Click To See My Recommended
TBR7 Upgrades
Ride Safe, Ride Fun!!!!
Recommended reading: My Chinese Motorcycle Exhaust Review

Hi I’m Tom, A New Motorcycle Rider and Blog Author.
I am a new rider(Pa Learners Permit at the end of 2020, and I received a Pa Motorcycle License in 2021 after passing a Motorcycle Safety Course).
I bought my first motorcycle, a TaoTao TBR7, at the beginning of 2021 and have been doing upgrades on that motorcycle since.
I added to my motorcycle collection by buying a Boom Vader Gen 2 in 2022, and that Grom-Clone motorcycle has been upgraded by me as well.
I continue to ride my Boom Vader Gen 2 motorcycle as well as my TaoTao TBR7 dual-sport bike.
Read more on my About Me page.
Fun Fact: I’ve only been on one group ride.
