
Now I replaced my TaoTao TBR7 motorcycle stock clutch springs with heavy-duty motorcycle clutch springs. This upgrade was easy to do with one set of aftermarket clutch springs, and the results were interesting. So, in this post about upgrading my motorcycle clutch springs, I will cover how I replaced them, why I replaced them, and the results.

Are you interested? Were the heavy-duty motorcycle clutch springs upgrade worth it? In a later post, I will cover the reasoning and results of this clutch spring upgrade.
This post will cover what I did to upgrade my TBR7 motorcycle clutch springs to the heavy-duty versions.
How I Replaced My Motorcycle Clutch Springs.
Intro to how I do both motorcycle clutch replacements and how I planned to do this motorcycle clutch spring upgrade. I work with a bike in the upright position.
Some people like to lay their bikes down and avoid losing oil; I’m OK with draining and giving the bike fresh motorcycle engine oil at the end. It’s a treat for a bike upgrade that went well. 😀
1.- Motorcycle Garage Safety Is Important.
- Ensure the motorcycle engine is cool to the touch.
- Working on a level surface.
- The bike is secured and prevented from rolling or tipping.
- Stage parts and tools.
- Addition Garage Safety Tips: Motorcycle Garage Safety Rules – FAQ
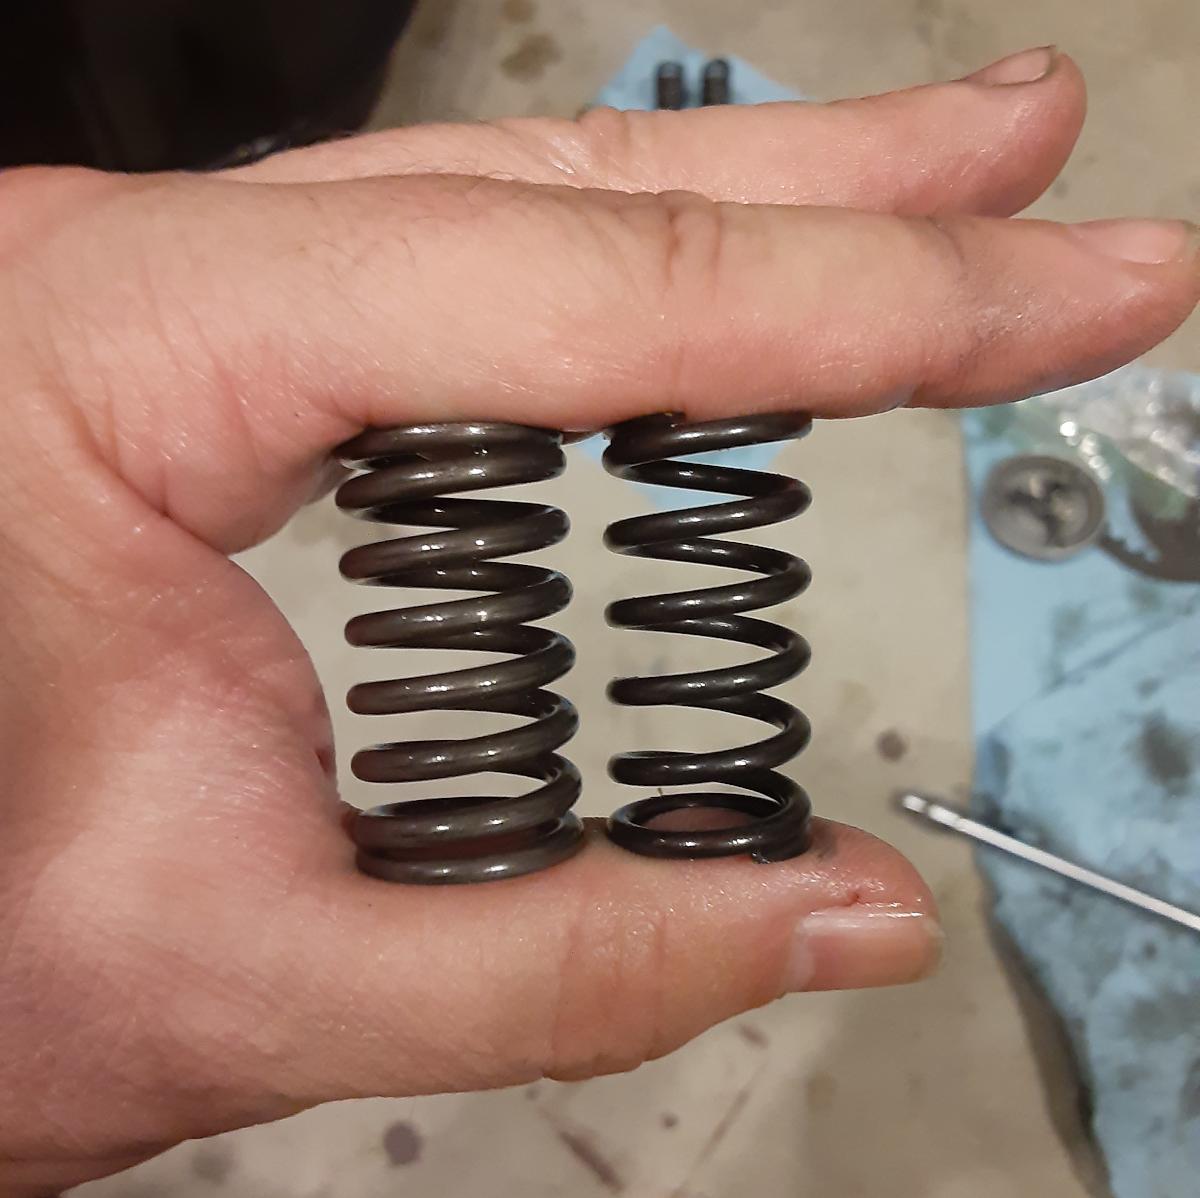
Note: Heavy Duty Clutch Springs I Purchased.
Author’s Notice: This page contains affiliate links, for which I may earn a commission by their use. As an Amazon Associate, I earn from qualifying Amazon purchases.
EBC Clutch Spring Set – CSK41
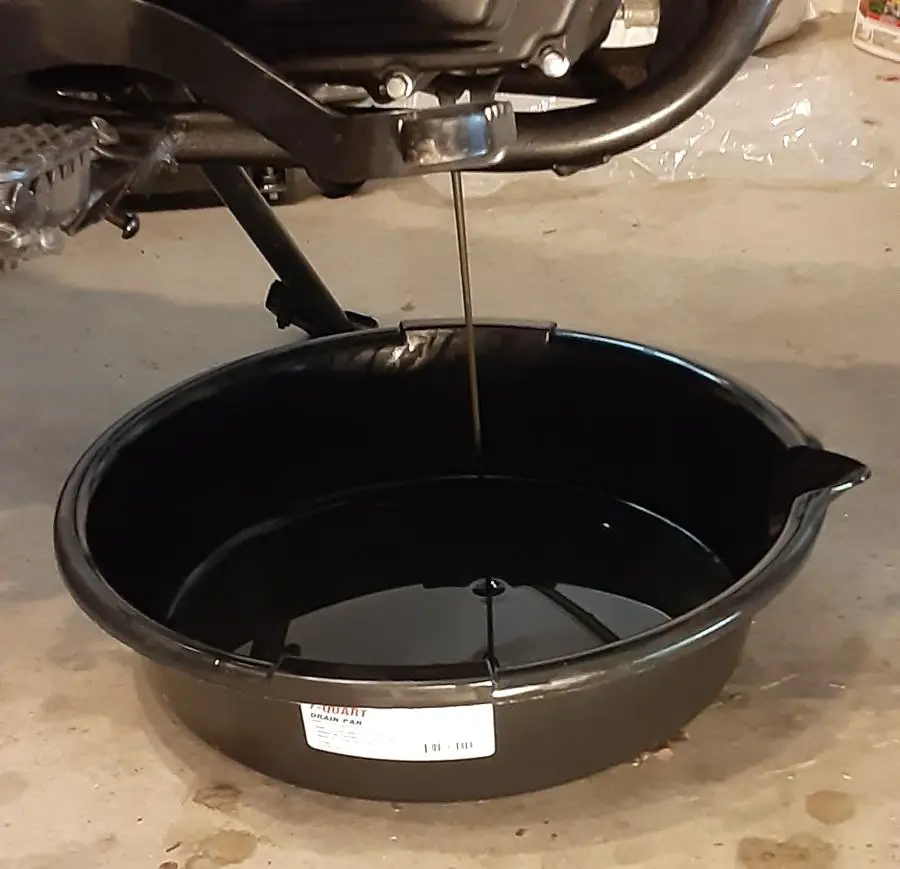
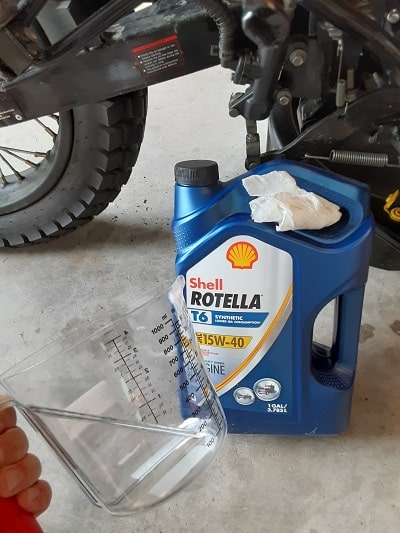
2.- Drain The Motorcycle Engine Oil.
As I said, some people skip this step by tilting the bike; just telling you what I did. I drained the engine oil.
Now my TaoTao TBR7 motorcycle has an after-market oil cooler upgrade, so I have to use the oil drain plug. If you have the strainer, you can do a TBR7 oil change, as I used to do it, through the TBR7’s oil strainer housing.
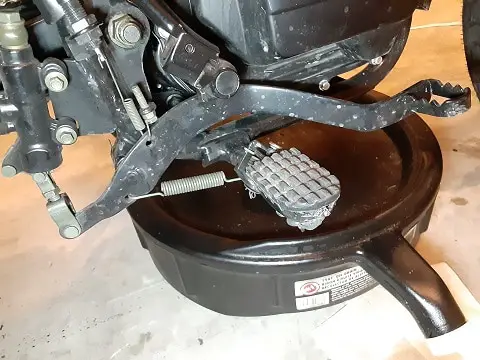
Tip: Keep the oil pan under the engine to collect any oil that drips down after opening the engine crankcase.
3.- Remove The Rear Brake.
My TBR7 motorcycle’s rear brake blocks the removal of the right side engine casing and is easy to take on and off, and I remove the whole rear brake.
4.- Remove The Kick Starter.
I removed the kick starter a long time ago. I was still determining if the kick starter worked, but then one day, it started. So although I removed it, I keep it wired tied to my rear luggage rack.

Just in case my stock motorcycle battery finally dies, it has not yet been in year three because of the battery trickle charger I use. Cheap insurance. 😀
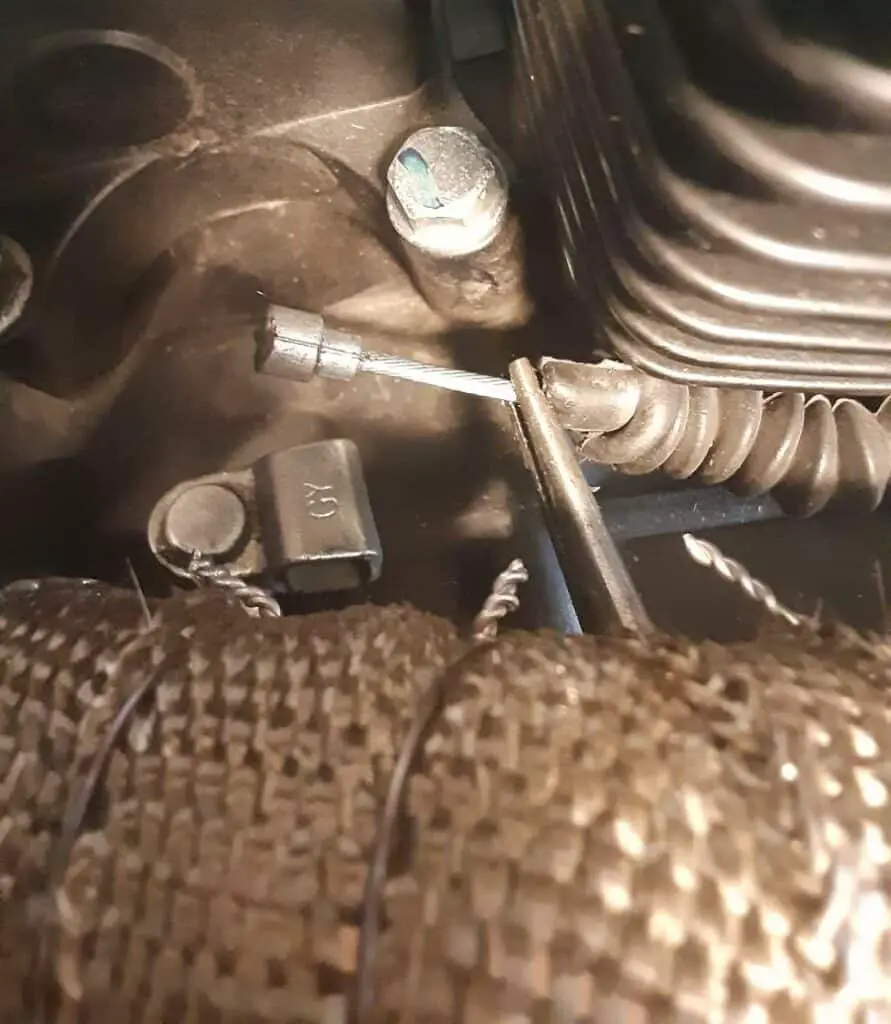
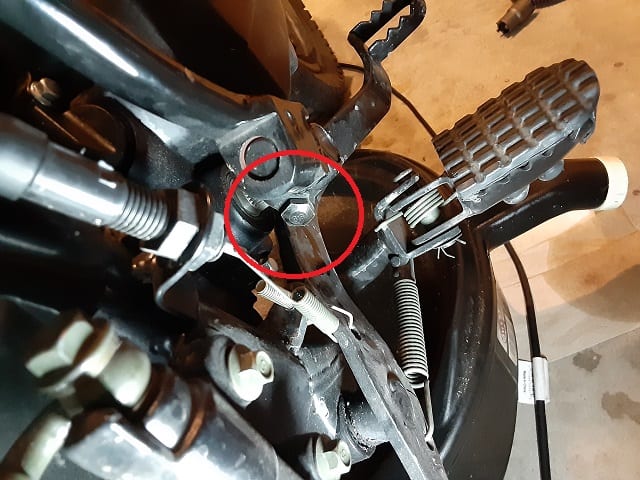
5.- Remove The Clutch Cable From The Engine.
Now How I remove the clutch cable is only at the engine.
A properly adjusted clutch cable has a little ‘slack,’ and I use this slack to my advantage.
I remove the screw that holds the jacket on the engine casing.
Once this screw is removed, the clutch cable mount is free, and now I work the end of the clutch cable out of the end of the clutch actuator arm. It’s a little keyed slot that the nub at the end of the cable comes free.
6.- Break Free, And Remove, All The Engine Casing Bolts.
As a good work habit, whether tightening or loosening bolts to a gasket surface, I use a crisscross method.
In this step, I’m just going around and breaking free the bolts at first, then completely removing the bolts.

Note: One bolt is longer than the rest and goes toward the front of the motorcycle in the raised hole(compared to the other bolt holes).
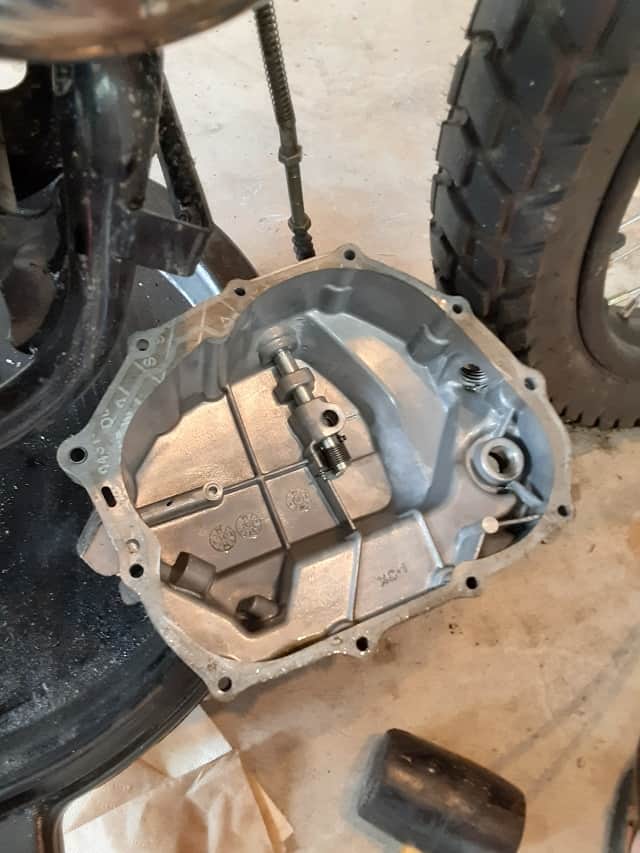
7.- Remove The Engine Crack Case Cover.
This cover might be ‘stuck,’ but a gentle tap with a rubber mallet should break it free.
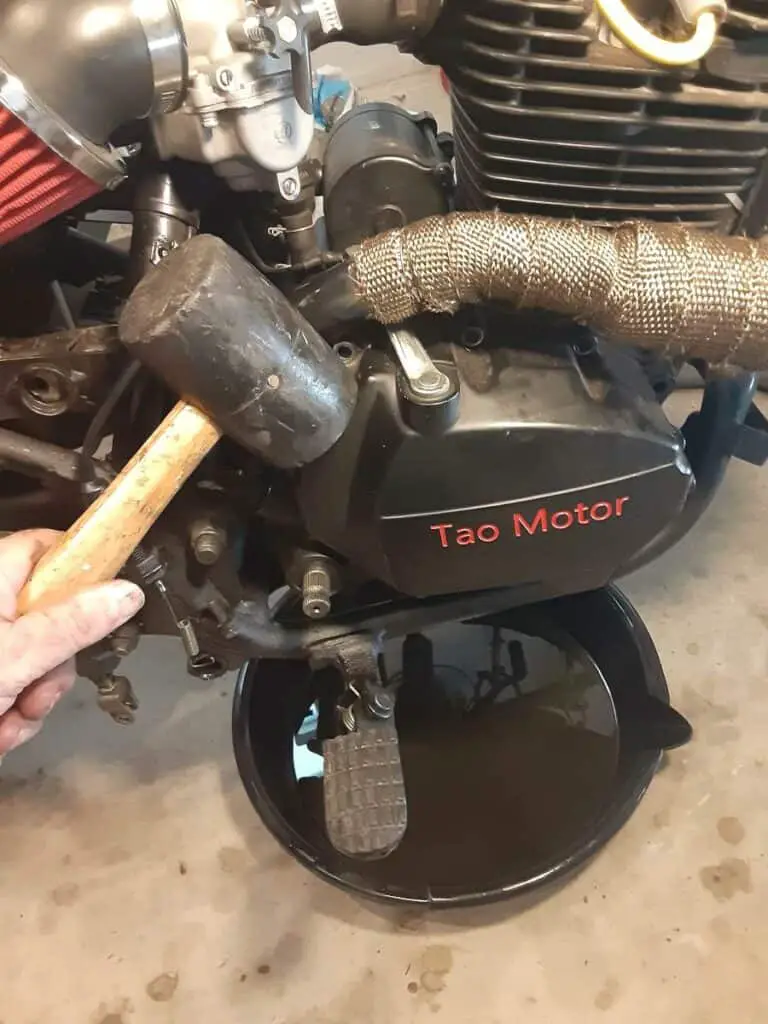
Carefully remove the cover while working the gasket off. If I don’t damage the crankcase cover gasket, I reuse it.
Note: Good time to inspect the inside surfaces of the cover, and lower areas of the engine, for abnormal wear products. I like wiping out the areas to help eliminate additional dirt the oil changes leave behind.
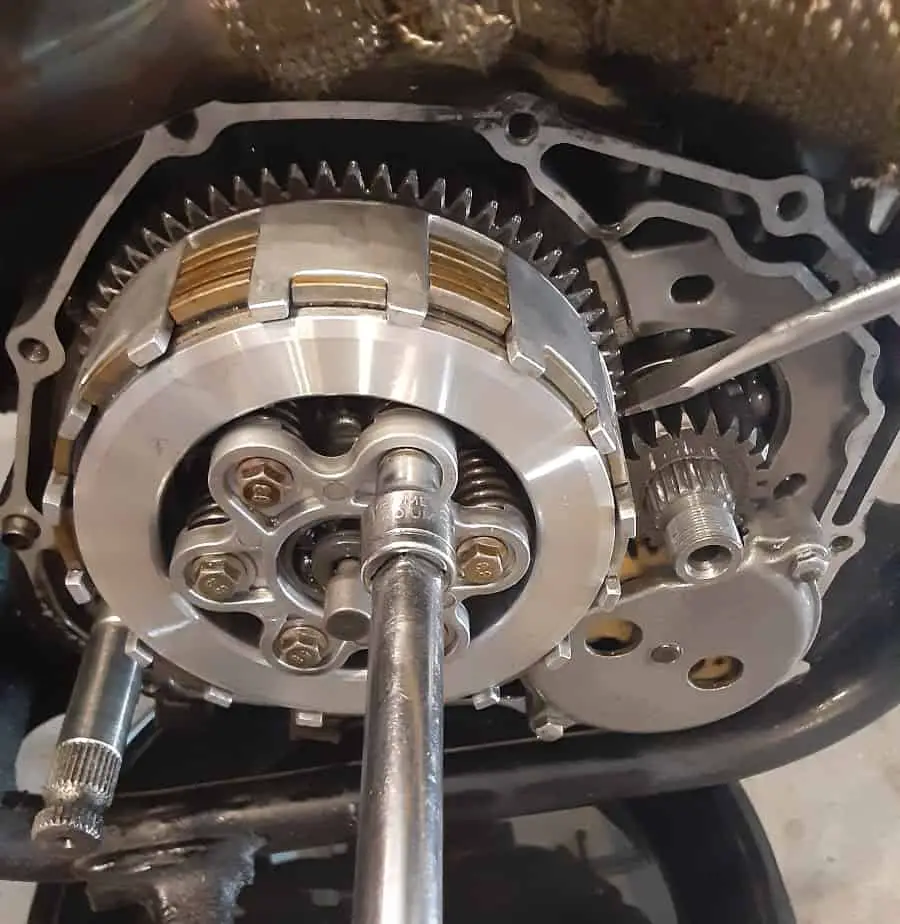
8.- Remove The Clutch Spring Plate.
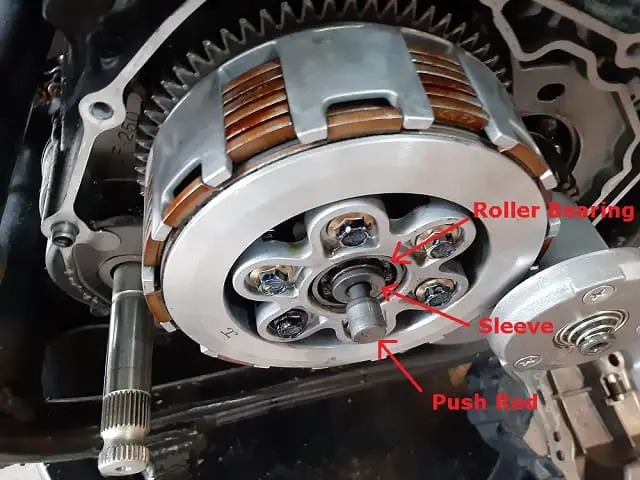
There are loose parts right in the center of the clutch spring plate. Be careful not to lose them. Often I leave them in place to help realign the plate up later for re-installation.
Remove all six bolts, again breaking free in a crisscross pattern, then remove the bolts altogether.
NOTE: when you remove the last bolt, expect everything to fall. I take my time and prepare to catch everything, the plate, the actuator rods, the springs, etc.
9.- Prepare The Bolts For Re-installation.
I laid out the crankcase and clutch spring plate bolts and put a dab of blue thread locker on the thread. This way, they were set up to grab and go as I installed them.
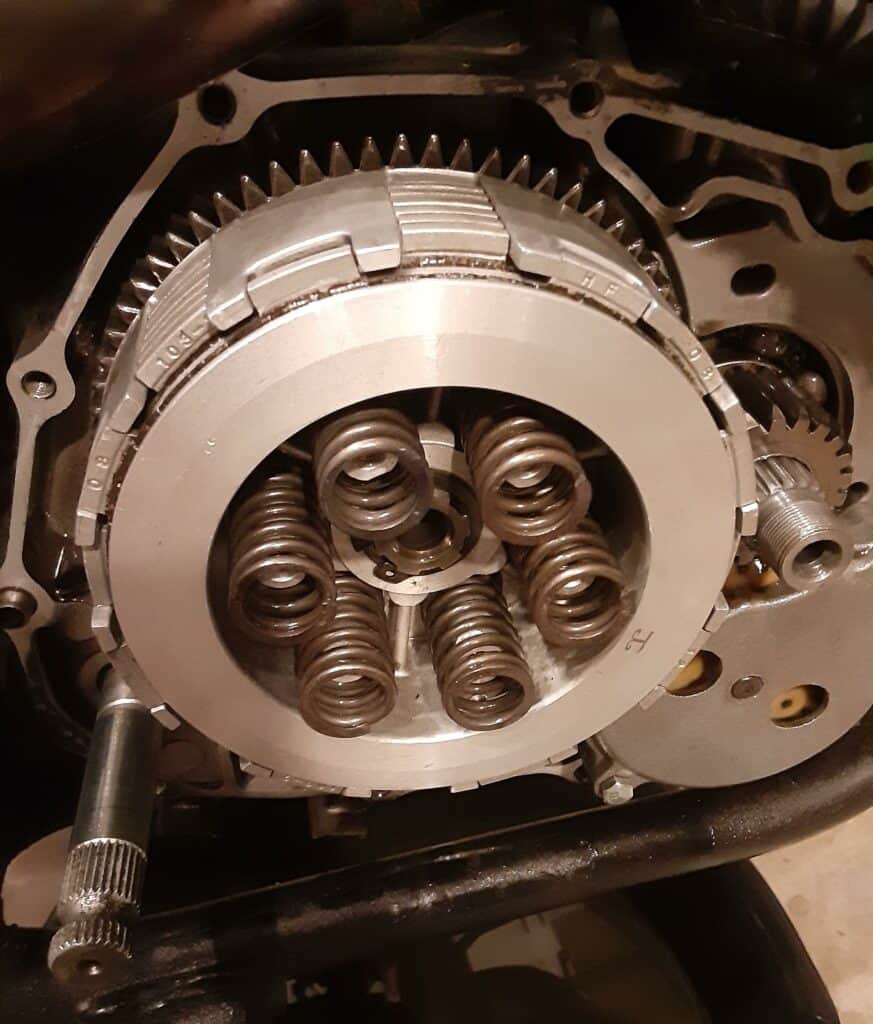
10.- Position The New Heavy-duty Motorcycle Clutch Springs.
I carefully positioned the springs and took steps to catch them should they fall. A pan underneath can help.
11.- Re-Install Clutch Spring Plate.
After the new heavy-duty clutch springs are in place, I hold the plate over them, with slight pressure, and thread one bolt in by hand.
Once the bolt is in place, it is less likely I will drop and lose parts.
Loosely and hand thread in bolts.
Continue tightening and compressing the clutch springs evenly. A few turns on one bolt, then turn the opposite bolt a few turns, then repeat on the next set of bolts. Continuing in a crisscross method, evenly compressing the plate and the clutch springs.
Once resistance was met, I went around and ensured resistance was met at every bolt. The springs are compressed to their max.
Time to torque down the clutch spring bolts to the recommended torque. If you know this value, please comment below. I found various values listed online.
12.- Inspect And Re-install Crack Case Cover.
Check the gasket for cuts, rips, or grim. Wipe down all sealing surface areas with a lint-free rag.
Push in clutch activator arm to fit under exhaust piping, orient gasket, and cover before re-installing.
Once the crank cover is positioned, inspect areas around the sealing surfaces for any damaged gasket signs.
Then move on to hand threading in crankcase cover bolts and preventing cross threading.
Remember, one crankcase bolt is longer than the rest; this goes in the forward area of the cover, where the bolt hold is raised compared to the other bolt holes.
Once hand tight, torque down the bolts in a crisscross method.
Torque values I found. 15-22 ft-lbs. I went with 22 ft-lbs. If this is correct or incorrect, leave a comment, please.
13.- Re-install Clutch Cable.
I fish the clutch cable behind the exhaust pipe and work the nub end into the little keyhole on the clutch actuator arm.
Once the clutch cable is installed on the clutch actuator arm, I re-install the clutch cable mount.
Note: no, this long screw, I put a dab of anti-seize on the threads.
I use a Phillips screwdriver to thread in the bolt, then tighten it with a wrench at the end.
14.- Re-install Rear Brake.
This rear brake assembly is easier than most think. Taking the rear brake off and on is easy after you know what the pieces are for.
My first time was the TBR7 assembly, and I had no instructions; it was crazy, so I wrote this post to help others.
15- If You Want, Re-Install The Kick Starter.
I covered that I don’t do this step, but for you guys that kill motorcycle batteries often, it might be what you need.
16.- Refill Motorcycle Engine With Fresh Oil.
TBR7 Motorcycle Oil Changes are easy to do, and your bike will appreciate them.
17.- Test Ride, And Be Careful.
This post is already very long; I will cover my results in more detail later. However, be ready to ease more into the shifting friction zone and re-adjust your clutch lever/cable.
If you’ve done this heavy-duty motorcycle clutch spring upgrade, comment below. Even if you did it on another motorcycle, I am interested in your results.
I plan on doing this also to my Boom Vader Motorcycle.
Ride Safe, Ride Fun!
Current Prices: EBC Clutch Spring Set – CSK41
New Update: My Motorcycle Heavy Duty Clutch Springs Upgrade Review.
Click To See My Recommended
TBR7 Upgrades

Hi I’m Tom, A New Motorcycle Rider and Blog Author.
I am a new rider(Pa Learners Permit at the end of 2020, and I received a Pa Motorcycle License in 2021 after passing a Motorcycle Safety Course).
I bought my first motorcycle, a TaoTao TBR7, at the beginning of 2021 and have been doing upgrades on that motorcycle since.
I added to my motorcycle collection by buying a Boom Vader Gen 2 in 2022, and that Grom-Clone motorcycle has been upgraded by me as well.
I continue to ride my Boom Vader Gen 2 motorcycle as well as my TaoTao TBR7 dual-sport bike.
Read more on my About Me page.
Fun Fact: I’ve only been on one group ride.
