
I ran into problems when I upgraded and changed my motorcycle’s rear sprocket (TBR7 Rear Sprocket and Studs Upgrade) for the new fewer teeth rear sprocket: problems I caused (My Bloopers), and issues I didn’t prepare for.
I share my experiences with all my fellow Hawk 250, and TBR7 owners can learn from my mistakes, and here are my rear sprocket changing and upgrade tips.
Ready to upgrade your RPS Hawk 250, Bashan Brozz 250, or like mine, your TaoTao TBR7’s rear sprocket? Then, read along and avoid my rear sprocket mistakes/troubles.
TBR7’s Rear Brake Problem.
I lifted my motorcycle on my hydraulic lift to prepare for the rear sprocket, but I was on the bike’s left side when I placed the lift in position. I guess I was in a rush and positioned the jack and lifted the bike. This sloppy lifting and only watching the placement from the left side will explain the problems I had.
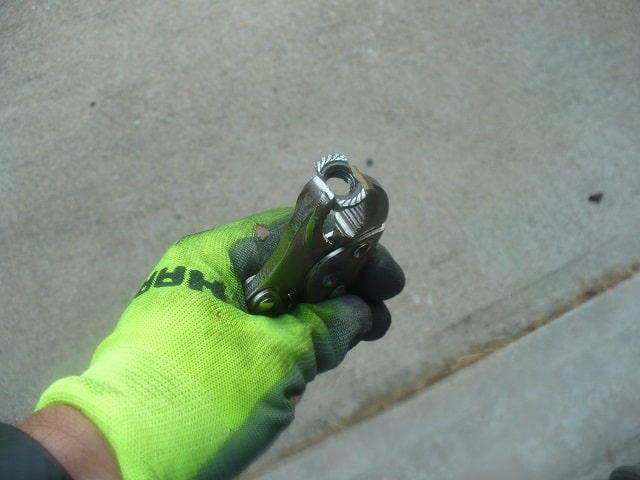
When it came to removing the rear brake, the brake piston wouldn’t compress. I felt the force by hand was too much, and to make it easier, I used a simple clamp, still without success.
Look here and see if you can notice why I couldn’t compress the rear brake caliper piston by hand and by a clamp.
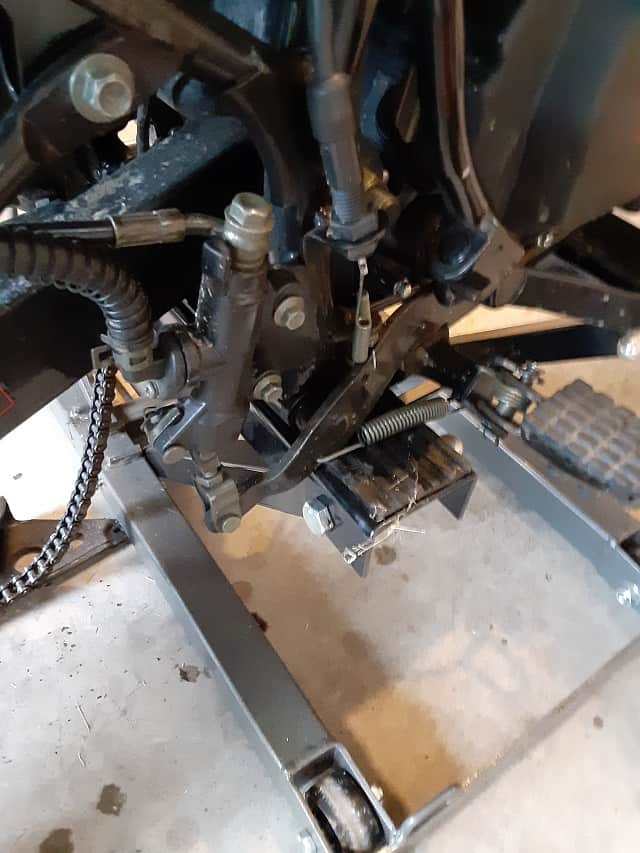
When I lifted the TBR7, I managed to place one of the lifting arms under the rear brake’s activating arms and compressing the brake cylinder. In the step where I was rotating the rear wheel into position to set up the motorcycle’s chain master link for later removal, I didn’t notice how difficult it was to remove the wheel.
Each time I squeezed the rear brake piston, I fought against the motorcycle’s weight, activating the rear brake.
Quick fix, safely lowed the motorcycle and repositioned the motorcycle lift while also watching the right side of the bike. The second time I was able to lift the bike and easily remove the rear brake caliper.
“Haste Makes Waste”
Unknown
My TBR7 Motorcycle Rear Sprocket Changing Studs
When you look at the rear sprocket, you will see threads and nuts. This appearance makes the rear sprocket appear attached to the motorcycle’s rear wheel with bolts. Not the case; on the TB7 and Hawk 250, they are studs. The inner side you don’t see is smooth. These parts are the studs.
After removing the snap ring, which holds the rear sprocket to the wheel, I positioned the wheel for the stud nut removal. The brake disc side rested on my left inner thigh, and I had access to the sprocket studs with my right hand. I used, take note here, a 6 point socket to remove the nuts. Or, should I say attempted to remove.
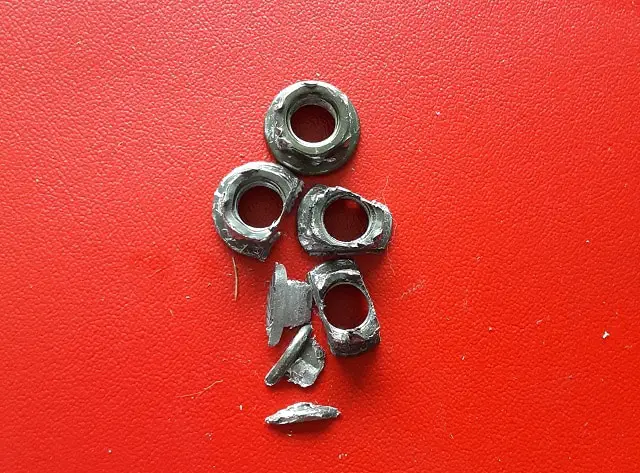
First Attempt with just a sprocket: I could only remove one of the nuts after several attempts. I found out the nuts were of very mild steel. The nuts rounded off very quickly. I used the correct size socket and used a six-sided one. This failure shouldn’t happen; it was the proper technique.
Second attempt at using liquid magic! Well, not real magic; I used liquid penetrant. I laid down the wheel, studs up, and sprayed the gap between the nut and stud. There wasn’t a gap, but I tried. I Failed.
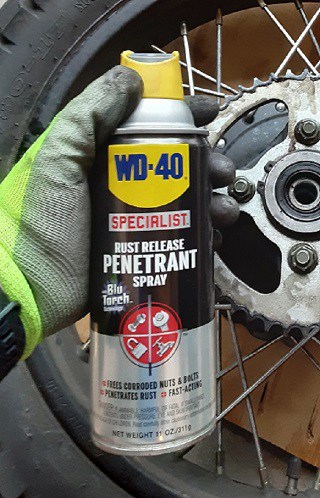
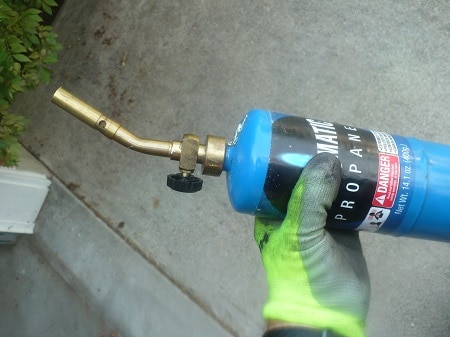
Third attempt at using fire! I broke out the propane torch and started heating the remaining nuts and then spraying them with liquid penetrant. Hoping the heating opened a gap between the threads, and the rapid cooling caused the liquid to be sucked down—no Joy.
Rear Sprocket Studs Removal Time Out And Plan Change.
My first attempts to remove the sprocket stud nuts failed overall. Only one of the nuts was removed, and that was mangled in the process. I needed to rethink my steps.
I took the one stud I could remove to my closet motorcycle shop and was told they couldn’t help me. They had no sprocket studs I could use in stock. The funny thing I asked for Hawk 250 sprocket studs figuring the TBR7 isn’t as well known as the Hawk 250, and my questions were met with a weird stare from the counter guy. I later told him the motorcycle was a Chinese knock-off matching much of Honda’s designs and the counter guy said he found an actual Honda version of the sprocket studs. However, there were only 5 in the whole country listed, and they were several states away.
So this plan to replace the studs and nuts didn’t work out.
Time To Get Mean On The Studs!
The TBR7 is a love/hate affair. I love the TBR7’s features over the Hawk 250. What I do not love is the TBR7 has fewer owners than the Hawk 250. So when I searched for TBR7 Rear Sprocket Removal, I found less information than Hawk 250 Rear Sprocket Removal.
Where this difference comes essential is when I am having a problem with my TBR7. I KNOW the motorcycles are such similar parts are interchangeable, but I was second-guessing myself. Was I using Hawk 250 rear sprocket changing information incorrectly? Was there a separate set of steps for the TBR7? Fed up, I was going to get tough on the nuts!
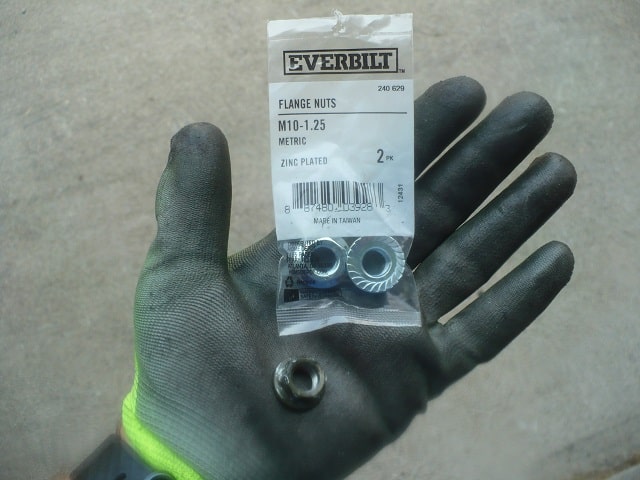
New Sprocket Stud Nuts From Hardware Store
On my travels to replace the rear sprocket studs, I figured the stock nuts were gone. I was trying to go easy on the nuts; yes, fire and chemicals were going easy on the parts. So with the one stud, I removed and its nut, I visited Home Depot. Found Home Depot had a better-looking nut, felt harder, brighter looking, and 1mm larger. Four of these replacement nuts were only about two bucks.
Gripping Power Of A Vise! Nuts Beware!
Now, a headline that should scare anyone.
I now have replacement nuts, I can get medieval on the remaining three nuts.
Fourth attempt: I clamped vise-grips onto the nuts and cranked. All I made was shredded metal parts. The teeth of the vise-grips bit into the metal, but once turned, just rounded the remaining edge and corners of the nuts. Nuts Are Darned!!!
Fifth attempt: Nut Cracking time!!! I pulled out a nut splitter, a nutcracker, and cranked it down on a nut. The blade cut into the metal, but no crack. No split. No broken nut. The rear sprocket stud nuts were too soft; the nut just absorbed the nut splitter’s blade. I order placement parts and give up on the stock sprocket and stock studs and nuts.
Not A Time To Work My Online Shopping Addiction.
I ordered the rear sprocket online. Since I couldn’t find the rear sprocket studs at my local motorcycle shop, I will have to order them online too. 🙁
A quick search resulted in a speedy order. The only thing not prompt was the delivery. I would have to wait, or I could make another attempt to remove the stock studs myself? This delay in my sprocket project made me mad. This delay gave me time to think plan my final attempt. I wasn’t going to wait.
TBR7 tip: Always search for Hawk 250 parts and components before searching for TBR7. As I said before, the Hawk 250 appears to have a more extensive following of owners than the TBR7. Since the TBR7 and Hawk 250 share most components and parts, you can benefit from the larger Hawk 250 owner group’s needs.
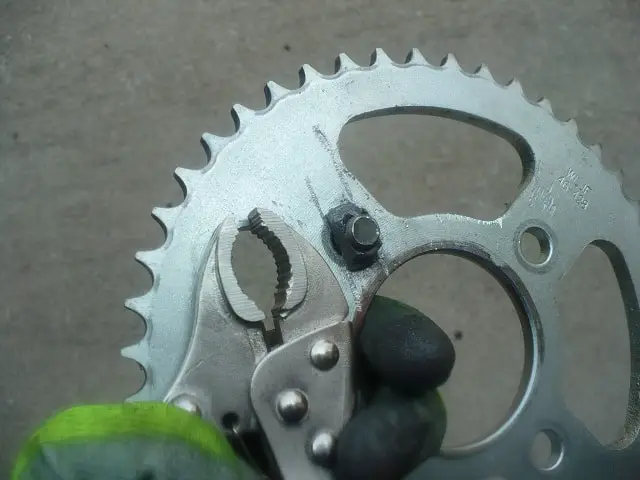
Rear Sprocket Stud Nuts Are Soft, Soft Enough To Be Cut.
The nuts took the nut splitter’s blade very easily and figured I just needed another blade to work differently for me. I have hacksaws that I could use, but I love my Rockwell Oscillating Multi-Tool. I use it for many projects.
FYI, I used my SonicCrafter for many DIY projects, it was a good investment and has held of for many years. My Rockwell SonicCrafter sands, it scrapes, and in this case, it CUTS. I attached to the metal cutting blade and went to town on the remaining nuts. The Rockwell cut those nuts ‘like butter’. 😀
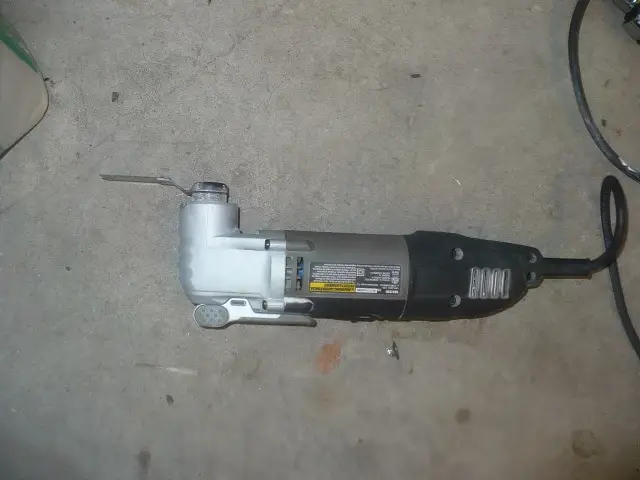
Note: for openness, my TBR7, sprockets, tools. etc. were were not sponsored items. These are my items. So my comments about the Rockwell SonicCrafter are from this DIY’er, not a script. I bought other Rockwell products because I like their line.
Sixth Attempt: After a couple of minutes, I had big fat sides on the nuts.
Rube Goldberg Would Be Proud!
I clamped down the new sides of the nuts and then used channel locking pliers to grab onto the vise-grips. I placed the sprocket back into the wheel for better leverage. I was amazed. Removing material from the nuts loosed them, and they had less grip on the thread and sprocket.
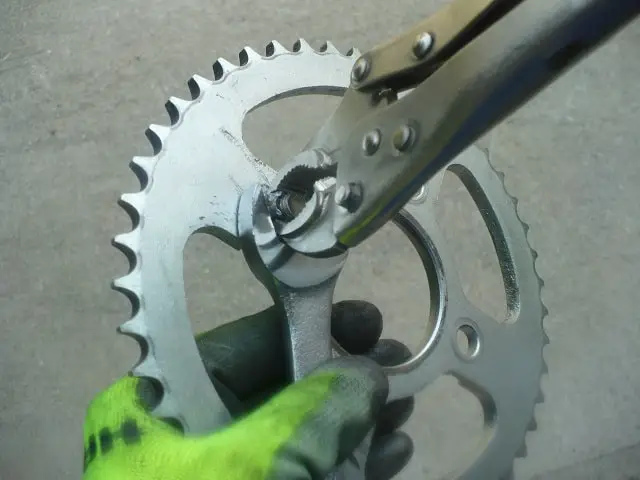
The Nuts Are Gone, And The Studs Are Free!
This headline means different things to different people, but this meant for my freedom. I reused the stock studs with the new nuts to install the new rear sprocket. It worked; my sixth attempt resulted in me moving forward with the new rear sprocket installation. My TBR7 is going to rock.
Now My Rear Sprocket Upgrade/Changing Tips.
1.- Hawk 250’s are more popular. Therefore there are more owners and more online information. If you need additional help(beyond my site) with upgrading your TBR7’s rear sprocket, do a quick search for “Hawk 250 Rear Sprocket Upgrade“. Hawk 250 owners have been posting good information to piece together and do the upgrade if you need more information than I posted. With time, TBR7 owners like myself will be producing more content for you to read through. Maybe someday Hawk 250 owners will search out our web content for their upgrade information? We TBR7 owners can only hope. 😀
2.- Take steps to set up your workspace correctly. As I wrote, I didn’t have the motorcycle lift set up correctly, and it was activating the rear brake. Just be sure you take your time and think about the steps you are performing.
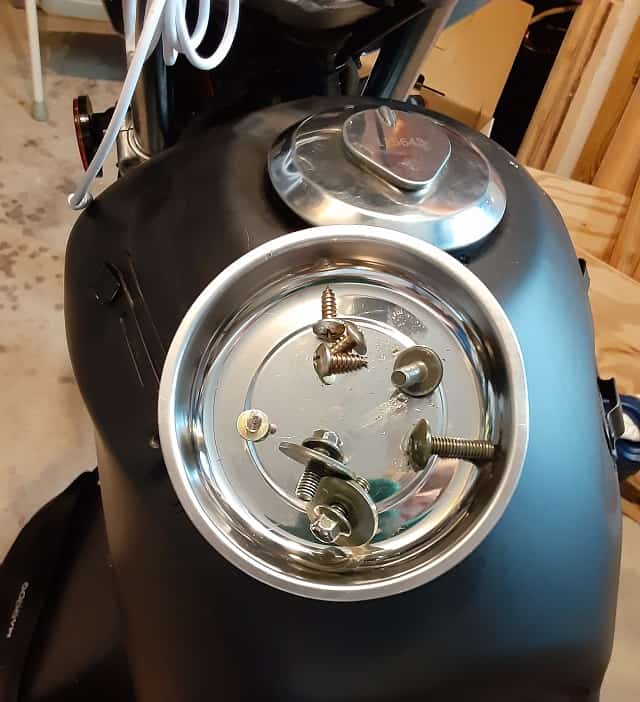
3.- Use a magnetic parts tray; this has saved my butt so many times. I have kicked this tray once, and the magnetic tray held the part. Another tip, the magnetic tray, can be attached to magnetic surfaces keeping it off the ground.
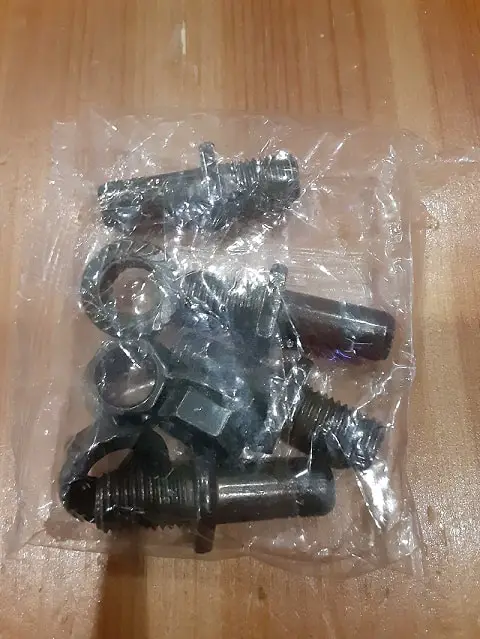
4.- A big tip, don’t worry about recovering the stock rear sprocket studs. You can order new studs with your new rear sprocket.
FYI, the sprocket studs I ordered came in after fighting with the stock studs and cutting off and replacing the nuts. For less than ten bucks, I could have saved several hours of frustration and drive time to and from the motorcycle supply shop. I am saving these for any future rear sprocket upgrades.
5.- Upgrade the stud nuts to better quality nuts. The Home Depot Nuts I used to feel more solid, looking very shiny on my new sprocket and were less than two bucks for all 4 nuts.
I hope this inspires you to upgrade your TBR7’s or Hawk 250’s rear sprocket. It was a good project, minus the time wasted parts. Remember, use this post for entertainment or educational purpose only. Motorcycle upgrades and repairs can result in dangerous riding situations. Seek professional mechanical advice where needed.
Thank you!!!!!
FYI, the full Rear Sprocket Upgrade Post, minus the Bloopers and Tips I shared here:
Click to read the original sprocket upgrade post:
TBR7 Rear Sprocket and Studs Upgrade
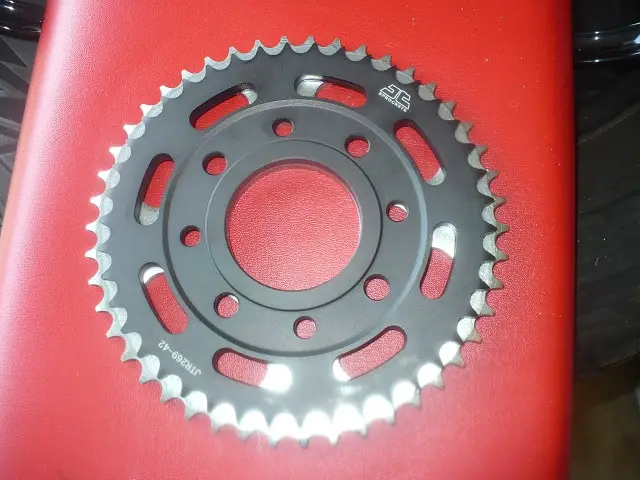
Extra Information: I went with a 17 tooth front sprocket and a 42 tooth rear sprocket. There are many opinions on chain gearing for getting the most out of your TBR7 ( TaoTao TBR7 Top Speed? – FAQ ), Hawk 250, or Raven motorcycles. I will post a follow-up about this gear ratio change, but in the meantime, I was wondering what you are running and your riding styles. Please leave me a comment below.
See My Recommended TBR7 Upgrades Page

Hi I’m Tom, A New Motorcycle Rider and Blog Author.
I am a new rider(Pa Learners Permit at the end of 2020, and I received a Pa Motorcycle License in 2021 after passing a Motorcycle Safety Course).
I bought my first motorcycle, a TaoTao TBR7, at the beginning of 2021 and have been doing upgrades on that motorcycle since.
I added to my motorcycle collection by buying a Boom Vader Gen 2 in 2022, and that Grom-Clone motorcycle has been upgraded by me as well.
I continue to ride my Boom Vader Gen 2 motorcycle as well as my TaoTao TBR7 dual-sport bike.
Read more on my About Me page.
Fun Fact: I’ve only been on one group ride.

You were working against red thread locker. Heat to greater than 250°C (550° F). Then, once the threaded assembly is hot, the nut can be removed without damage. Or like you said replace sprocket and studs as a set. I recommend reapplying red thread locker on the nuts.