
I separated posts about why I wanted to upgrade my TaoTao TBR7’s rear sprocket and the steps I took to actually upgrade my rear sprocket. If you want to read about my thoughts leading up to this upgrade, here is my previous post: Thoughts On Upgrading Rear Sprocket Of My TBR7.
If you are just here to follow the steps I did, then you are on the the right page. Just an FYI, it didn’t go very smoothly, and here is another post about how this sprocket upgrade had some rough spots: Rear Sprocket Upgrade Tips and Bloopers.
Now time to get down to business. Here is how I upgraded my sweat TBR7’s rear sprocket ( More Speed! TaoTao TBR7 Top Speed? – FAQ ) . Also, remember, much of this process was inspired by posts made by Hawk 250 owners. So I hope my TaoTao TBR7‘s Chonda-Cousins(RPS Hawk 250, Brozz 250, Raven 250, etc.) can benefit from what I am posting.
Author’s Notice: This page contains affiliate links, for which I may earn a commission by their use. Also, as an Amazon Associate, I earn from qualifying Amazon purchases.
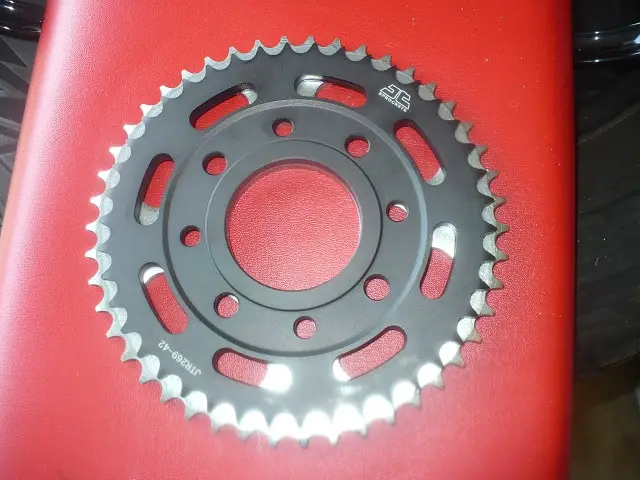
My TaoTao TBR7 Motorcycle New Rear Sprocket
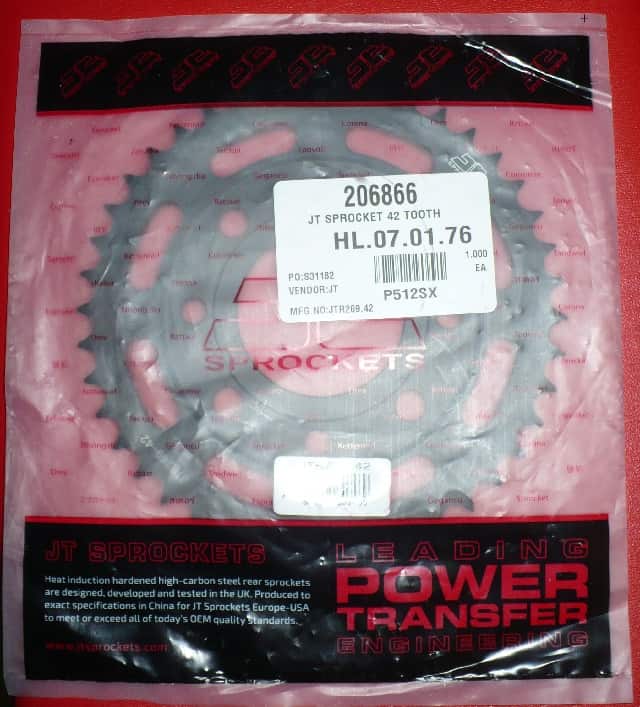
Click For Current Prices: JT Rear Sprocket.
Upgrading The TBR7 Rear Sprocket and Studs.
1.- Safety First!
- Working with a cold bike. I let the engine cool overnight.
- Disable the motorcycle from starting. Disconnecting the battery is the safest way.
- Have the bike on a level, stable surface.
- Eye safety! Use safety glasses. FYI, I need reading glasses, so I use these safety glasses with built-in readers.
- Set up your tools ahead of time. ( Must Have Tools For Motorcycle Owners )
- Set aside time to do this upgrade in sitting. There are lots of small parts.
- For more suggestions: My Motorcycle Garage Safety Rules – FAQ
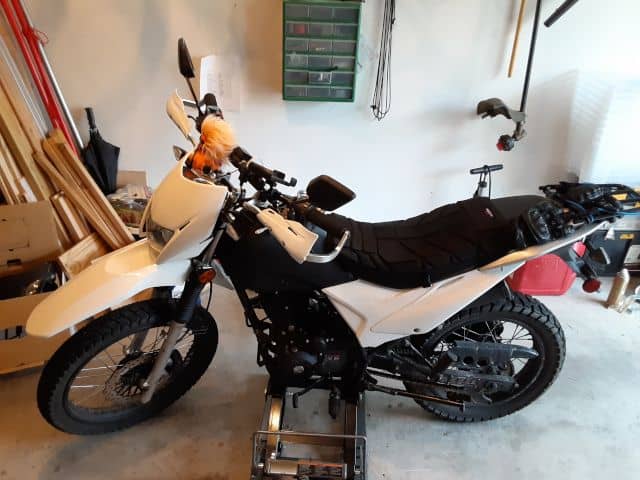
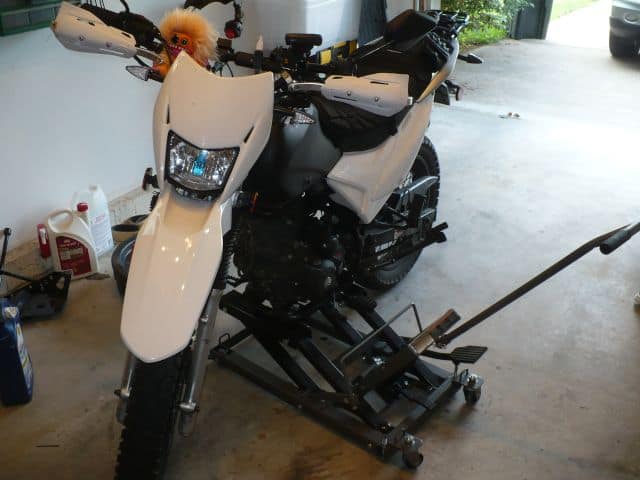
2.- Lift the motorcycle, and have the rear wheel off the ground. Ensure it’s secured and will stay safe with the removal of the rear wheel.
3.- Remove upper chain guard. Again, these bolts are small, so I use a magnetic parts tray to store parts like this and prevent accidental losses.
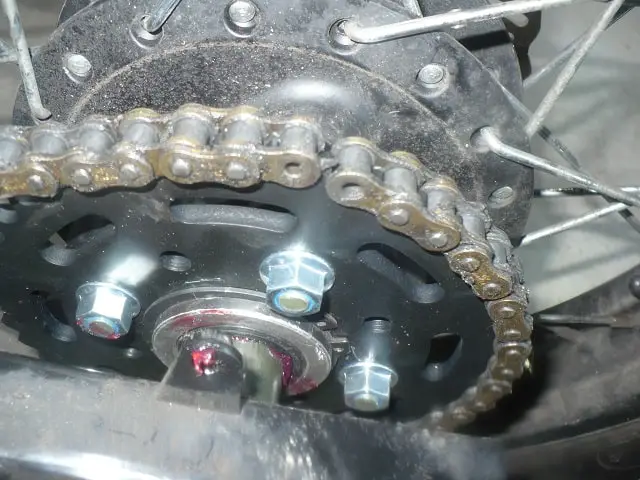
4.- With the rear wheel off the ground (ensure the transmission is in neutral), rotate the rear wheel till you find the master link. Position the master link such that each end of the chain is on a couple of rear sprocket teeth. It prevents chain jumping off as you unhook the master link.
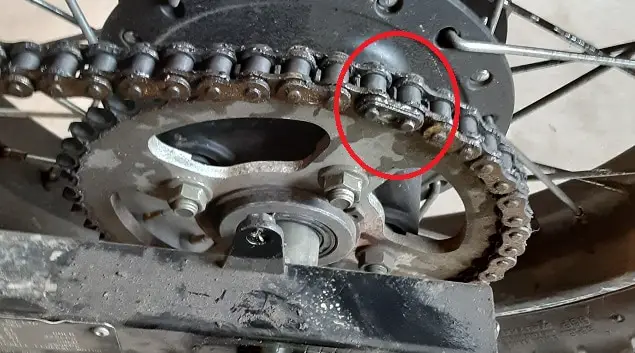
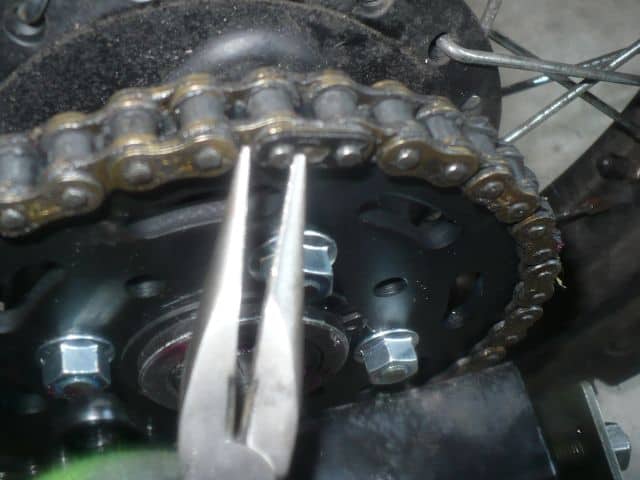
5.- Remove the master link clip(pushed with a flat head screwdriver or pinching with needle-nose pliers works) and disassemble the master link(3 parts). Store in a safe place. Hint, Hint: Magnetic Parts Tray.
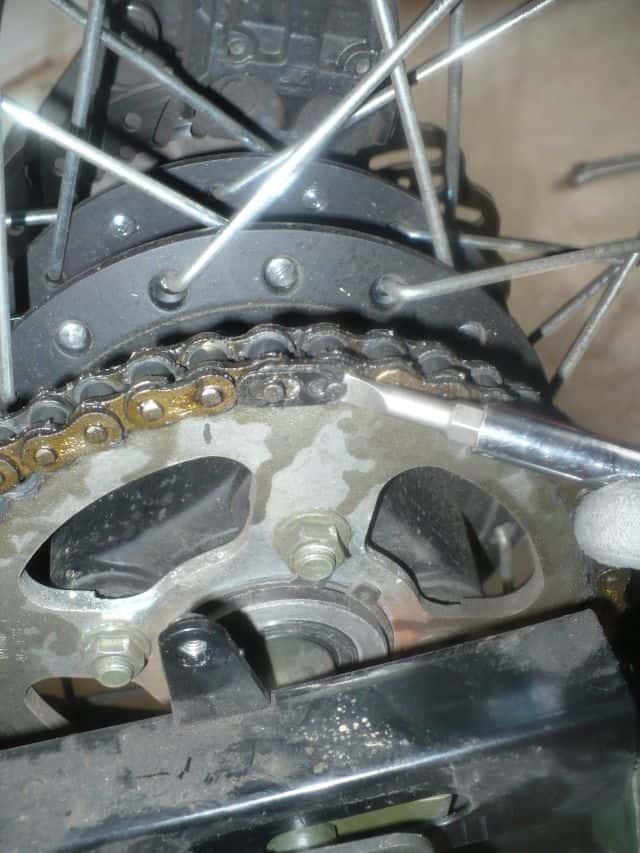
6.- Lower chain to floor, onto something clean. I use chain wax, and it like make a mess of what it touches. Cardboard should be OK if you think ahead.
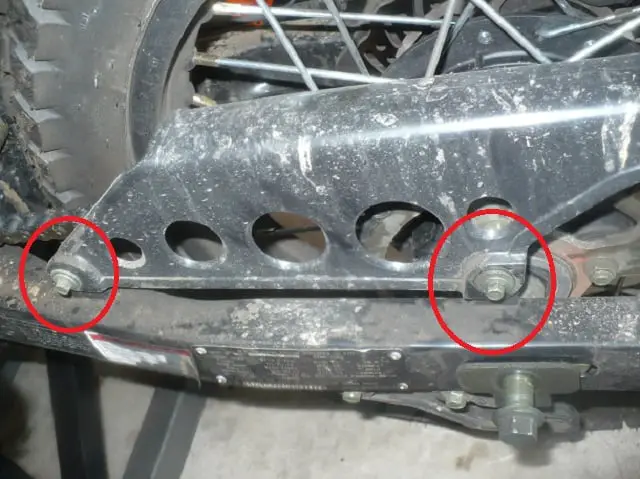
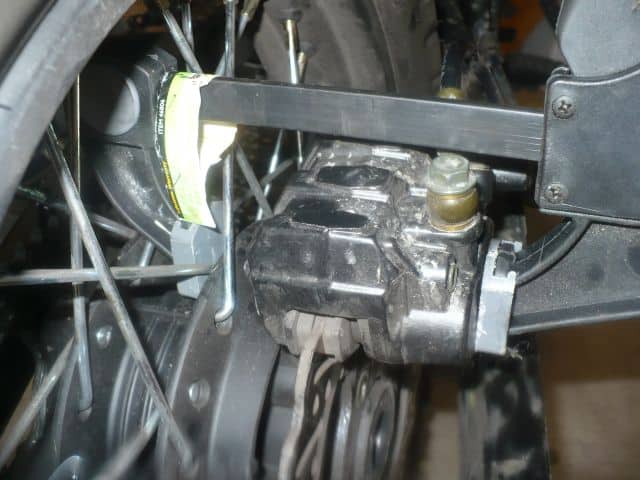
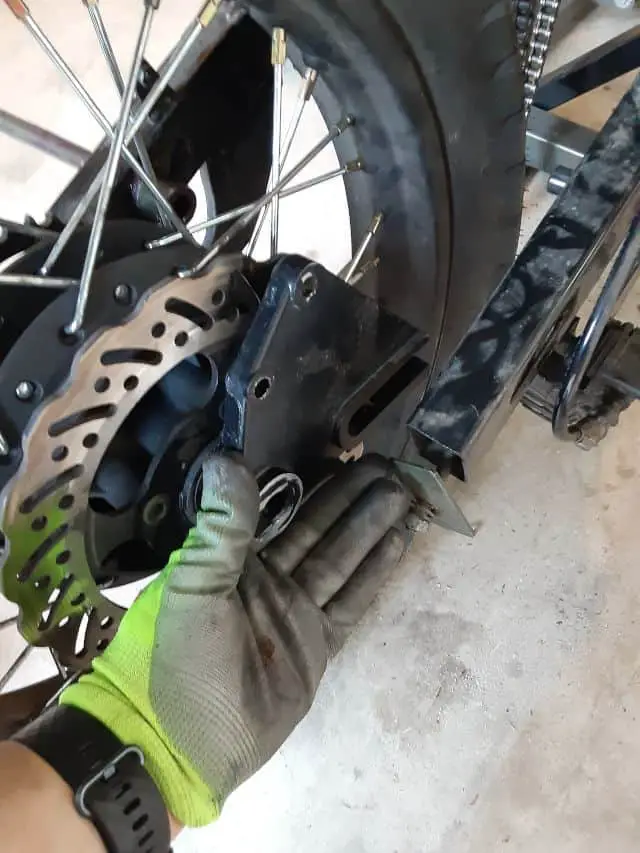
7.- Rear Brake removal. If necessary, you can compress the rear brake piston by hand or using a clamp. The goal is to create space between pads to slid the brake caliper off. Remove the two bolts from the mount(place in a safe place), and hang the caliper on the swingarm side. DO NOT let the brake caliper hang on its brake hose. Could damage the hose. Look at my example: I used copper wire to keep stress off the hose.
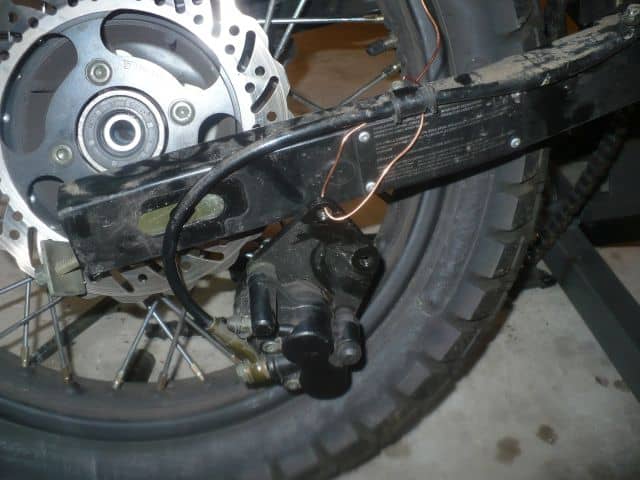
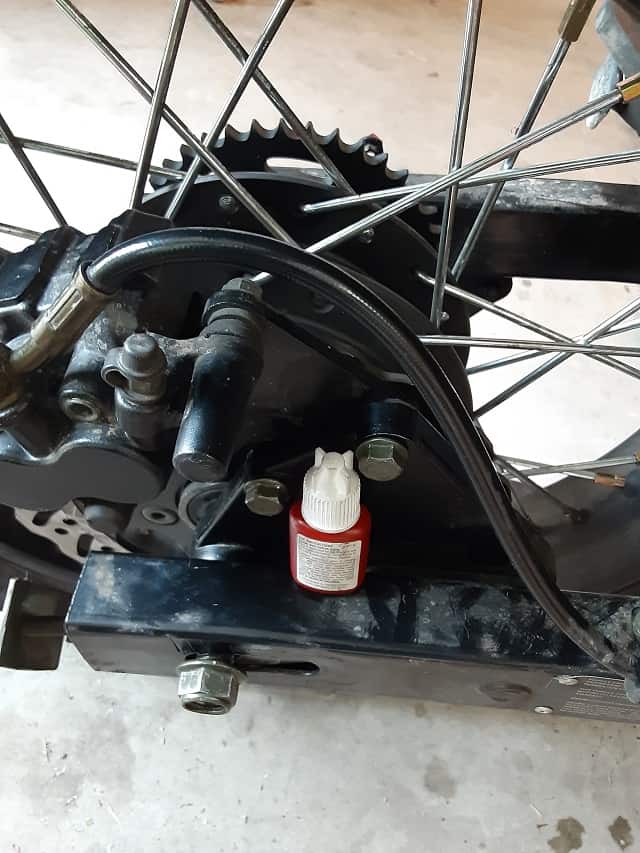
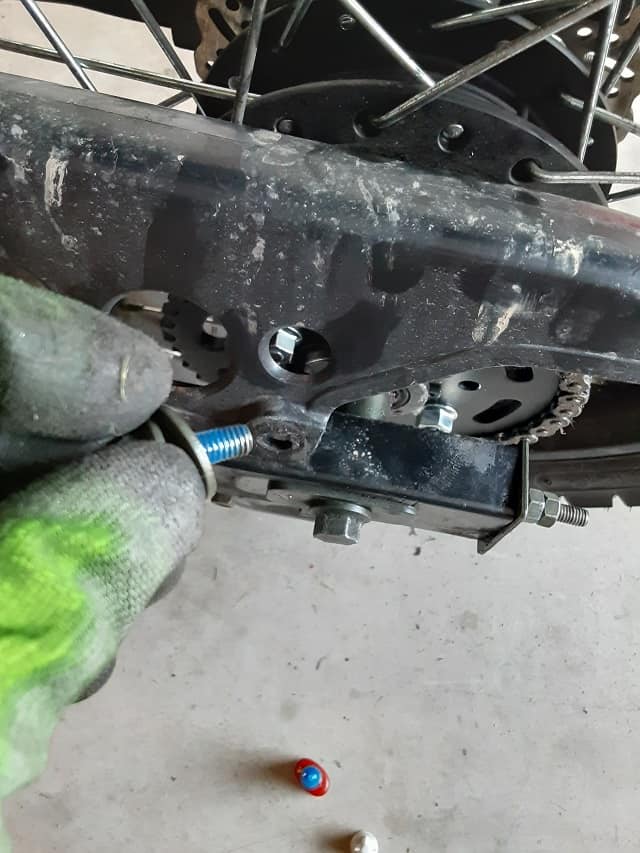
8.- Remove the chain tensioner lock nuts and safe in a safe place and loosen the chain tensioners. I wanted to get everything ready now, but loosening the chain tensioners can be done before the wheel and chain are reinstalled.
9.- Before you remove the rear axle, you need to take steps to prevent an accident.
- Removing the rear axle/wheel will have the motorcycle weight shift forward. Ensure the motorcycle is secured to the jack stand, and have the front wheel close to the ground preparing for the wight shift.
- Have the rear wheel touching the ground to take the wheel’s weight off the axle, but not have the wheel supporting the motorcycle. As the rear axle is removed, this step will prevent the wheel from dropping.
- Parts will fall off!!!! Yes, this seems to be a constant joke about the TBR7 being a cheap Chinese motorcycle, but this is by design.
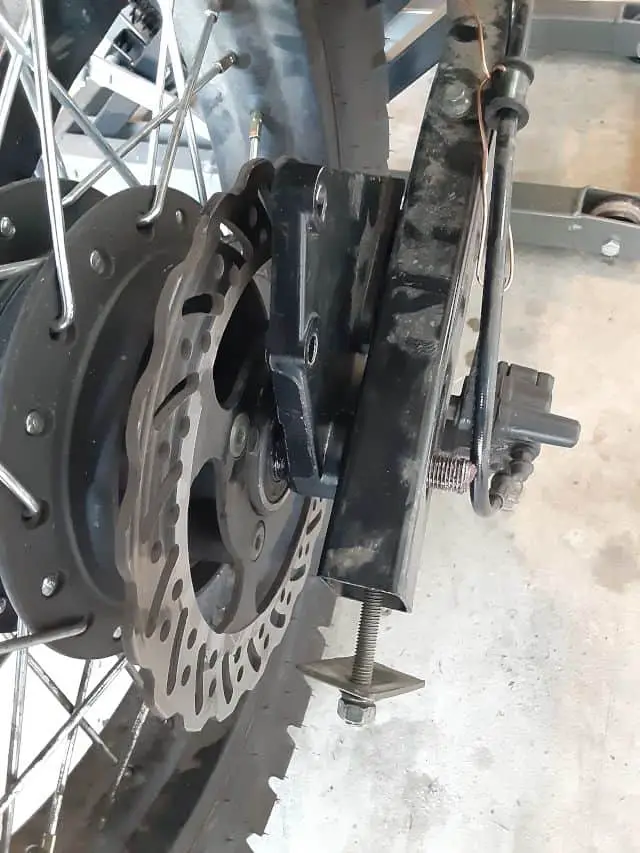
- On the right-side: rear brake mount ‘floats’ and is held in place by the axle and a grove on the right-side swingarm where the wheel holds the brake mount in place.
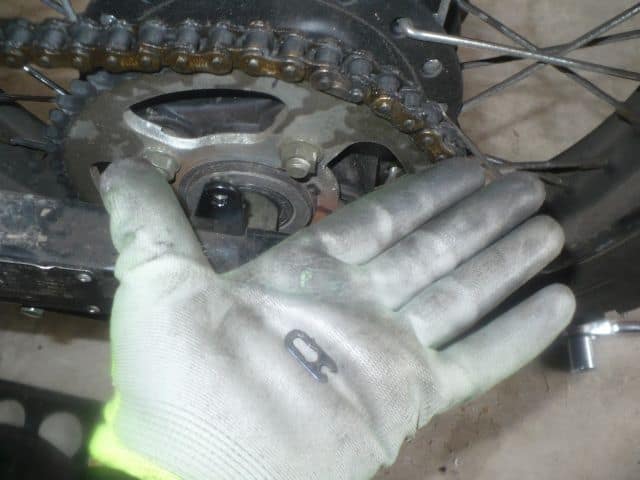
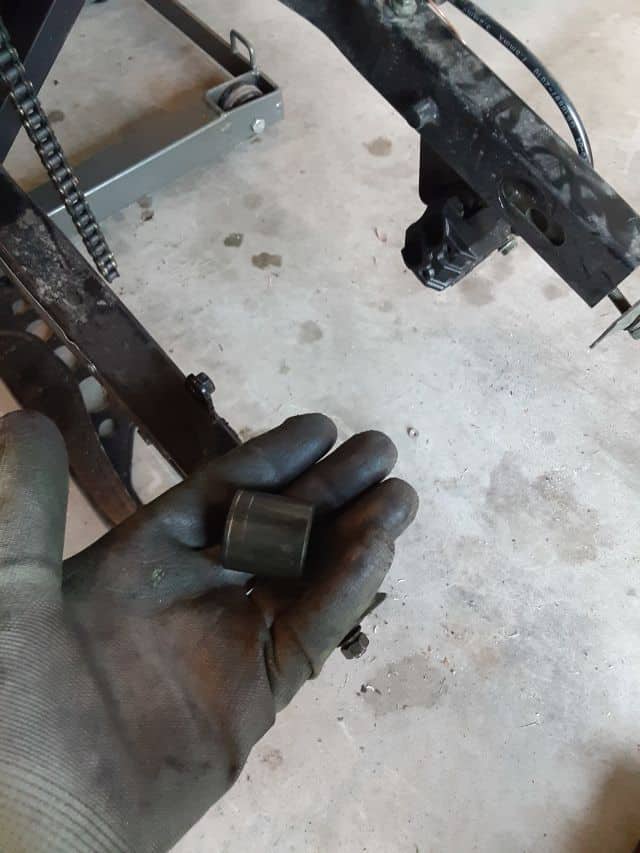
- On the left side: there is a spacer, much like the spacer on the front wheel, but bigger. It sits on the rear wheel’s left side and held in place by the axle while being wedged between the swing arm and wheel(removing the axle and wheel will have this part fall out like mine).
10.- Slide the wheel rearward, and now you are ready to change the sprocket.
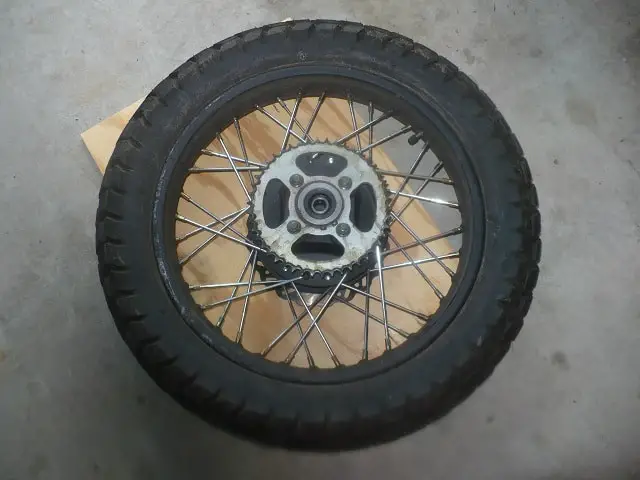
11.- Protect the brake disc, and place the wheel down on the soft surface with the sprocket side up. I used plywood to off some protection, but getting weight totally off the disc would have been a better idea in hindsight.
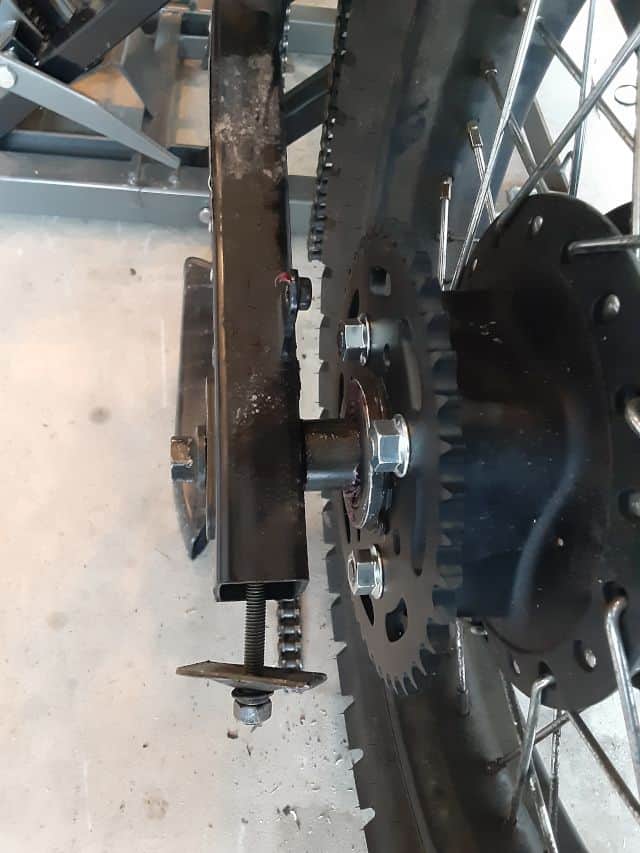
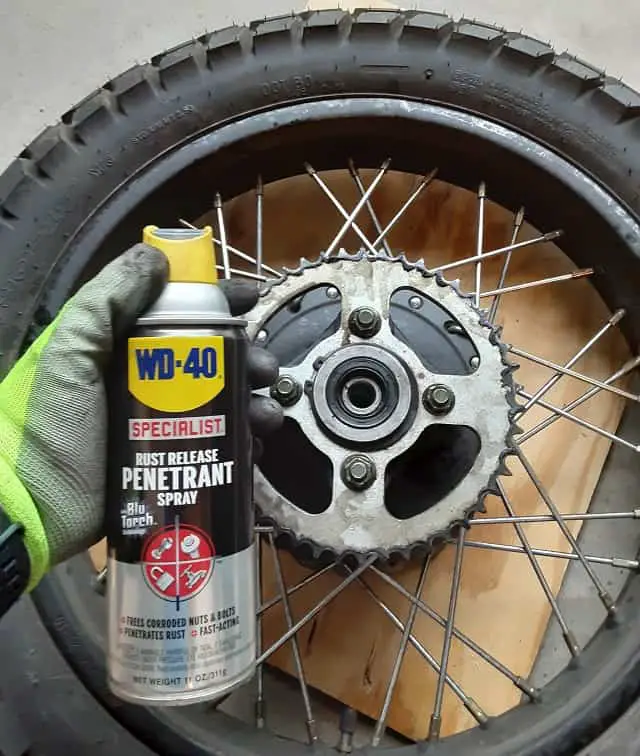
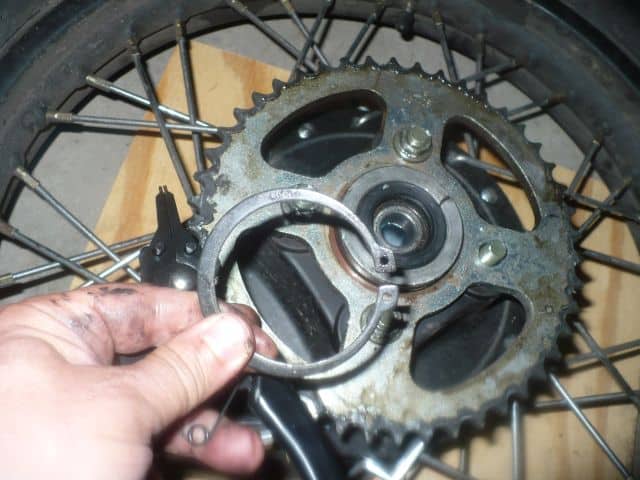
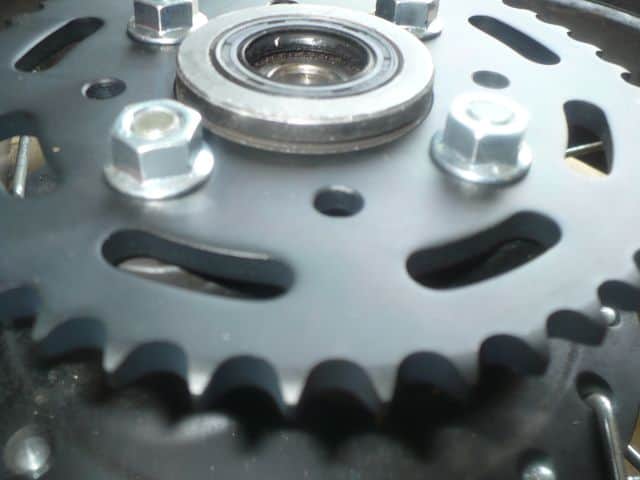
12.- Note, the only thing holding the sprocket to the wheel is a snap ring. It’s easier to keep the snap ring in place and use the wheel as leverage for removing the rear sprocket stud nuts. The stud nuts are soft (insert joke here), and even with a six-sided socket, they can be quickly rounded. Take your time, and later I’ll write how I upgrade this problem. Loosen, but do not remove the nuts.
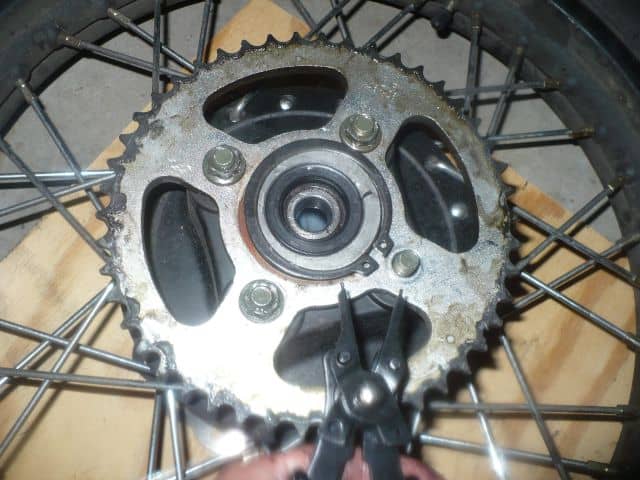
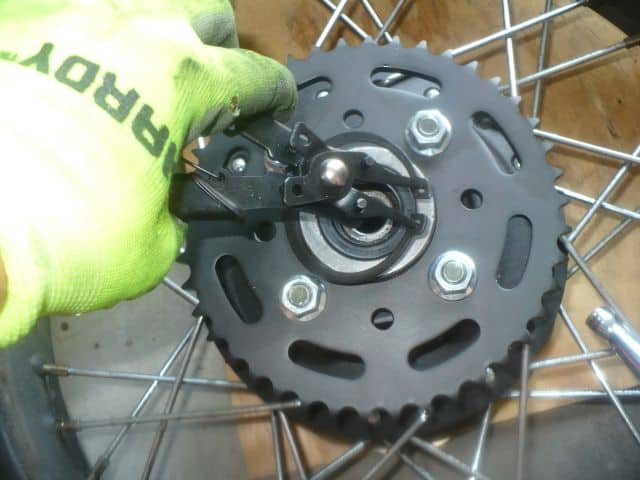
13.- As said before, the only thing holding the rear sprocket onto the wheel is a snap ring. Look at how the snap ring sat in a grove around the hub. Do no damage to this snap ring since you will reuse it for the new rear sprocket. Using snap ring pliers, carefully remove the snap ring and keep it in a safe place. Ever tell you how I love my magnetic parts? Try for items like this? 😀
14.- This is where you can remove the sprocket by lifting it. Since you didn’t remove the nuts, the studs should be lifted with the sprocket right out of their bushings.
15.- Disassemble all the studs from their nuts and inspect the parts for damage. Look at the bushings. Look at the studs. Do they need a replacement? Now look at the sprocket, it is being replaced, but the condition of the teeth can give hints of chain/sprocket alignment problems.
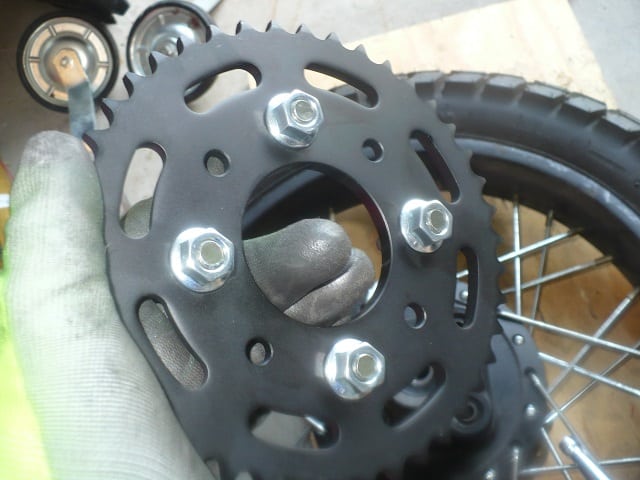
16.- Inspect the new sprocket, install the studs onto it. For me, only some of the sprocket holes were the proper size, so I used them. Only install the nuts finger-tight(with blue thread locker) and look how the stud side is held in place by a groove/track on the underside of the sprocket. Ensure the studs sit on the track; this will prevent them from rotating when tightening the nuts later.
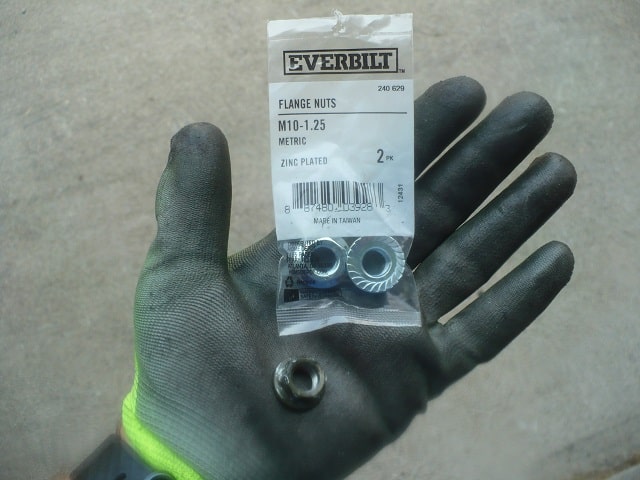
Now I will cover this information more in the rear sprocket blooper’s post, but I got new nuts from a hardware store. The original sprocket stud nuts were 14mm in size, and the new ones are 15mm, although the threads were correct. Also, the new ones were much better quality material, larger, and, to me, clearly a good upgrade.
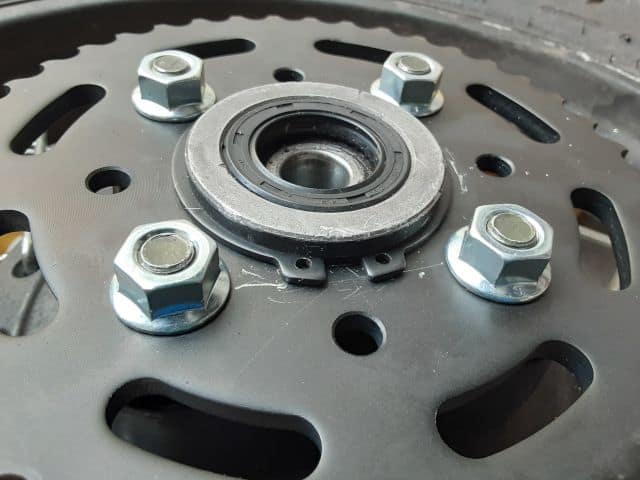
17.- Remember the groove that the snap ring sat in; make sure it’s visible around the hub. If your studs are aligned right and the nuts are tight(insert joke here too), the sprocket should be close enough to the wheel to make the groove visible. Install the snap ring using your snap pliers.
Tip: The open ends of the spring should be oriented to the space between the sprocket stud nuts. This alignment will allow for much room to manipulate the snap ring into place.
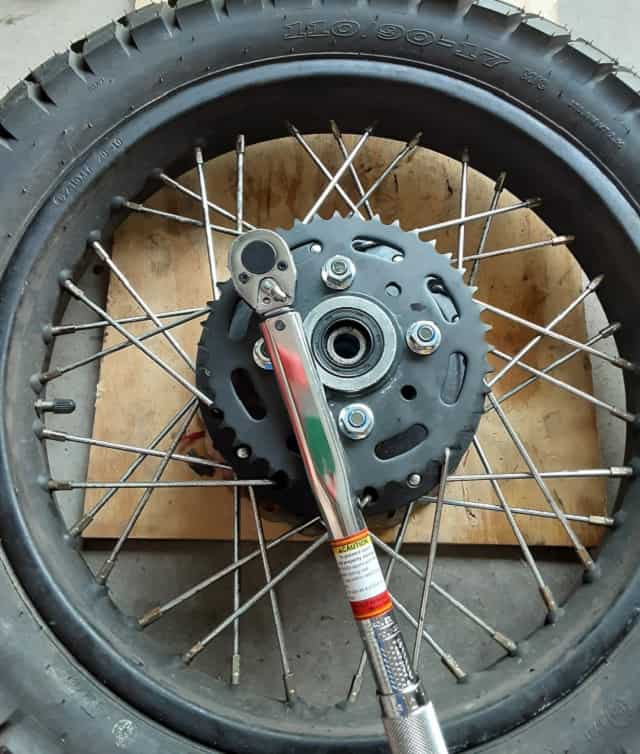
18.- Line up the studs with their associated bushings since the only finger tight you have wiggle room. The rear sprocket should slide down, centered. Tighten the rear socket stud nuts. If the studs spin freely, pull up on the studs while turning the nut. This pulling up should have the stud engage in the groove on the underside. Once studs are stationary, I torqued the nuts down(Please find your source for torque, but from many sources settled on 30ft-lbs).
19.- Take the metal axle spacer, the metal pipe that fell out of the wheel’s left side, and insert it into its space in the hub. I used a dab of bearing grease to make it ‘stick’ in place while moving the wheel around.
20.- Hold the rear brake mount(ensure the mount is set up to slide on the swing arm properly). Insert the wheel into the swing arm. Ensure the sprocket is on the left side with the spacer in place.
21.- Install the axle(I put a coating of bearing grease on the axle). Carefully line up the axle through the left swingarm, the spacer, the wheel hub, the brake mount, and the right swing arm. Apply the axle nut loosely(don’t forget the blue thread locker).
22.- Take the top end of the motorcycle chain and place a couple of links over the top of the sprocket. The goal is to have the sprocket hold the chain end. Take the lower end of the chain and wrap it under the sprocket and up the back. Adjust the end such that the ends are one chain link away from each other on the sprocket.
23.- Install the master link. While facing the rear sprocket, start away from you and insert the master link prongs towards you. Then, install the flat plate(looks like a figure ‘8’), and the last step is the spring clip. The spring-clip opening should be facing the rear. Start from the left, insert the clip towards the back of the motorcycle, and snap the clip fully into position. In this clip direction, the closed-end moves in the same direction as the chain when the bike is operating.
24.- Clean the brake disc, brake cleaner is a standard cleaner, but I use denatured alcohol. For some reason, I thought the alcohol was safer to breath since I was in my garage.
25.- Reinstall the rear brake onto the brake mount. Again, don’t forget the blue thread locker. Elevate the motorcycle to get the rear wheel off the ground. Pump the rear brake pedal while turning the rear wheel by hand till the brake functions again.
26.- Adjust the axle position and chain slack with the axle tensioners. See previous post: TBR7 Chain Adjustment.
27.- After the chain is adjusted correctly and the axle is secured, rotate the tire and watch how the links engage onto the sprocket. The chain links should not skip, click, or jump of the sprocket. If they do, this is dangerous, and something is very wrong. Do not ride the bike in this condition.
28.- Reinstall the upper chain guard.
29.- Lower motorcycle onto kickstand and remove the jack. Move bike forward and back, and test rear brake.
30.- My favorite part. TEST RIDE! Common sense approach. Only start this process if you are confident the motorcycle has been reassembled correctly. Be sure the brakes work before even moving under the engine’s power. Start slow and then proceed to test the motorcycle thoroughly.
Upgrading The TBR7 Rear Sprocket and Studs Recap.
Upgrading the rear sprocket and studs did take some time, but from what I read well will be worth it. This upgrade is the first time I ever did a rear sprocket change. So don’t view this post as a how-to, just how I did it. If you consider upgrading your TBR7’s, or Hawk 250’s rear sprocket, do your research and get some help from people who know what they are doing. I don’t.
I made many bloopers doing this sprocket upgrade, and as stated before, I will post the bloopers as a separate post later. It should be up in a couple of days. I plan on doing more riding on the TBR7 and enjoying this latest upgrade.
If you have feedback, feel free to leave them in the comments section below. In the meantime, have fun and ride safe!
Additional information: Remember, motorcycling can be a dangerous hobby, seek professional advice for your upgrades, riding, and maintenance. You can read about the rear sprocket problem I had here in this post:
*** Rear Sprocket Upgrade Tips and Bloopers ***
Spoiler Alert: I would order new studs with the new rear sprocket to save time and steps. The old studs can remain with the stock rear sprocket and you can install the new studs with the new sprocket. This will save you so much time and frustration. The cost of ordering new rear sprocket studs, was < $10 for me.
Ride Fun, Ride Safe!
