
This post is about what I found after running my TaoTao TBR7 motorcycle after installing the new PE30 Nibbi Carburetor. I did the initial Nibbi Carburetor Setup and installation, and now I am looking at tuning the carburetor. So follow along if you want to see how I adjust the Nibbi carburetor, tuning it for my TBR7 motorcycle.
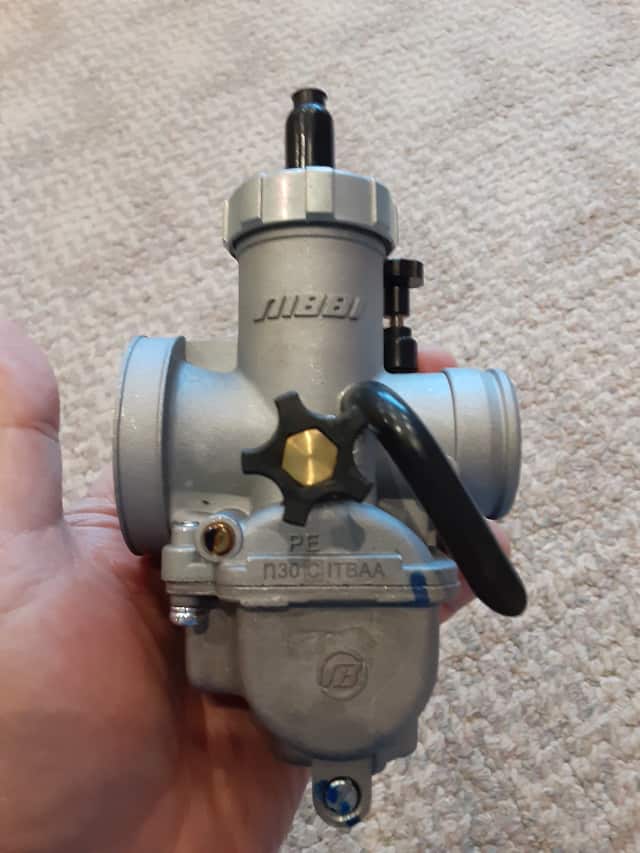
Hawk 250 Nibbi Carb Note: Much of what I know about my Nibbi carburetor (PE30) is from reading online China bike forums and YT videos( Need TBR7 Help & Guides? ). Much of which was from Hawk 250 motorcycle owners explaining how they adjusted their Nibbi Carburetor, tuning them for their Hawk 250 motorcycles. Meaning what I share today from my experience should cover more than my TaoTao TBR7 motorcycle, but other Chonda motorcycles like the Hawk 250, Brozz 250, etc.
How Did I Set Up The Nibbi Carburetor First?
If you are initially setting up your Nibbi Carburetor, best you go to this post: URL and read how I set it up for my motorcycle. Within a bit of time, you can have your Nibbi carburetor installed and tested. Once you do test rides on your new Nibbi carb, you can come back and read up on how I tuned my carburetor.
How Do You Install A Carburetor?
Every carburetor is different, my Mikuni Carb (VM-26 clone) had a lever choke, and my Nibbi carb (PE30) has a choke plunger. My point is if you found your way to this page and looking to find information about the Mikuni Carburetor installation (My TBR7’s VM-26 Clone), please look at this post: TBR7 Carburetor Upgrade!
If you are installing the Nibbi Carburetor (My TBR7’s PE30), I direct you to this post: TBR7 Nibbi Carburetor Installation Instructions (Hawk 250 info).
Once your carburetor installation is complete, test out the motorcycle, and if you have a Nibbi (PE30) carb, come back here to compare notes.
Post Nibbi Carburetor Installation Adjustments.
I did the typical tests to adjust the air/fuel idle screw adjustments (1-3 turns open from soft close, perfect). Then after proper starting and warming of the motorcycle, I rode the motorcycle to test how I planned to run my TBR7. Tested the motorcycle in its different fuel circuit ‘zones.’
I found my motorcycle was bogging worse as I opened the motorcycle throttle.
My Nibbi Carburetor Is Shuttering My TBR7 Motorcycle.
So what does “Shuttering” mean to me?
Shuttering is a characteristic of a stumbling sensation when you give the motorcycle more fuel—stumbling is usually an indication of a “rich” condition(too much air for fuel supply or too much fuel for air supply). The adjustments need to be made to have the correct fuel/air ratio for the motorcycle motor.
So what does “Bogging” mean to me?
Bogging is a characteristic of a rapid loss of power when you give the motorcycle more fuel. Bogging is usually an indication of a “rich” condition(too much air for fuel supply or too much fuel for air supply). The adjustments need to be made to have the correct fuel/air ratio for the motorcycle motor.
So my TBR7 motorcycle isn’t bogging, losing power rapidly, but shuttering, the pulsating sensation when I open the throttle.
Now an essential bit of information is this shuttering (too rich condition) seems to be happening in almost all ranges of the throttle position, right from opening the throttle to full throttle open.
This shuttering means there is a rich condition throughout the throttle power range. I have a spotless, brand new Nibbi air filter installed with the new Nibbi Carburetor ( My TBR7 Nibbi Carburetor Installation Instructions ), so I know I cannot increase the air supply to reduce the motorcycle running rich.
So my only options are to reduce the amount of fuel entering the air stream for the carburetor.
How Do I Know If I Am Rich Or Lean?
The term rich or lean is used to express the condition of having too much fuel or too little fuel for the amount of air entering the engine. The fuel/air mixture ratio is too high if the engine is running too rich. The fuel/air mixture ratio is too low if the engine is running too lean.
Read more at: https://en.wikipedia.org/wiki/Carburetor
Why Is My Carburetor Getting Too Much Gas?
The Nibbi Carburetor controls fuel flow through a series of ‘circuits,’ tiny to large pathways for fuel to enter the air stream and ultimately into the engine intake. I cover them with my initial setup of the Nibbi Carb post ( How Do You Set Up A Nibbi Carburetor? ), and now I have to adjust some of the circuits down to reduce the fuel flow.
Please understand how the Nibbi Carburetor Choke position works: Nibbi Carburetor Choke Open Or Closed?
How Do You Adjust A Nibbi Carburetor?
The fuel circuits you can adjust is the following:
- Idle circuit: with the air/fuel screw.
- Pilot circuit: with the Pilot Jet.
- Needle circuit: with the throttle needle position.
- Main circuit: with the Main Jet.
FYI, I Cannot Adjust The Nibbi Carburetor Choke
The Nibbi’s choke circuit is an enrichment circuit used for cold engine starts. It’s either on (choking) or off. The Nibbi choke is not adjustable.
How Did I Adjust The Running Rich Carburetor?
Normally Nibbi Carbs on small engines like my TBR7 motorcycle are known to be finicky, so minor adjustments are recommended. As well as only changing one jet(pilot, needle, or main) at a time is advised. I am trying something different.
Since my rich fuel condition seems to be over the whole throttle range, I will change both the pilot and main jet sizes. However, if this doesn’t work, I will continue working on the pilot jet first.
Once I have the pilot jet set and the engine works perfectly in its range (0-25% throttle open), I will focus on the main jet afterward. The main jet regulates the (75-100% throttle open range).
The PE30 Nibbi Carburetor Parts I Needed.
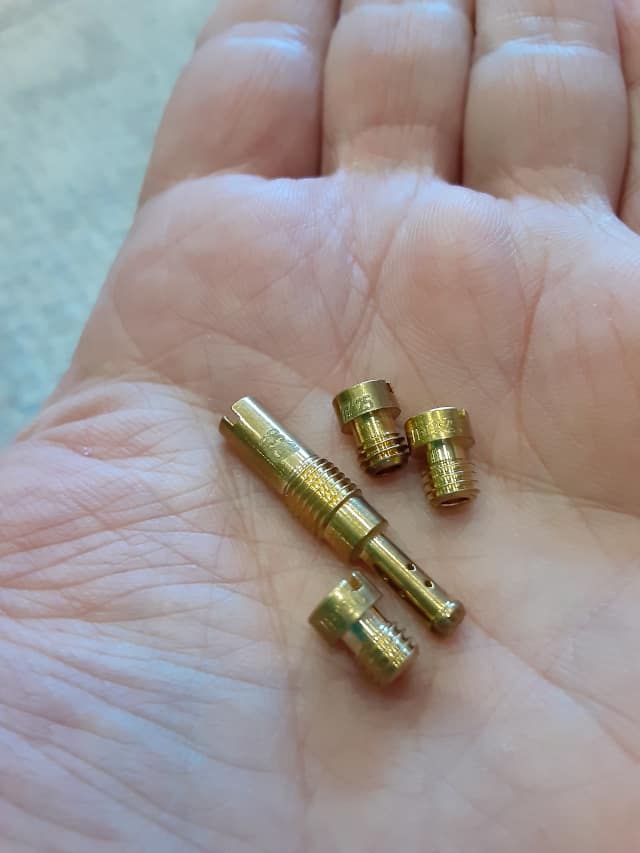
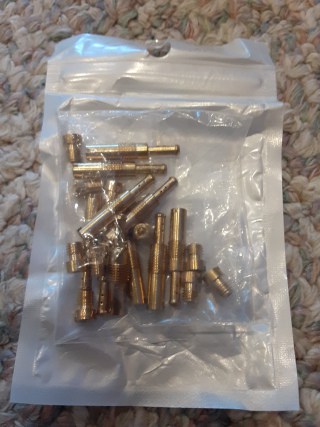
To make changes to the pilot and main jet, I need to have a supply of different-sized Nibbi carburetor jets.
My Initial Nibbi Carburetor (PE30) Setup
Post about how I setup the Nibbi Carb for its installation: How Do You Set Up A Nibbi Carburetor? (For A TBR7)
Nibbi Carburetor Choke circuit untouched, as expected.
Air/Fuel Screw, about one and a half, turns open from a soft seat.
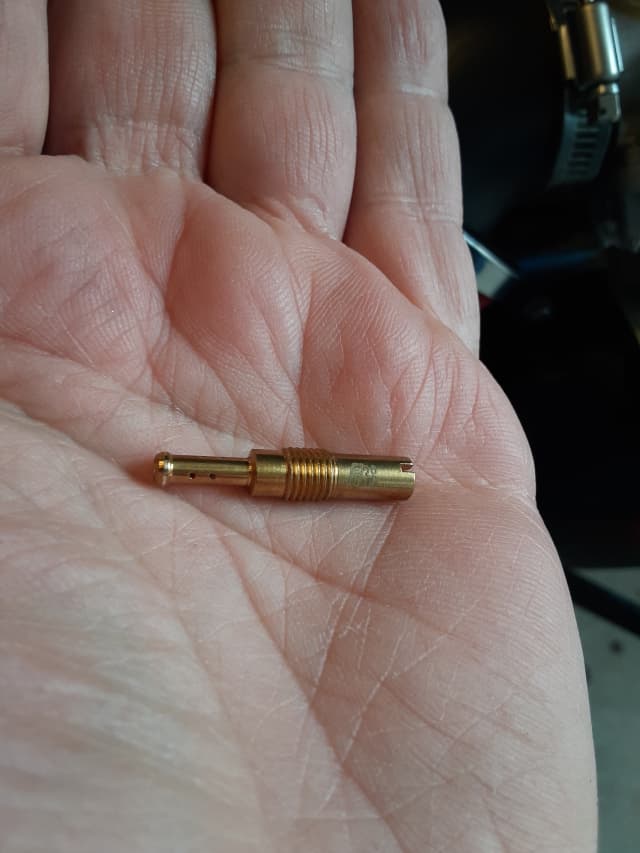
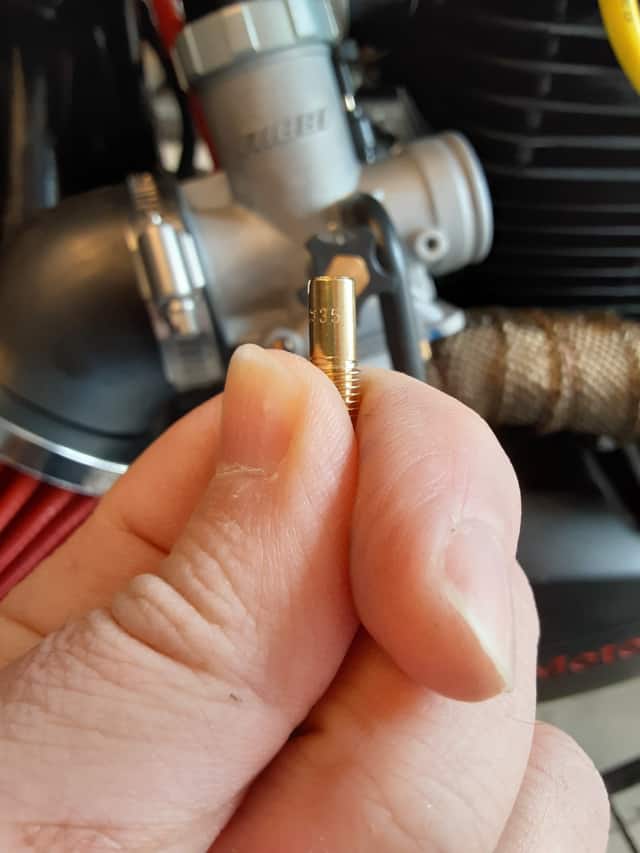
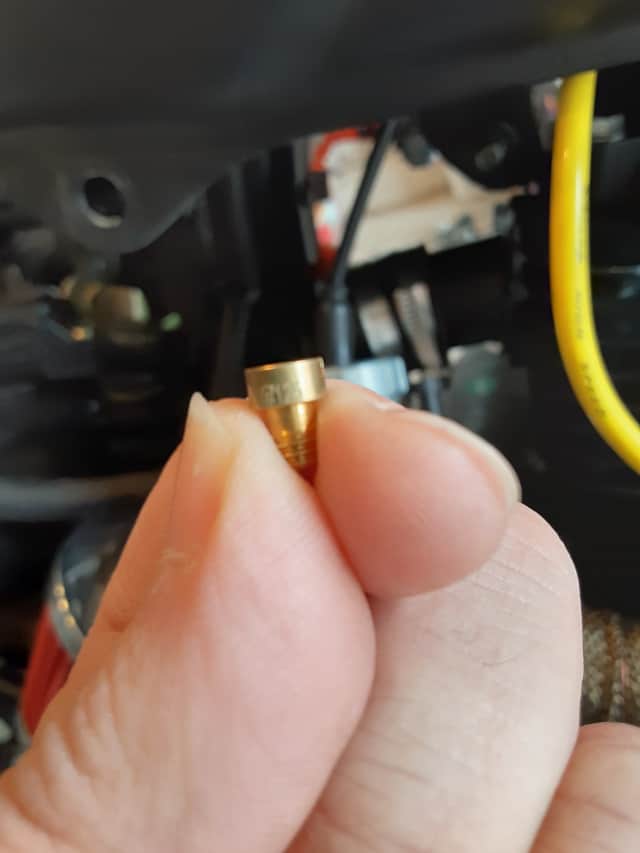
Pilot Jet, I installed a 38 sized pilot jet.
Needle Jet, needle valve in the mid-position, how it came from Nibbi.
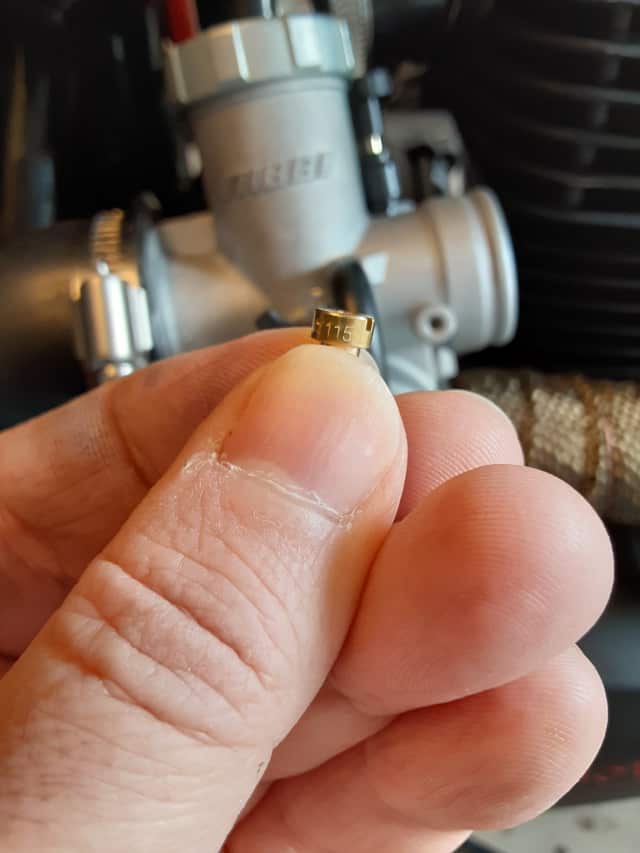
Main Jet, I installed a 125 sized Main Jet.
My goal is to go down to size 35 pilot jet and size 115 main jet.
For your reference, I mainly ride locally about 300-350 feet above sea level. Also, by going smaller in number for the jets, it reduces the orifice size in the jets, limiting fuel flow.
First Steps I Took To Adjust My Nibbi Carburetor.
Motorcycle Site Setup First
1.- Motorcycle Repair Safety First.
- Motorcycle Cooled down enough to the touch.
- Fuel supply to the carburetor turned off/petcock closed.
- Fuel drained from the carburetor. (If this is a clean fuel, reuse)
- Ventilated area due to gasoline fumes.
- Fire extinguishers due to gasoline.
- Eye and hand protection.
FAQ: Motorcycle Garage Safety Rules.
2.- Adjustment Tool(s) ready:
A Screwdriver.
FAQ: Must Have Motorcycle Tools.
3.- Carburetor Part(s) Ready:
Nibbi Jets, both pilot and main of different sizes. This case: a 38 pilot and a 115 main.
4.- Shop Materials Ready:
Shop towels/Paper towels.
Drain basins.
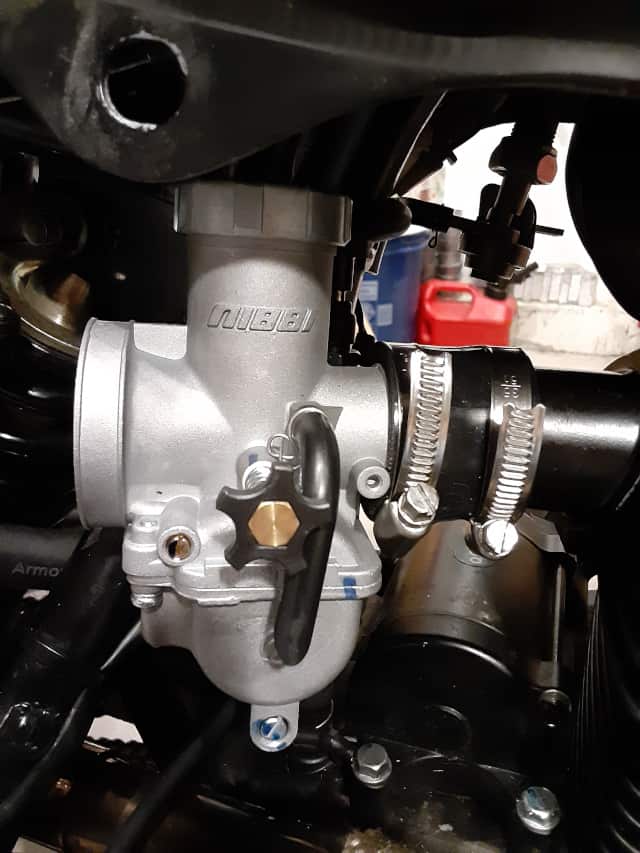
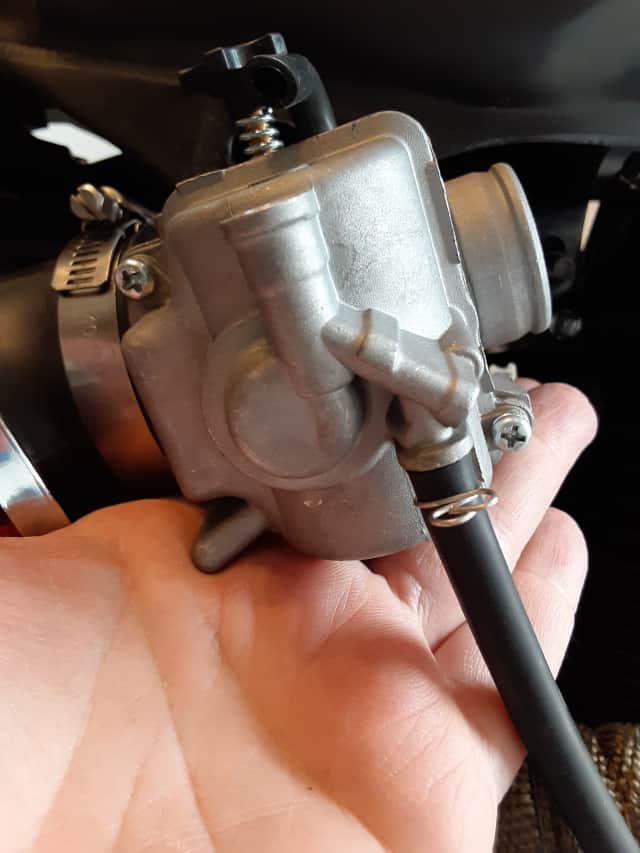
Remove The Nibbi Carburetor From Engine Intake Manifold.
I only had to remove some hose clamps with my current Nibbi carb installation to the TBR7 engine’s inlet, and I didn’t have to disconnect the fuel line with my new fuel line to access the jets.
1.- Remove the hose clamp holding Nibbi Carburetor to the engine intake manifold and support the carburetor safely.
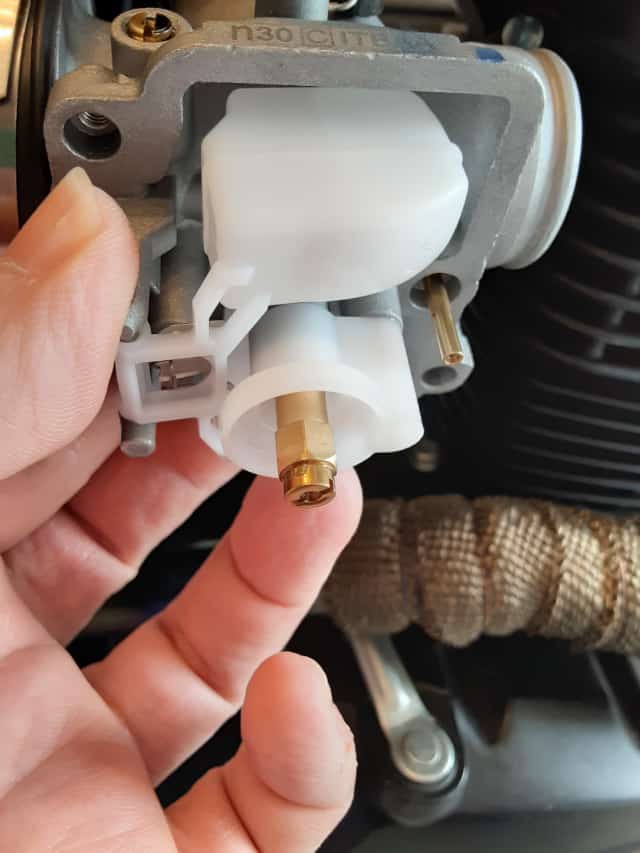
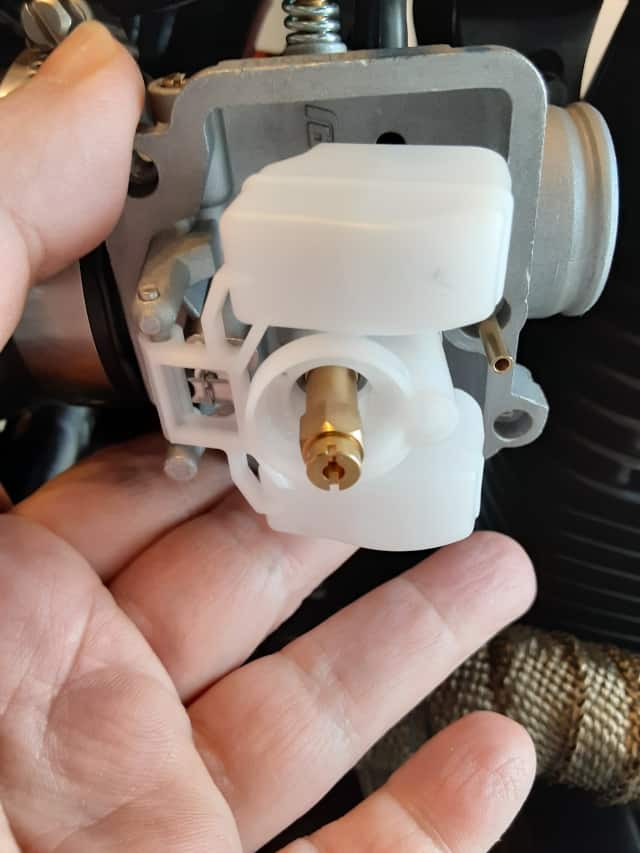
Get Access To The Carburetor Jets.
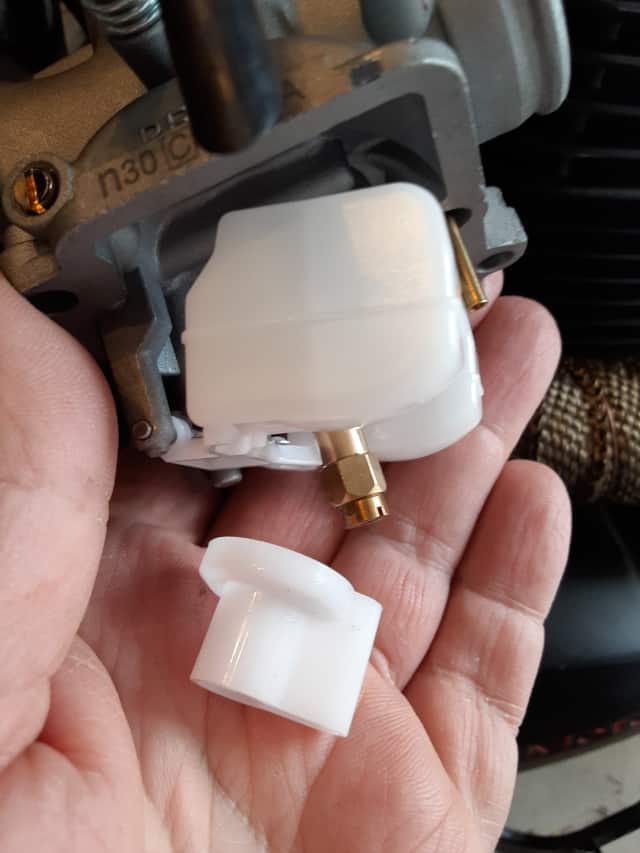
Disassemble the Nibbi carburetor fuel bowl and plastic ring.
1.-Remove the two screws holding the fuel bowl to the carburetor. Careful; there could be residual fuel in the bowl.
2.- Remove the white plastic ring.
Change The Nibbi Carburetor Pilot Jet.
Note that the pilot jets are made of brass, do not over-torque them; this could damage the carburetor pilot jet threads.
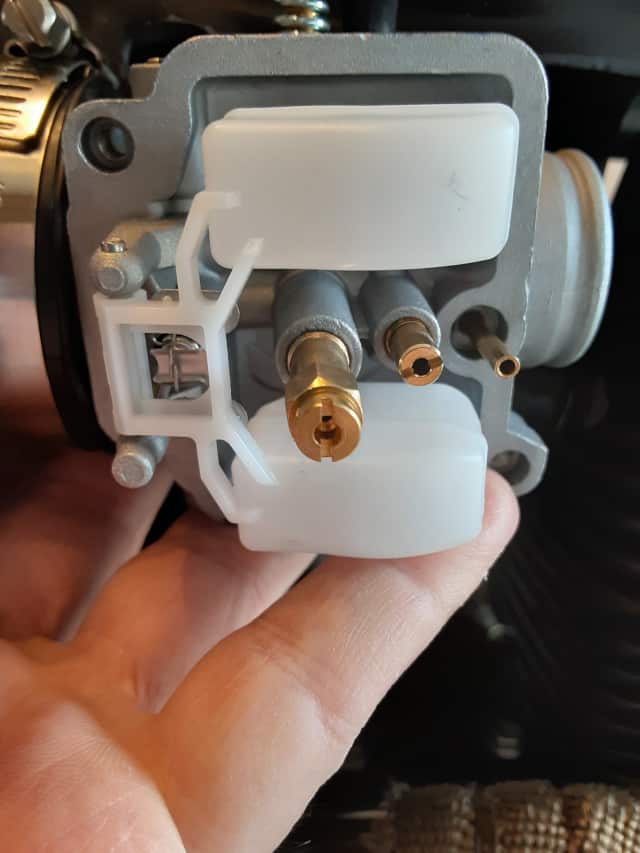
1.- Using a flat-head screwdriver, remove the existing pilot jet.
2.- Thread in the new pilot jet by hand.
3.- Using a flat head screwdriver, carefully tighten the pilot jet into place.
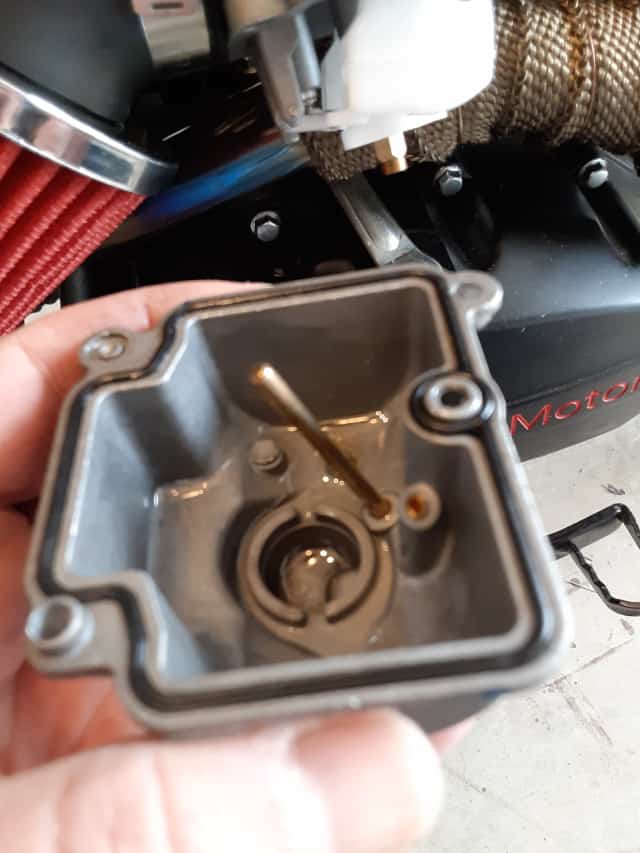
Change The Nibbi Carburetor Main Jet.
Note that the main jets are made of brass, do not over-torque them; this could damage the carburetor main jet threads.
1.- Using a flat-head screwdriver, remove the existing main jet.
2.- Thread in the new main jet by hand.
3.- Using a flat head screwdriver, carefully tighten the main jet into place.
Reinstall The White Ring
Just as the plastic white ring popped off, you can carefully slide it back into position.
Reinstall The Carburetor Fuel Bowl
1.- Inspect fuel bowl gasket and seating surface. The gasket should be present, intact, and in good condition, and the gasket seating surfaces should be clean.
2.- Hold the fuel bowl in place and carefully screw in the screws by hand and then with a screwdriver. Be careful and don’t cross-thread the screws. Stop when you feel metal to metal contact; this means the gasket is compressed between the seating surfaces and should be leak-tight.
Remount And Refuel The Nibbi Carburetor.
1.- Again, I have just a hose clamps holding my Nibbi carb to the engine intake manifold. Once the hose clamp was tightened, I checked to ensure the carburetor wouldn’t fall off, and then I was done.
2.- Open the fuel supply, the fuel petcock, and check for leaks.
Test Your Nibbi Carburetor Adjustments.
This step is where I am at.
I warm up the motorcycle and initially adjust the air/fuel screw, about one and a half turn open from the soft seat, making me happy.
Then I set the engine idle by turning the Nibble idle speed knob, engine rpm 1500 +- 150 per TaoTao TBR7 manual.
Then I ride. Testing each circuit by opening the throttle and holding it in each of their ranges:
- 0-25% throttle – pilot jet
- 25-75% throttle – needle jet
- 75-100% throttle – main jet
I am still testing, but I might not have done so badly so far. If I need to make further adjustments to fine-tune the Nibbi carb, I might focus on each jet at a time. Adjust the pilot jet till I am happy, then the needle jet, followed by the main.
Thanks for following along. I am learning motorcycle maintenance as I go along, and please leave a comment below to leave me feedback or share your experiences.
Ride Safe, Ride Fun!
Author’s Notice: This page contains affiliate links, for which I may earn a commission by their use. Also, as an Amazon Associate, I earn from qualifying Amazon purchases.
My Nibbi Carburetor (PE30) Shopping List
|
|
|---|---|
| The Nibbi Carburetor (PE30) |  Click For Current Prices. |
| Nibbi Original High Performance Intake Manifold and Boot Connector |
 Click For Current Prices. |
| 20 Pieces Nibbi Carburetor Main Jet Kit |  Click For Current Prices. |
| Nibbi Motorcycle High Performance Air Filter |  Click For Current Prices. |
Click To See My Recommended
TBR7 Upgrades

Hi I’m Tom, A New Motorcycle Rider and Blog Author.
I am a new rider(Pa Learners Permit at the end of 2020, and I received a Pa Motorcycle License in 2021 after passing a Motorcycle Safety Course).
I bought my first motorcycle, a TaoTao TBR7, at the beginning of 2021 and have been doing upgrades on that motorcycle since.
I added to my motorcycle collection by buying a Boom Vader Gen 2 in 2022, and that Grom-Clone motorcycle has been upgraded by me as well.
I continue to ride my Boom Vader Gen 2 motorcycle as well as my TaoTao TBR7 dual-sport bike.
Read more on my About Me page.
Fun Fact: I’ve only been on one group ride.