
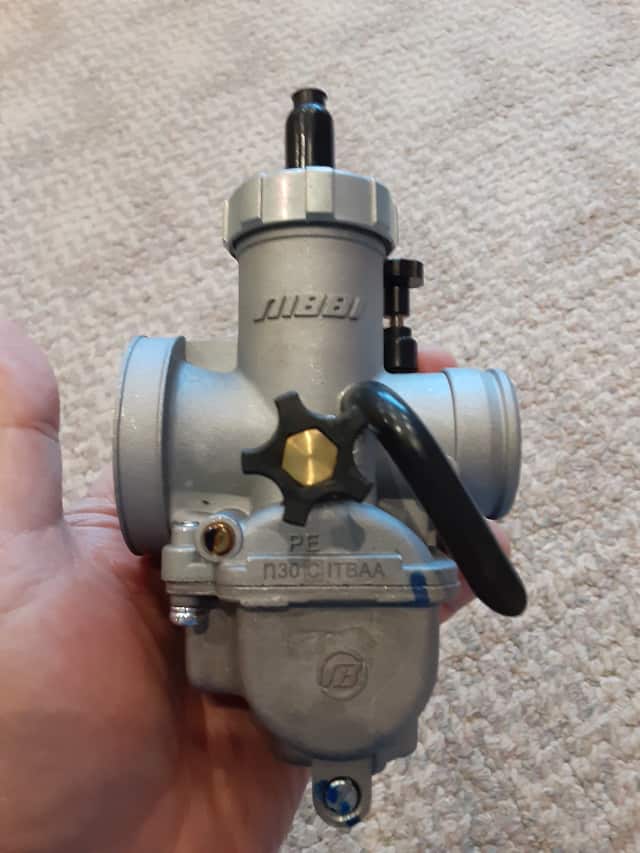
Well finally got around to installing my new Nibbi Carburetor (PE30) on my TaoTao TBR7. THE STEPS WERE ALMOST THE SAME since I have lots of practice removing, tuning, and installing my Mikuni carburetor. Almost.
Hawk 250 / Brozz 250 Info: Just a heads up, much of this Nibbi carb installation post can parallel the exact instructions in installing your Nibbi carb on your carburetor-ed Hawk 250 or Brozz 250. These motorcycles are Chonda-cousins of the TaoTao TBR7. So hope this post will help you guys out as well. Please post comments about your results.
Nibbi Carburetor Installation Preparation.
Prep work is necessary for a smooth installation. Don’t forget to get your new Nibbi Carburetor jetted first. Jetting can be changed later since each engine is different, but you can ‘guess’ your starting jet settings before installing the new carburetor.
Author’s Notice: This page contains affiliate links, for which I may earn a commission by their use. Also, as an Amazon Associate, I earn from qualifying Amazon purchases.
Installation Tools I Used:
- 8mm combination wrench.
- Combination Flat-head/Phillips Screwdriver.
- Needle-nose pliers .
- Pocket Knife, yes, will cover this more later.
- Optional: My trusty magnetic parts tray. FYI, love this these trays. <Check Current Prices>
FYI: Building My List of Must-Have Tools For Motorcycle Owners
Materials Used For Carb Installation:
- Shop towels/Paper towels. I used low lint, paper towels.
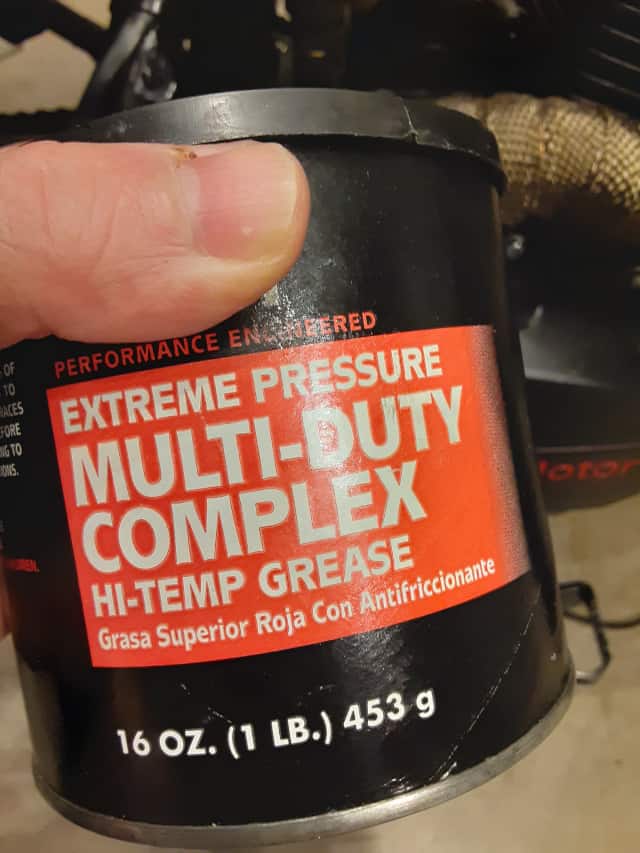
- Grease. Kind you buy once in your life and use forever. 😀
- Anti-seize. Again, a bottle like this lasts me forever.
New Nibbi Carb Install Parts I Used:
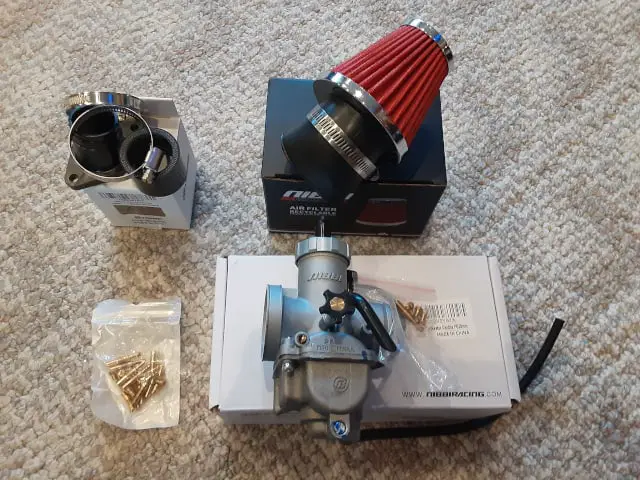
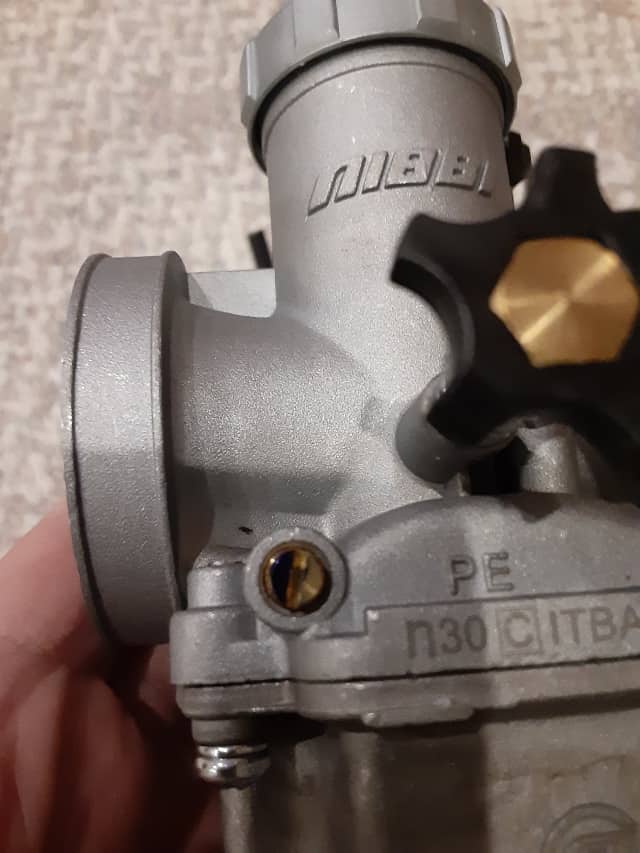
- Nibbi Carburetor (PE30) (“Racing”). <Check Current Nibbi Carburetor Prices>
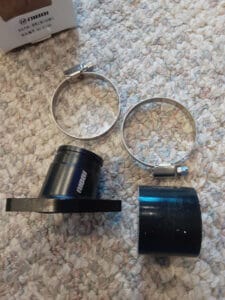
- Nibbi Intake Manifold Mount. <Check Current Nibbi Intake Manifold Prices>
- Nibbi Cone Air Filter (“Racing”). <Check Current Nibbi Air Cone Filter Prices>
- Nibbi Carburetor Jets. <Check Current Nibbi Carb Jet Prices>
Safety Steps For Carburetor Installation Preparation.
With any work on your motorcycle, be sure you are set up for success. Motorcycle repairs and modifications can be complicated, so get help where you can.
- Collect and Stage your installation tools and materials.
- Setup your motorcycle for safety(level floor, no roll-away, ventilated area, safety glasses, fire extinguisher, clean work area, etc.)
- Research a good starting point for the pilot, main, and needle get setting for your Nibbi Carburetor.
- Set up your Nibbi Carburetor’s jets and get the carburetor ready for installation. No, lose screws or parts.
Stage The Motorcycle’s Engine For The Nibbi Carb Installation.
I mean, by this staging, you have to remove the old carburetor altogether. Much of this is already covered in my previous post about upgrading the carburetor with a Mikuni clone VM-26 ( Completed My TBR7’s Carburetor Upgrade! ), but I will briefly detail it here.
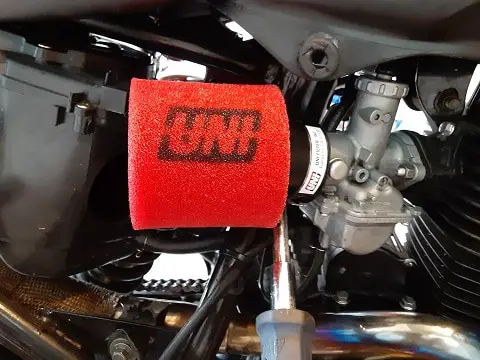
Carburetor Air Intake Note: I already did an airbox delete process on my TBR7, and I no longer have the carburetor air intake tube, and I have a Uni Foam filter. This difference might not drastically change much in the installation; I will cover the later steps where you might have to modify the steps to meet your current installation.
Carburetor Air Filter Note: I will change my TBR7’s Uni Foam filter for a High-performance Nibbi cone filter. Again, the steps might not be the same depending on how you have your motorcycle set up or plan to set up your bike, and I will ensure I make notes in the steps where this is important.
Upgraded Carburetor Note: I have a Mikuni Carburetor “clone” VM-26. Much of the carburetor looks precisely like the TBR7’s stock carburetor. Therefore if you still have the stock carburetor your TBR7 came with, it’s OK. You will get the idea of what I am sharing.
Installation Starts With Removing The Old Carburetor.
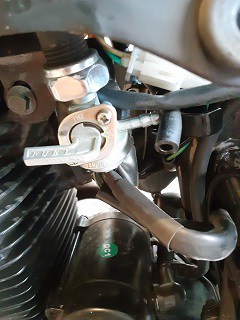
1.- Shut off fuel to the carburetor.
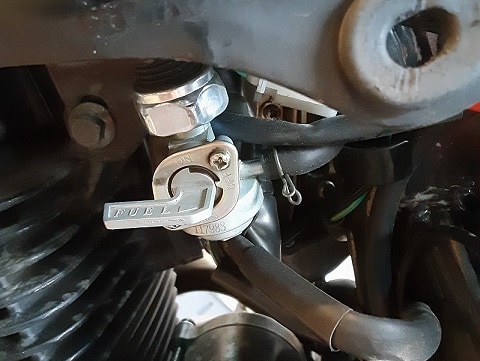
There is a fuel cut-off petcock valve on the motorcycle fuel tank’s left side. For my TBR7, turning the handle (horizontal) parallel with the floor stops the flow of gasoline to the carburetor.
2.- Remove The Fuel Line From The Fuel Tank.
I used needle-nose pliers to compress the ring and slide the ring towards the carburetor, and then slide off the fuel line.
3.- Remove Air Filter/Intake Air Tube.
Follow the steps necessary for your motorcycle. I will include old pictures where I can.
For Original Airbox and Carburetor Inlet tubing: Loosen the hose clamp upstream of the carburetor. Once loosened(or removed if you like), slip off the air intake tube. In the past, I bent the tubing back and pinned it against the frame to keep it out of the way.
For Upgraded Motorcycle Filters(Foam/Cone Filters): Lossen the clamping device and remove the air filter. Place filter in a safe place since these aftermarket motorcycle filters are often oil-soaked and get messy quickly.
4.- Unbolt Old Carburetor.

My stock and upgraded Mikuni Carburetors were mounted with two 8mm nuts. One is easily accessible on the right side of the motorcycle, and the other is better accessible from the left, working under the fuel tank.
5.- Slide Out Old Carburetor.
Once the carburetor is unbolted, you can slide the carburetor rearward off the studs. Once off, you should see a fuel line, remote carburetor choke cable(if installed), and throttle cable still attached to the carburetor.
6.- Remove Cables From The Carburetor.
*. (If Remote Choke Cable Installed) Loosen the upper mount of the remote choke cable, rotate the lug on the end of the cable to line up with the choke lever slot, and remove the carburetor choke cable. You can now completely pull out the TBR7’s remote choke cable and remove the handlebar-mounted remote choke slide.
*. Unscrew the carburetor throttle slide cap. Remove the throttle slide from the carburetor.
Now your old carburetor’s body can be removed entirely from the motorcycle. Place this in a safe area(clean, tiny holes in the carburetor can become plugged quickly). You will be reusing the fuel line still attached to the old carburetor.
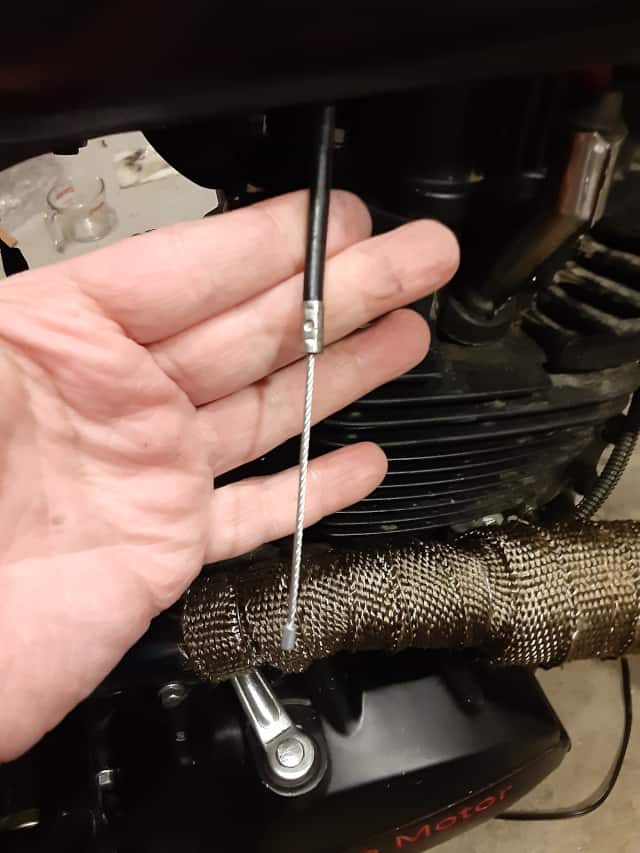
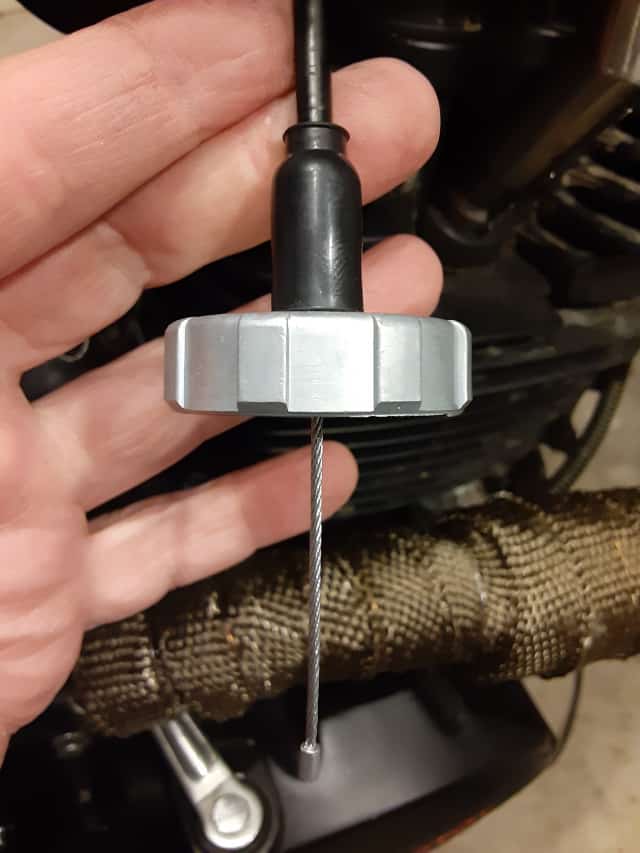
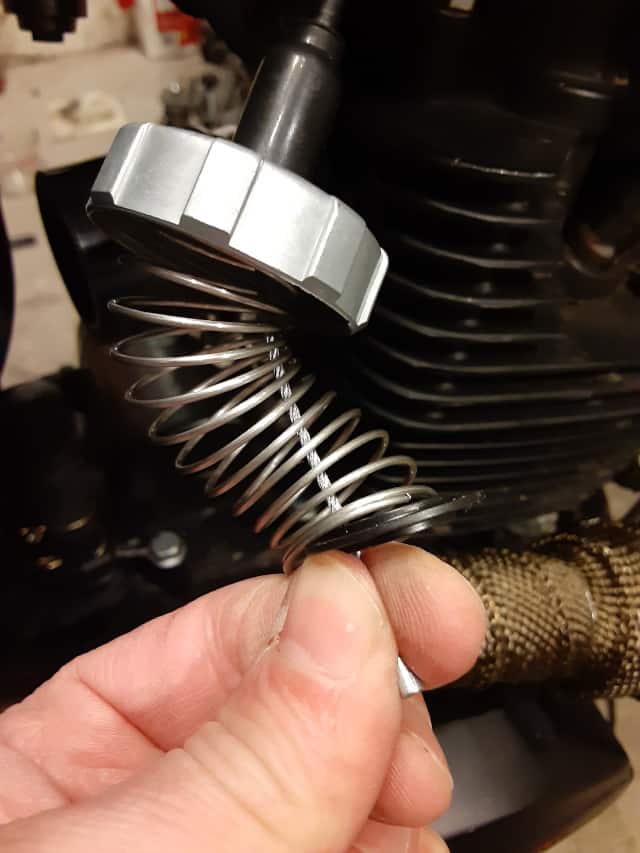
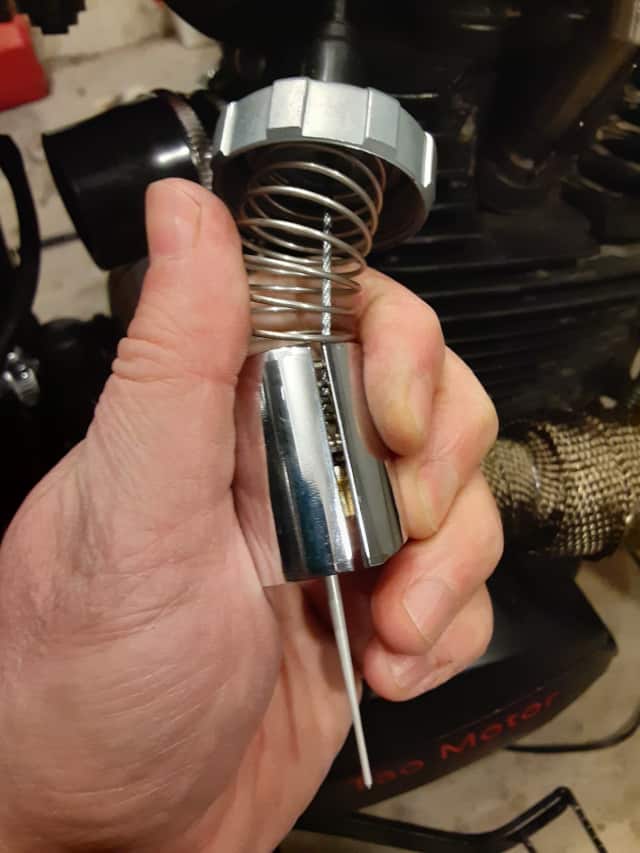
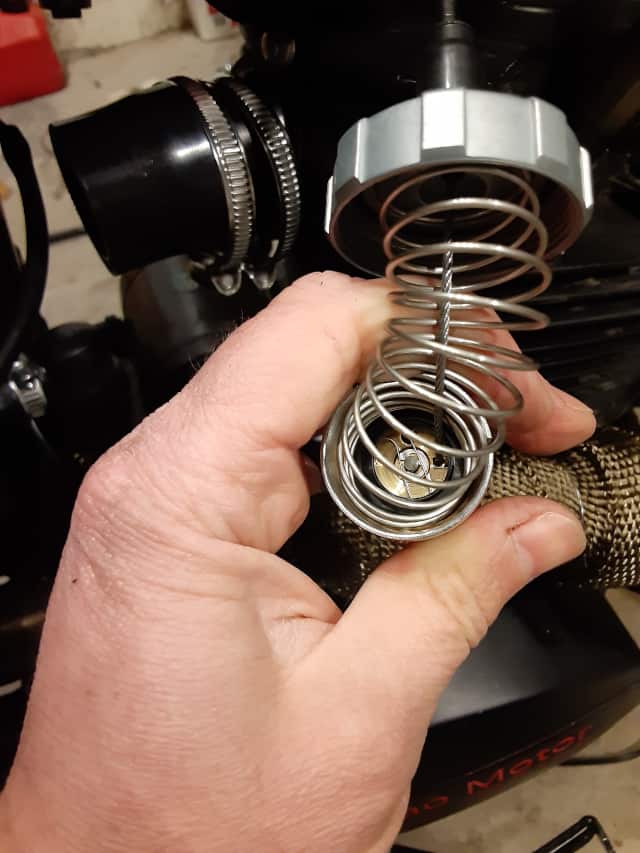
7.- Move the Remaining Throttle Slide And Remaining Carburetor Parts.
I compressed the throttle slide spring in my hand, exposing the lug at the end of the slide. Move the lug and cable up the throttle slide slit and move the slide. Carefully uncompressed the spring. Remove spring, remaining cap, and rubber throttle dust boot.
I took this time to reassemble the old carburetor(throttle slide, spring, cap, and dust cable boot) to keep the old carburetor complete. Also protected the throttle slide from damage.
These previous steps are typical for removing the stock carburetor and Mikuni carburetor upgrade for repairs, rejecting, or even cleaning. We move on further to set up the motorcycle engine for the Nibbi Carburetor installation.
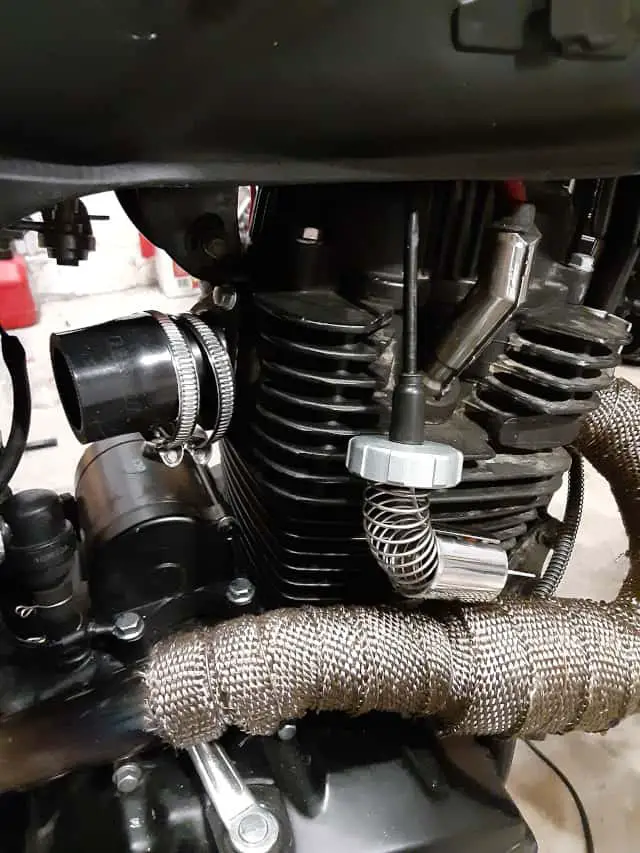
Install Nibbi Carburetor Engine Intake Manifold Boot Connector.
Unlike the stock carburetor and the Mikuni Carburetor, the Nibble Carburetor (PE30) doesn’t have a mounting flange for bolts. This is why I had to purchase a specific Nibbi Carburetor mount that fits my TBR7. To ready this mount:
1.- Remove Old Stock Carburetor Engine Intake Manifold Boot Connector
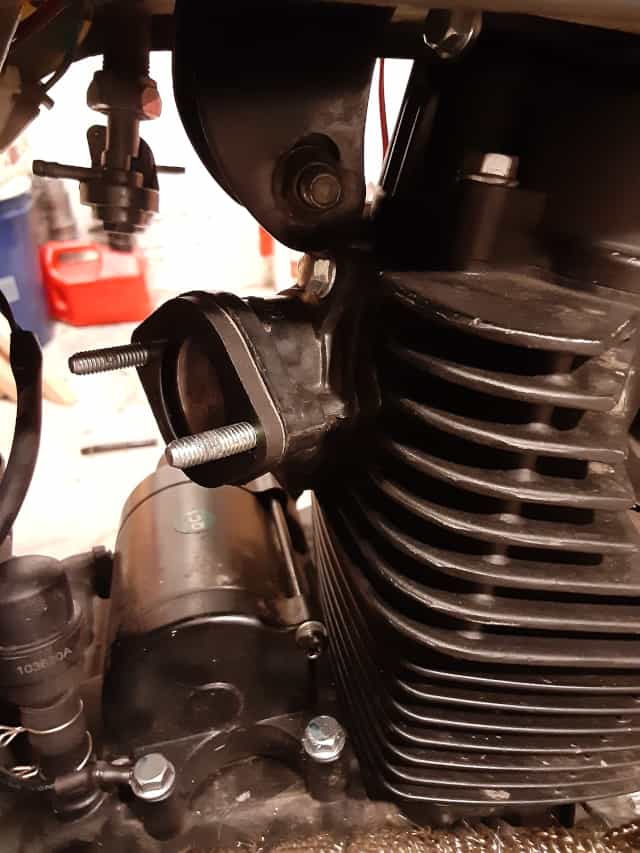
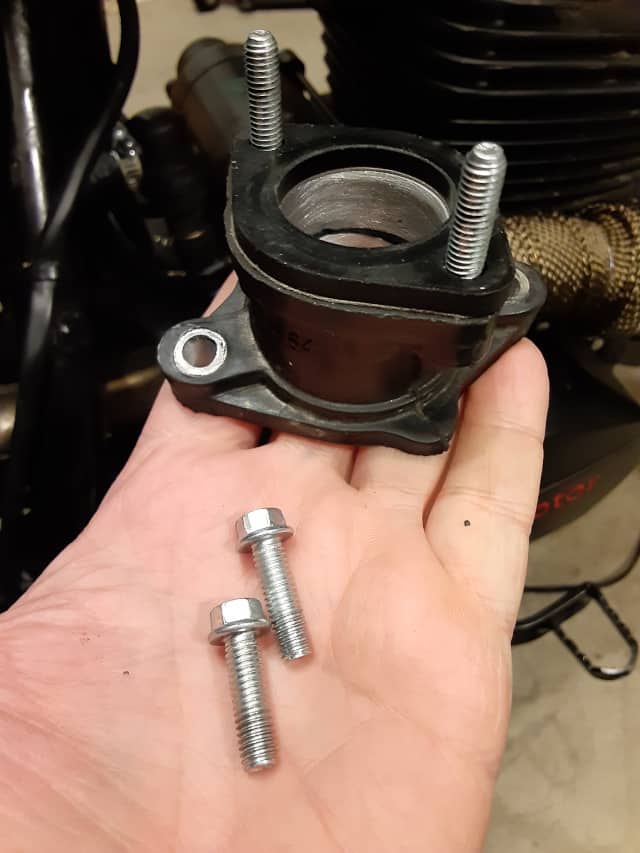
This intake boot is made of ‘rubber,’ With the engine heat, people complained the boot falls apart with time, so be careful to prevent debris entering the engine during the removal process. I used an 8mm combination wrench to remove the two bolts. Save these bolts; these bolts are needed for the Nibbi Carb mount.
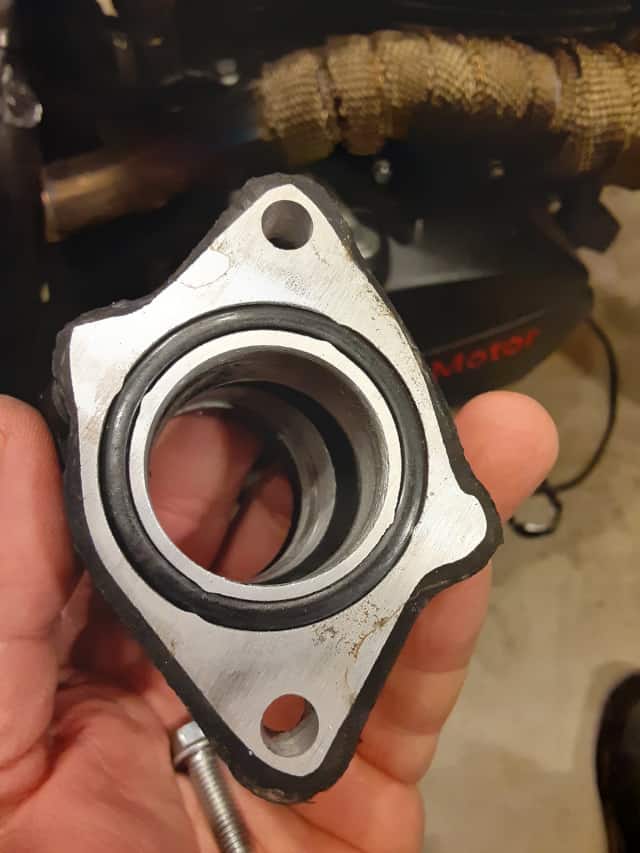
2.- Examine TBR7’s Engine Intake Surface Area.
Ensure old o-ring from old carburetor intake manifold boot is clear(often found inside the old intake manifold boot), ensure the engine mounting surface is clean of dirt and grease. I wiped mine down with a towel to prep the area for the Nibbi Carburetor Manifold.
3.- Install The Nibbi Engine Intake Manifold Boot.
Check the flange are of the new intake manifold for its o-ring.
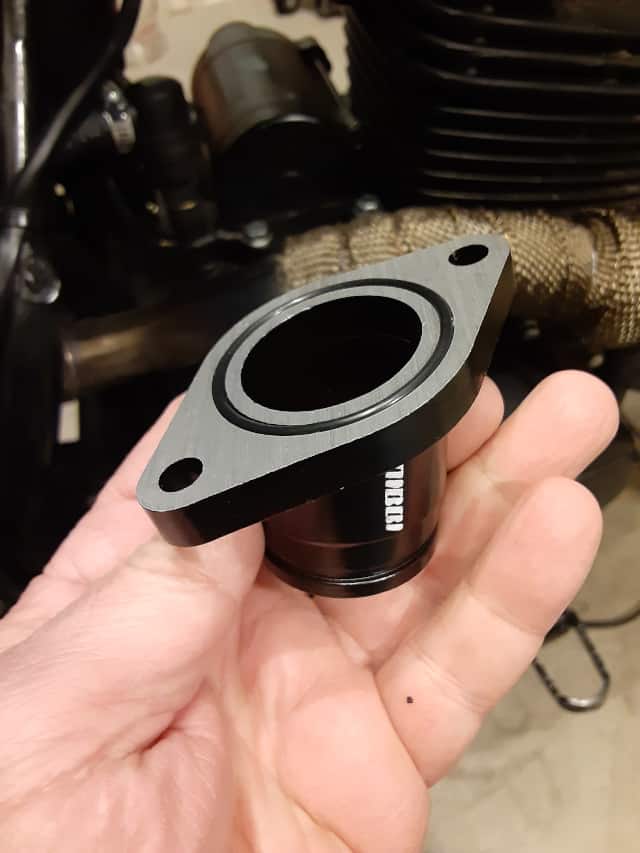
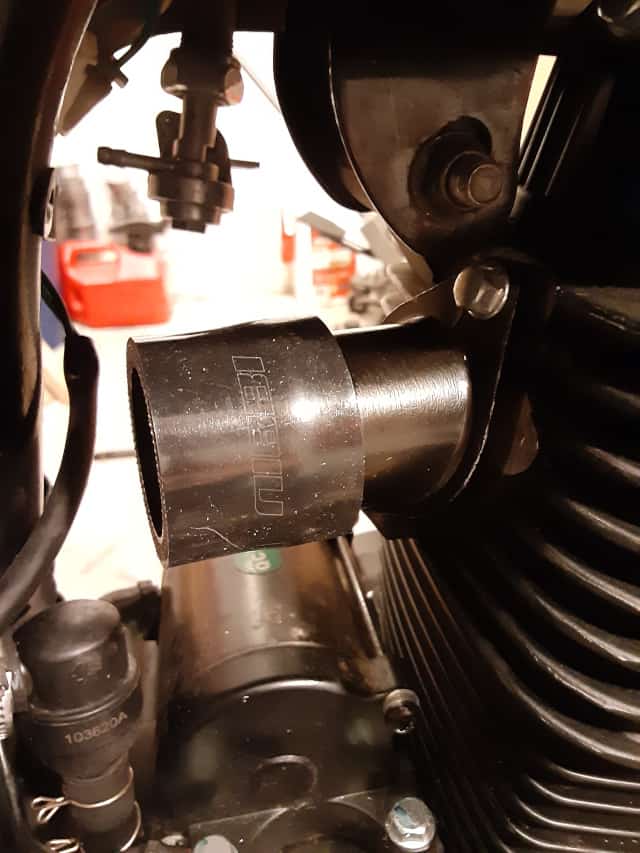
Position the letters ‘Nibbi’ to the motorcycle’s left, and the intake should slope downward.
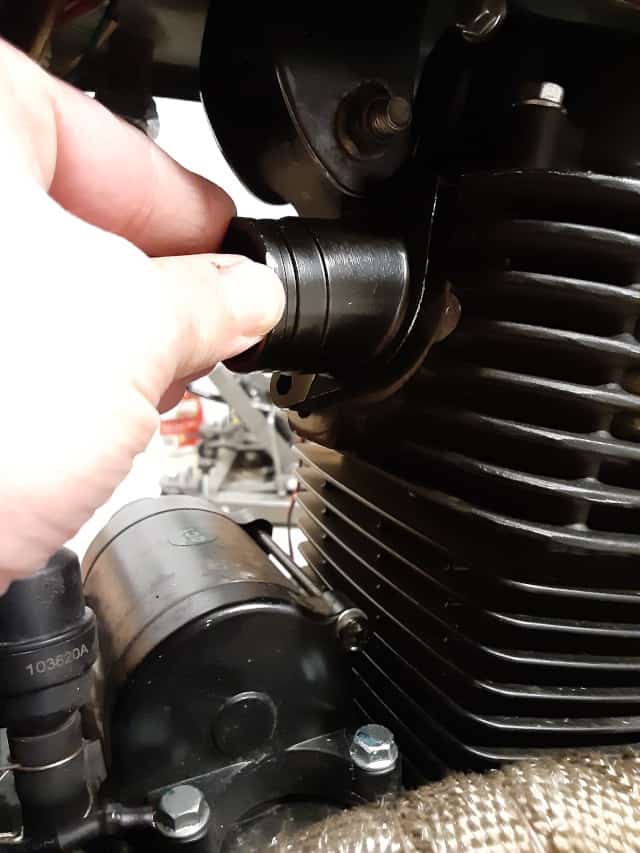
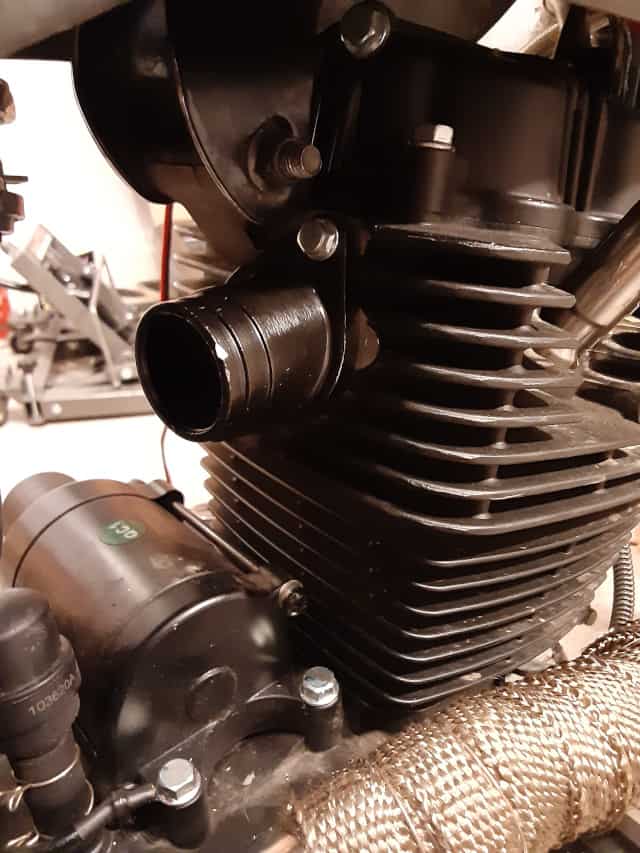
Secure the new intake manifold with the original bolts(I used a thin coat of anti-seize to prevent future problems). Remember to hand thread bolts first to avoid cross-threading. Then use a wrench at the end. I just ‘snugged’ up the bolts as a finishing touch.
4.- Prep The Nibbi Carburetor Rubber Boot.
At this step, I used some grease, hi-temp ball bearing grease, to lightly coat the inside of the rubber boot.
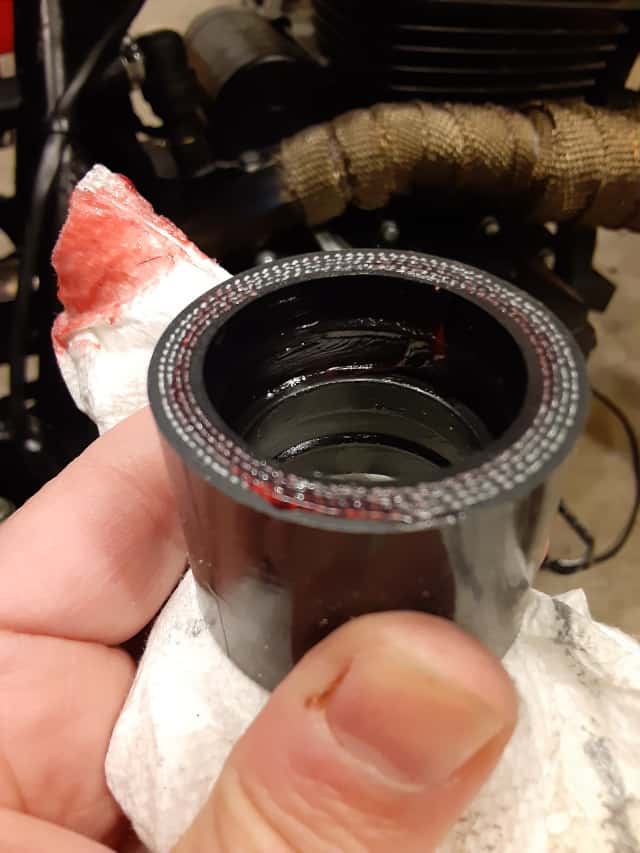
From the angle of the Nibbi intake manifold(downward and rearward) and the bike’s frame, I know the boot will not be squarely fit on the intake manifold. The boot will be angled outward on the manifold, and the Nibbi carburetor will also be angled outward. These angles will prevent the boot from ‘snapping’ into its seating surfaces(the internal grooves) and might hang up the installation process.
Note: I didn’t like how short this Nibbi rubber boot was and how tight I had to crank down on the hose clamps to feel it was secure, so I picked up an aftermarket solution for my aftermarket upgrade: Nibbi Carburetor Upgrade From Auto Zone!
5.- Install The Nibbi Carburetor Rubber Boot.
Simple process, slide the rubber boot over the Nibbi Intake Manifold. Again, your goal isn’t to seat the rubber boot; have the boot partially installed(not fully seated in its groove). We allow the boot to move as needed to get the carburetor installed.
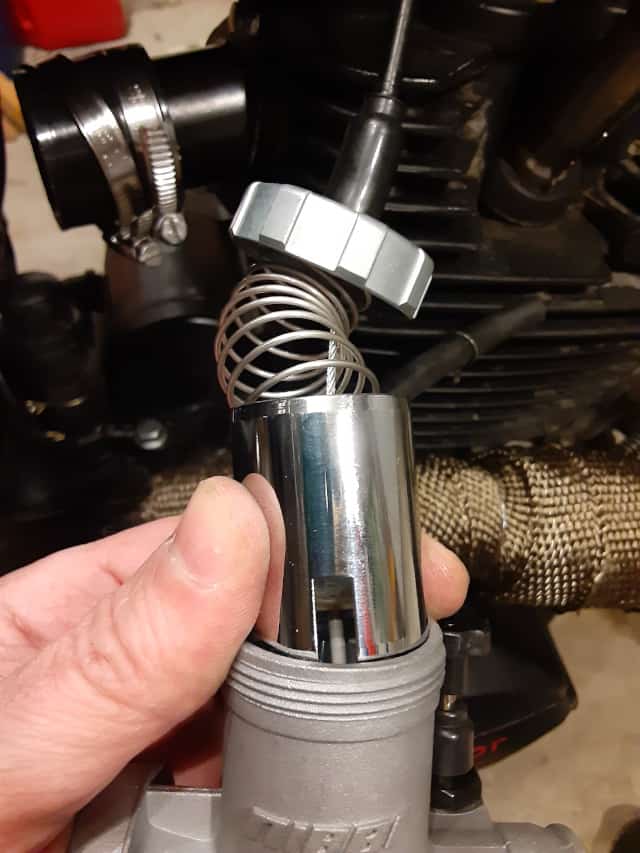
6.- Attach Throttle Cable To New Nibbi Carburetor.
Warning, this step requires compressing the throttle slide spring, so take your time and please use eye protection.
a.- Slide the dust boot over the throttle cable jacket.
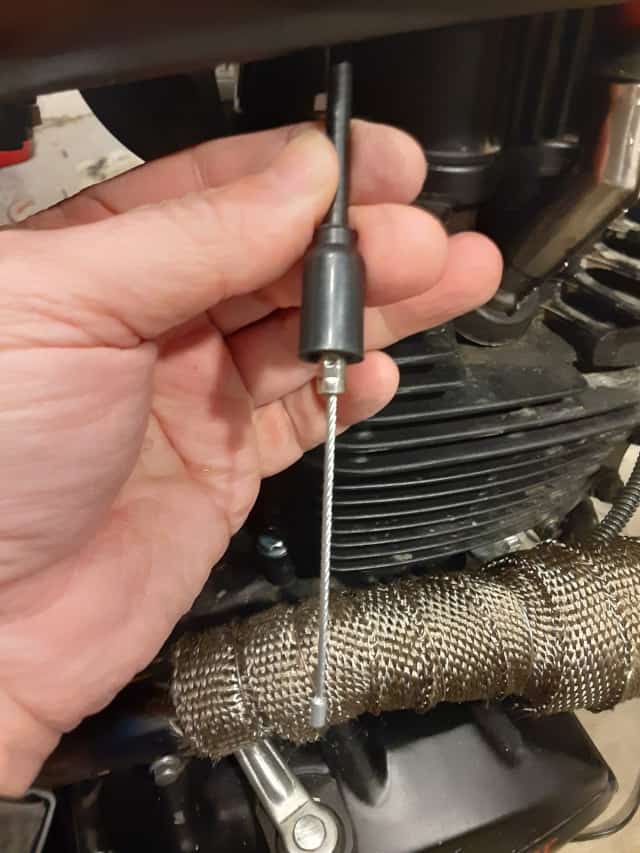
b.- Slide the throttle slide cover up throttle cable.
c.- Slide on and compress the throttle slide spring.
d.- Slip the plastic washer up and to the bottom of the compressed throttle slide spring. Now you should have the throttle cable with its lug fully exposed.
e.- Slide the throttle cable down the throttle slide slit and seat the lug.
f.- Slowly release the spring, allowing the plastic washer to slide down the throttle slide body and seat flatly.
The spring now uncompressed will work with the throttle cable lug to hold the throttle slide securely on the end of the throttle cable.
7.- Install Nibbi Throttle Slide Into The Carburetor.
Hold the Nibbi Carburetor with the idle knob towards you. Take the throttle slide and turn the slit to the throttle slide that the throttle cable down away from you. You will see a small notch in the throttle slide facing you.
This notch is for the idle speed knob to rest on. Insert the throttle slide into the carburetor.
You can watch as the throttle slide comes to a fully seated position in the carburetor. Now carefully compressing the spring, screw on the throttle slide cap. Again, be careful about preventing cross-threading.
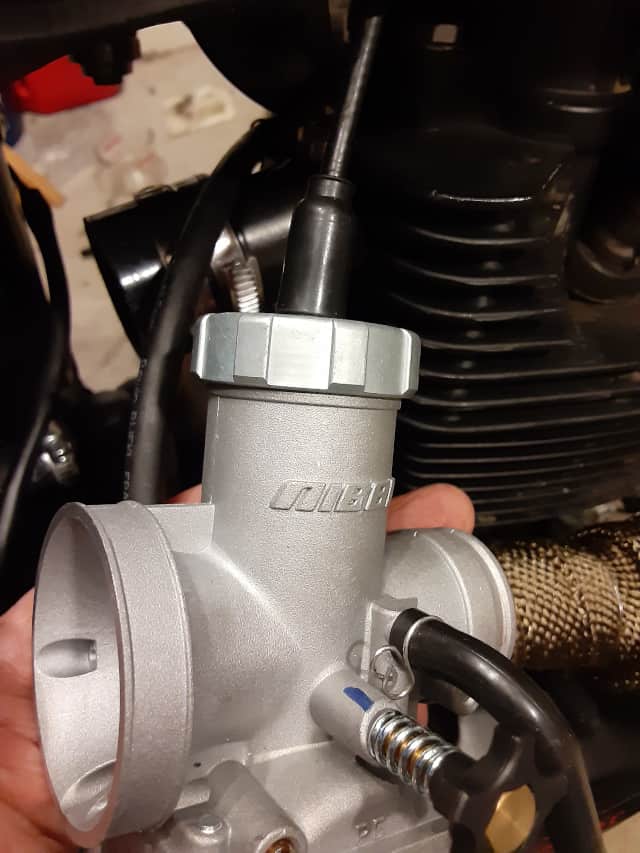
Once you seat the throttle slide cap, slide down the dust boot cover.
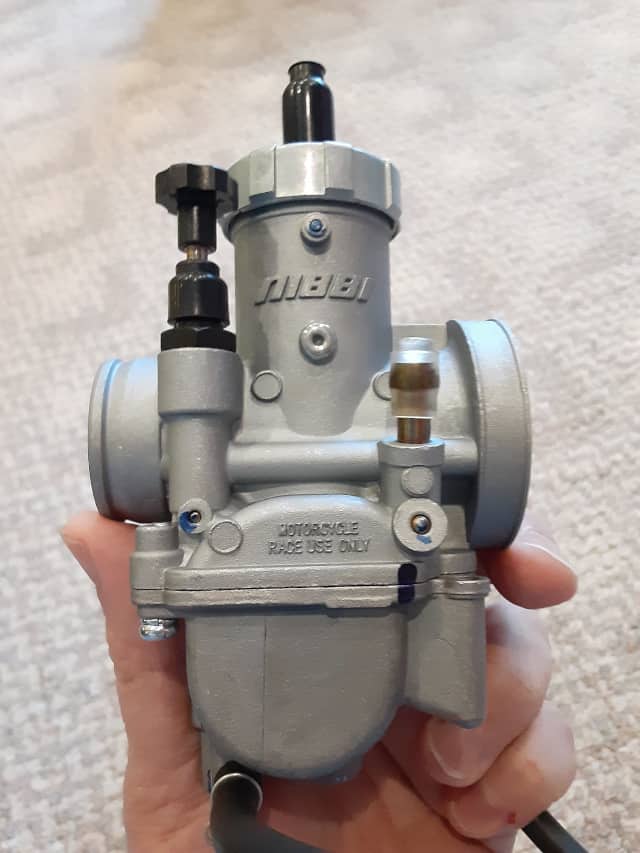
8.- Test Nibbi Carburetor Throttle Slide.
Hold the Nibbi Carburetor, and slowly cycle the hand throttle. The throttle slide should freely move up and down without binding or force. The throttle slide should fully open, allowing max airflow, and then close with almost no opening for airflow.
The idle speed knob will control this closing position to prevent the motorcycle from stalling out.
If there are any problems with the throttle slide, it should have been revealed early with difficulties installing it. If you are unsure about the operation of the throttle slide, you can remove it and review your steps. I had once put the throttle slide in the wrong on my Mikuni Carburetor, and the throttle slide was stuck in the open position, and I couldn’t cycle the throttle well. Take your time, be sure the Nibbi Carburetor is functioning for the next steps.
9.- Install Fuel Line On Nibbi Carburetor.
I used the original stock fuel line. This fuel line has been on both my stock and Mikuni Carburetors, and I am reusing it again since I don’t have a replacement at this time.
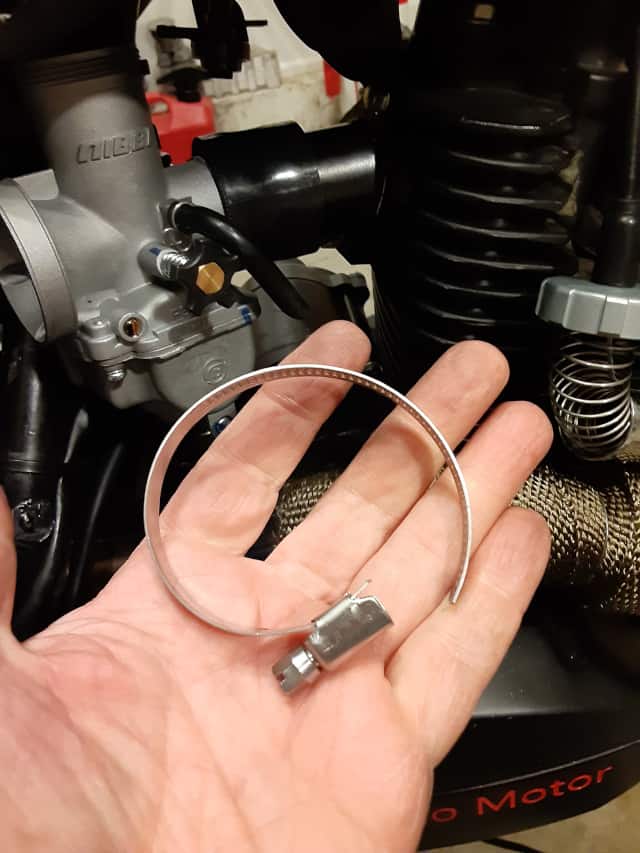
Slip one end over the Nibbi carburetor fuel inlet, and secure with a clamp.
10.- Install The Nibbi Carburetor.
Note: You can slip on the two hose clamps now, or you can wait till you have the carburetor in position, then install the hose clamps.
I tried putting on the hose clamps before the carburetor was mounted, but they got in my way. So I removed them and opened them fully to allow the hose clamps to be installed after the carburetor was mounted—your choice.
Now, remember the internal surfaces of the Nibbi rubber boot are lubed with grease. Don’t let go of the carburetor without ensuring it’s being held in place.
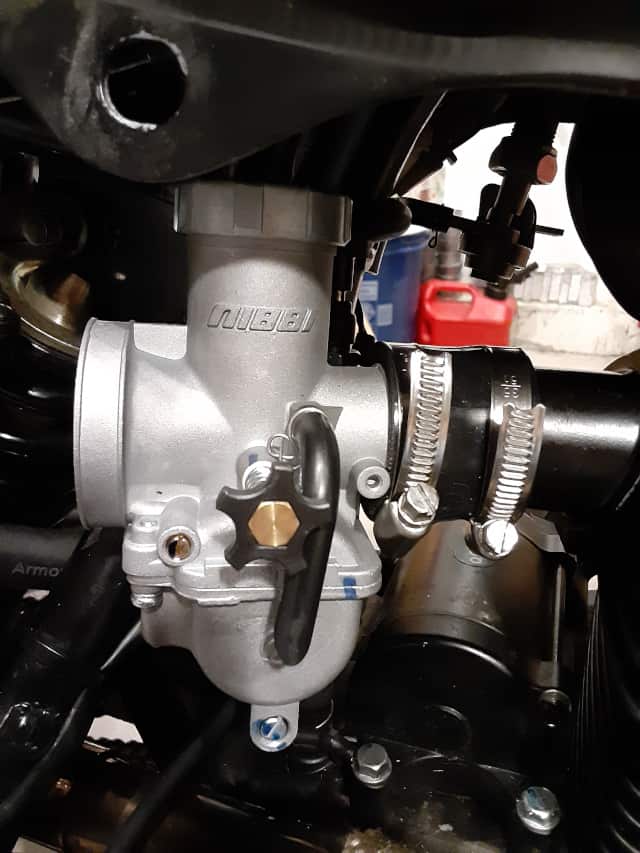
Gently position the Nibbi Carburetor with its idle speed control knob towards you and the fuel line way from you. The fuel line should be passed under the motorcycle fuel tank so you can connect the other end to the fuel shutoff later. Slip the carburetor’s outlet into the rubber boot. This step took me two hands as I was holding the boot and angling it while angling the carburetor installation.
Get the carburetor fully inserted and the Nibbi intake manifold into the boot while angling everything to be as tight as possible.
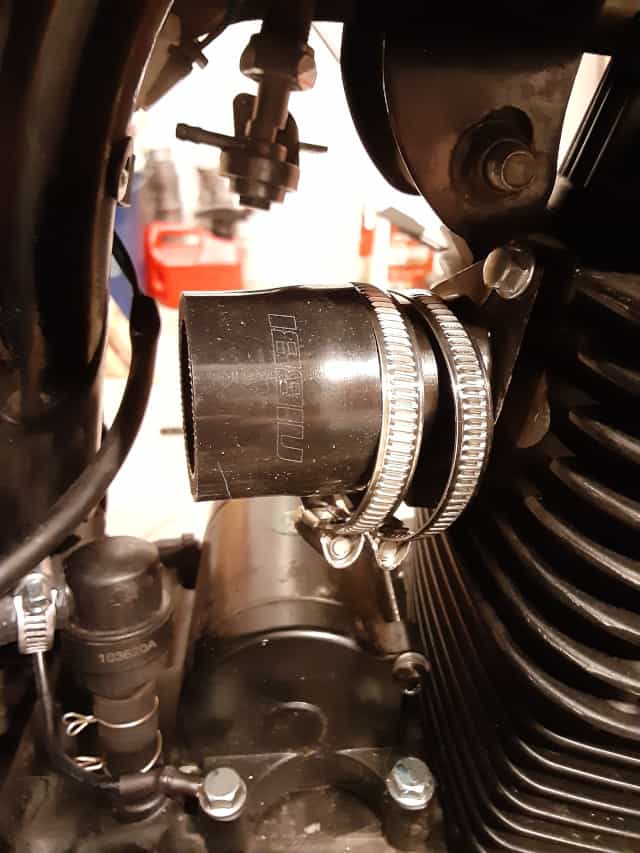
11.- Secure The Nibbi Carburetor With Hose Clamps.
The Nibbi rubber boot came with two hose clamps. Install them on the carburetor side of the boot and the intake side of the boot.
Watch as you tighten the hose clamps, I didn’t have the carburetor fully inserted, and the hose clamp popped it out. I caught the carburetor before any damage could occur.
Once both hose clamps were hand-tight, I gave the carburetor a gentile pull to ensure it was fully installed. I adjusted the hose clamps as needed to ensure the carburetor wouldn’t slip out while riding my TBR7 motorcycle.
12.- Test Carburetor’s Throttle Slide(Again)
Just cycle the hand throttle and observe the throttle slide moving open(up) and closed(down) freely.
13.- Install The Air Filter.
I did an airbox delete a while ago when I went over to the Uni Foam Air Filter (UR), so I am using a “Racing” Nibbi Cone Filter that matches the Nibbi carburetor’s intake size.
If you use the original air intake from the air box, you might have challenges getting the size differences to match up. If you are a true Chonda owner, duct tape is your friend. 😀 Best of luck, and I hope you guys send me your solutions. I am interested in seeing how the original airbox works with the new Nibbi Carburetor.
Please follow along if you use the “Racing” Nibbi Cone Air Filter like me. I had to do some sketch stuff to get this installation to work.
My garage is like 50 degrees, and I couldn’t get Nibbi Cone Air Filter to soften enough to reshape and expand over the Nibbi carburetor inlet.
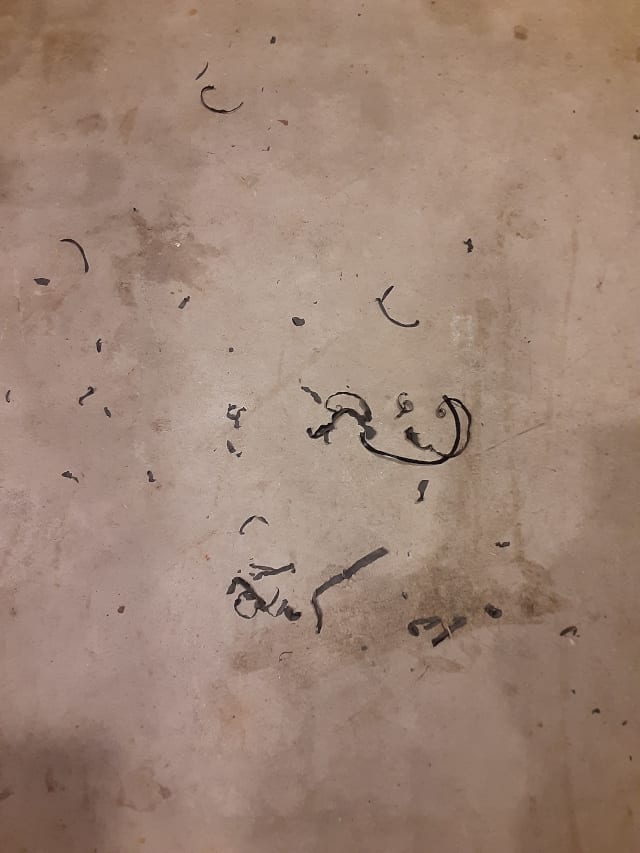
My solution. I beveled and sloped the outer edges of the air filter till I could slip the new air filter over the inlet of the new carburetor.
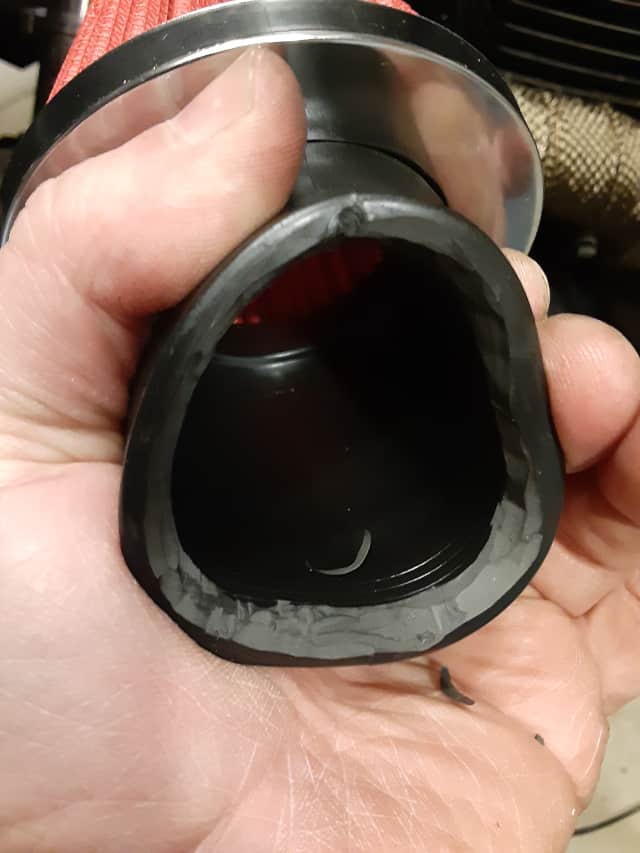
I held the new air filter with the opening to the ground and shaved off rubber/plastic till I could get the filter to slip on. I kept the opening of the new air filter downward to ensure all the shavings fell out.
Once I trimmed off enough rubber, I slipped on the air filter and secured it with its provided hose clamp.
14.- Reattach The Fuel Line.
This process is an easy step. From the motorcycle’s left side, fish the fuel line from the carburetor to the fuel stop valve and secure it with provided clamp.
15.- Test For Leaks!
This step can be dangerous, be sure to take safety precautions.
Open the fuel stop. For my TBR7 motorcycle, I point the valve upward(long handle portion down) to open the normal flow of gasoline. Yes, I have gasoline in my fuel tank to check for leaks.
If there are leaks, be sure you stop gasoline flow, shut fuel stop, deal with the leakage and tighten the system where necessary.
16.- Starting The TaoTao TBR7 Motorcycle.
This first start was tricky for me!!!! All I say is what worked for me, and I hope this gives you hints on how to start your TBR7 for the first time with the new Nibbi Carburetor. As I described before in an earlier post ( Nibbi Carb vs. Stock Carb (TBR7/Hawk 250) ), the Nibbi carburetor choke function doesn’t restrict airflow but enriches airflow.
Knowing this, we can move on to the Nibbi Carburetor’s first start-up.
I opened the fuel stop.
I engage the carburetor choke by reaching under the fuel tank pulling up on the Nibbi carburetor choke knob. The knob should stay in the upward position.
I had the Nibbi Idle Speed Control Knob turned almost all the way out.
Now alternating between cranking, opening the throttle slightly with the twist handle throttle, and increasing the idle speed of the motorcycle(by turning the Nibbi Idle Speed Control Knob clockwise), I got the motorcycle to start.
Note: My garage is 50 degrees. My TBR7 motorcycle still has the stock battery(it works because of the battery tender I use). I had some rough starts. After several attempts, giving time for my electric starter to cool, I got the motorcycle running. I nursed the throttle and, after a while, turned off the Nibbi carburetor choke by pushing the choke knob downward.
17.- Rough Tuning The Nibbi Carburetor.
Once my TBR7 Carburetor was warmed up:
I adjusted the engine idle to about 1500 RPMs(+- 150) per TaoTao TBR7 Manual.
I adjusted the air/fuel screw inward/outward till the idle was smooth. About 1-1/2 turns to 2 turns open right now.
I ran the motorcycle for several minutes, testing my Nibbi carburetor adjustments.
I even stopped the motorcycle engine to retest the starting process. I am amazed at how the TBR7 sounds right now.
18.- Clean Up Time!
Well, that sad time during winter motorcycle modifications, and I am left with just cleaning up and waiting for a warmer day to go riding.
I will create a later post to update you guys about the outcome of upgrading my TBR7’s carb to a Nibbi carburetor (PE30).
Thanks for reading along, and remember, Ride Safe, Ride Fun!
Click To See My Recommended
TBR7 Upgrades
Author’s Notice: This page contains affiliate links, for which I may earn a commission by their use. Also, as an Amazon Associate, I earn from qualifying Amazon purchases.
My Nibbi Carburetor (PE30) Shopping List
|
|
|---|---|
| The Nibbi Carburetor (PE30) |  Click For Current Prices. |
| Nibbi Original High Performance Intake Manifold and Boot Connector |
 Click For Current Prices. |
| 20 Pieces Nibbi Carburetor Main Jet Kit |  Click For Current Prices. |
| Nibbi Motorcycle High Performance Air Filter | 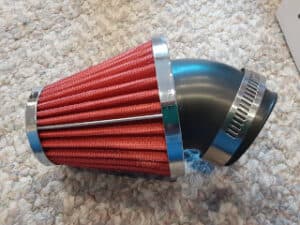 Click For Current Prices. |

Hi I’m Tom, A New Motorcycle Rider and Blog Author.
I am a new rider(Pa Learners Permit at the end of 2020, and I received a Pa Motorcycle License in 2021 after passing a Motorcycle Safety Course).
I bought my first motorcycle, a TaoTao TBR7, at the beginning of 2021 and have been doing upgrades on that motorcycle since.
I added to my motorcycle collection by buying a Boom Vader Gen 2 in 2022, and that Grom-Clone motorcycle has been upgraded by me as well.
I continue to ride my Boom Vader Gen 2 motorcycle as well as my TaoTao TBR7 dual-sport bike.
Read more on my About Me page.
Fun Fact: I’ve only been on one group ride.
