
Should Read Bloopers and Mistakes With My TBR7 Carburetor Upgrade.
I ran into several problems with upgrading my TBR7’s carburetor(See Upgrade Post: My TBR7’s Carburetor Upgrade!). One was a real pain in the but and required me to walk away from the motorcycle for a day to relax and figure out what I did wrong. I messed up the motorcycle and made it unrideable. 🙁
Note: Before you read on, I want to say, with even hindsight, doing the TBR7 carburetor upgrade has been one of the best upgrades I did for the motorcycle. I now have more control over the power output and throttle response now. This carburetor was the first motorcycle carburetor I ever changed. The upgrade part was fun; the tinkering later with jets is fun; just initially, when I changed the carburetor, I broke something. I’ll cover it in this post.
Major TBR7 / Hawk 250 Carburetor Upgrade Warning.
This warning is a personal safety issue, so that I will be cover this first.
The Motorcycle Carburetor Might Still Have Fuel In It!
I tried using the drain screw on the stock carburetor, but unlike other TBR7 fasteners, this screw was tight. I ran the motorcycle the day before, with the fuel line shut off till it stalled. I figured the fuel bowl was empty, or at least open enough. I was wrong.
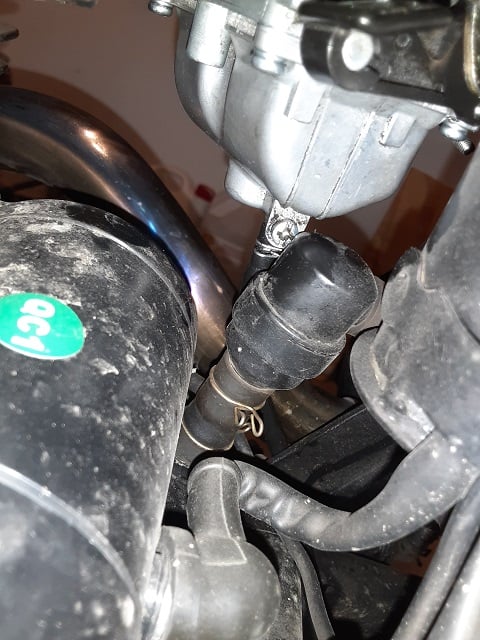

The gasoline didn’t spill out of the carburetor till I started undoing the fuel bowl screws. I was down to the last screw, with no actual warning ahead of time. The fuel waited till the end to dump gasoline out. So please use the drain screw, still be prepared for a carburetor fuel bowl to dump a significant amount of gasoline when you open it.
Carburetor Upgrade Safety Tip #1: Work in a ventilated area.
Working on a motorcycle carburetor exposes you to gasoline fumes. Over time, those small amounts of fumes can deaden your ability to smell and notice the level of gasoline fumes you are inhaling. This condition can be a severe health hazard.
When my TBR7’s carburetor dumped all the gasoline out, I worried about catching the gasoline and preventing it from getting onto the floor and myself. I was already working in a ventilated space; after collecting the spilled gasoline, I left the garage to wash my hands.
When I returned to the garage, wow, the smell of gasoline was powerful. My garage door was open, but a gasoline smell was in the air. If you smell it, you are inhaling it. Take steps to protected your lungs, and work on improving ventilation where possible, and take steps to minimize your breathing exposure.
Carburetor Upgrade Safety Tip #2. Use Collection Basins.
I use small bins to collect dropped small parts. This reason alone is enough to work over a bin, but the sudden gasoline dump was another. If the gasoline remains clean, it can be reused; if not, you have it contained for recycling/disposal.
If the gasoline is collected in a bin, you can quickly get it into an enclosed container, further reducing your exposure to fumes.
My Carburetor Upgrade Bloopers.
These aren’t personal safety issues, per se, but are mess-ups that can affect safely riding the motorcycle.
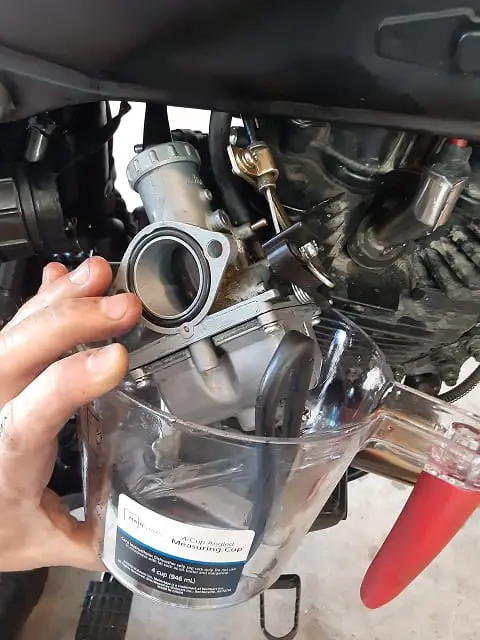
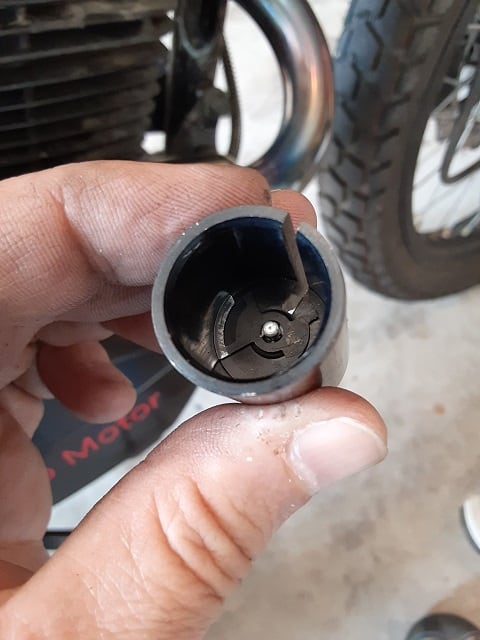
Carburetor Upgrade Blooper #1 – Throttle Body Inserted Wrong.
There are two grooves on the throttle body. One groove runs the (“basically”) total length of the throttle body, which is for the throttle cable insertion; the second groove is smaller and only located on the bottom of the throttle body. When you look inside this smaller groove, you will see it is sloped. The slope is for the low idle screw to work against, adjusting the throttle’s max closing position up and down.
If you install the throttle slide backwards or 180 degrees turned around, the throttle may hand up, stay fully open, or not operate as expected.
Easy Fix: Look for the grooves. Find the smaller groove, which is only located at the bottom of the throttle, and ensure this side faces the idle speed set screw.
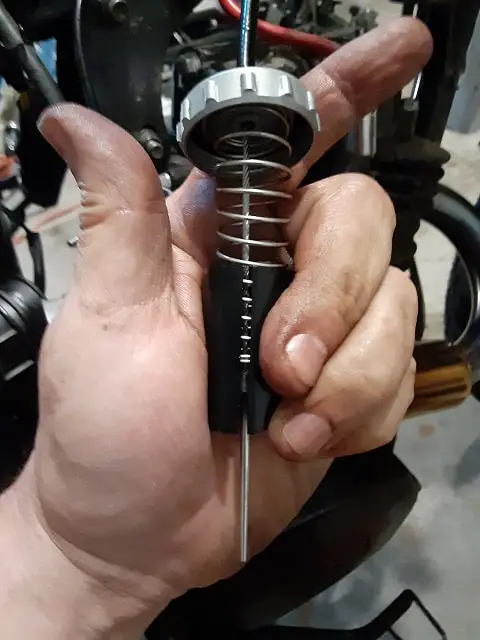
Carburetor Upgrade Blooper #2 – Jet Needle Floating.
When the throttle moves up and down, it pulls the Jet needle out, opening the space around it, metering more gasoline into the air stream. When the throttle is closed, the jet needle is pushed down into its opening, reducing the space around it, metering less gasoline into the air stream.
Further Info: Wikipedia Carburetor Page
If the jet needle is ‘floating,’ it can move on its own. From what I found out, it will move upward and stay there and send slugs of gasoline into the engine. Evident by no power, only runs with the throttle fully open, and a lot, I mean a lot, of engine backfire.
How did I create a ‘floating’ jet needle condition?
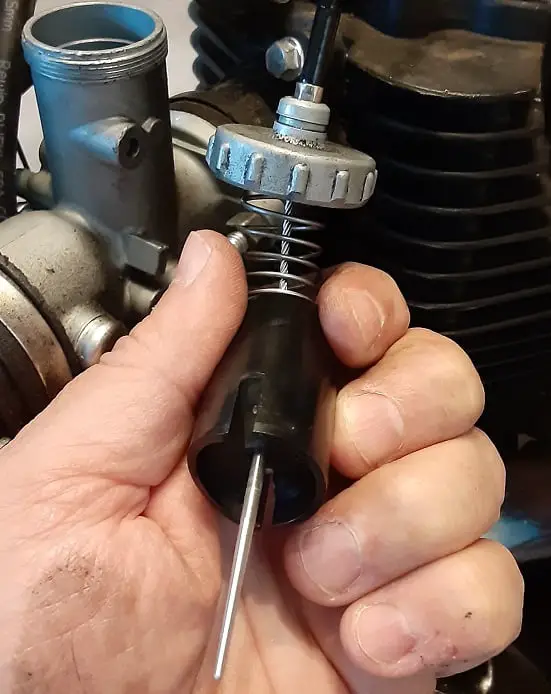
I lost the jet needle retention clip. I did not know. The retention clip in the new carburetor is black and a flat piece of metal. So when you look in the throttle barrel, it is hard to see when installed. So it was not apparent when it fell out.
How did I lose the retention clip? I dropped the throttle body. I didn’t notice the needle was loose or ‘floating.’ I work over basins, and it was easy to find once I figured it was gone. But not after a couple of failed runs/rides that woke up the dead. My TBR7 was backfiring like crazy.
Maintenance Tip: Don’t use black collection basins or pans.
Many motorcycle parts are black, painted, anodized, etc. The color of the bin you use to collect liquids or any dropped parts will camouflage the part. In my case, I had a tiny jet needle retention clip all out of the throttle body, it was black, and I used a black collection bin for catching such parts. I did not notice. I plan on getting a yellow, or another bright color, a container for future repairs.
End Of My TBR7 Carburetor Upgrade Bloopers and Errors Post.
First, let me remind you, this was my first time replacing a motorcycle carburetor, or any carburetor, in my life. There are teeny-tiny parts, which is why I use safety glasses with readers (see my earlier post: Safety Glasses With Readers.) and bright lights. I do need more lights for close-up work, though. These are my excuses.
My lessons and resulting tips are important. They can protect your health, the health of your motorcycle, and peace of mind. Remember, motorcycling is a dangerous hobby; seek professional advice before starting any project.
Ride Safe, Ride Fun!
Click To See My Recommended
TBR7 Upgrades

Hi I’m Tom, A New Motorcycle Rider and Blog Author.
I am a new rider(Pa Learners Permit at the end of 2020, and I received a Pa Motorcycle License in 2021 after passing a Motorcycle Safety Course).
I bought my first motorcycle, a TaoTao TBR7, at the beginning of 2021 and have been doing upgrades on that motorcycle since.
I added to my motorcycle collection by buying a Boom Vader Gen 2 in 2022, and that Grom-Clone motorcycle has been upgraded by me as well.
I continue to ride my Boom Vader Gen 2 motorcycle as well as my TaoTao TBR7 dual-sport bike.
Read more on my About Me page.
Fun Fact: I’ve only been on one group ride.
