
I wrote before about how I immediately messed up by not following the advice to change the stock motor mount bolts on my Boom Vader Gen 2 125cc motorcycle. I changed the stock motorcycle chain due to warnings about the quality of the metal. Still, I didn’t figure out the engine mounting bolts needed replacement.
However, I was confused and resulting in breaking my motor mount bolts. I fixed it and replaced my Boom Vader motor mount bolts, and I want to post about it.
I was confused when you read my previous post( I Broke A Motorcycle Motor Mount Bolt. ). I am not only confused about the stock motor mount bolts needing immediate replacement immediately but also finding appropriate bolts at my local Lowe’s and Home Depot. Home Depot had a bolt that was almost an exact match to the one that broke on my motorcycle, and I didn’t want the same results, so I went with another type of bolt.
I opted for a set of bolts and nuts from Lowe’s.
Did I Modify The Motorcycle Frame Engine, Mount Holes?
I just wanted to cover this topic here fast. There are suggestions to not just replace the motor mount bolts on the Boom Vader(or any other Grom Clone) but increase the size of the bolts. By drilling open the bike’s frame, the engine mount holes from 8mm to 10mm(???). This upgrade is still on my My Boom Vader 125 (Grom Clone) Upgrades To-Do List.
The advice says the engine’s mount holes are already larger, so using a bigger bolt will reduce the vibration you feel riding the bike.
I did not drill out the engine mount holes and wanted to replace the broken stock engine mounting bolt and replace the remaining engine mounting bolt.
So I found replacement sizes for the stock holes, and when hunting for replacement bolts.
Boom Vader Motorcycle Engine Mount Bolts Size?
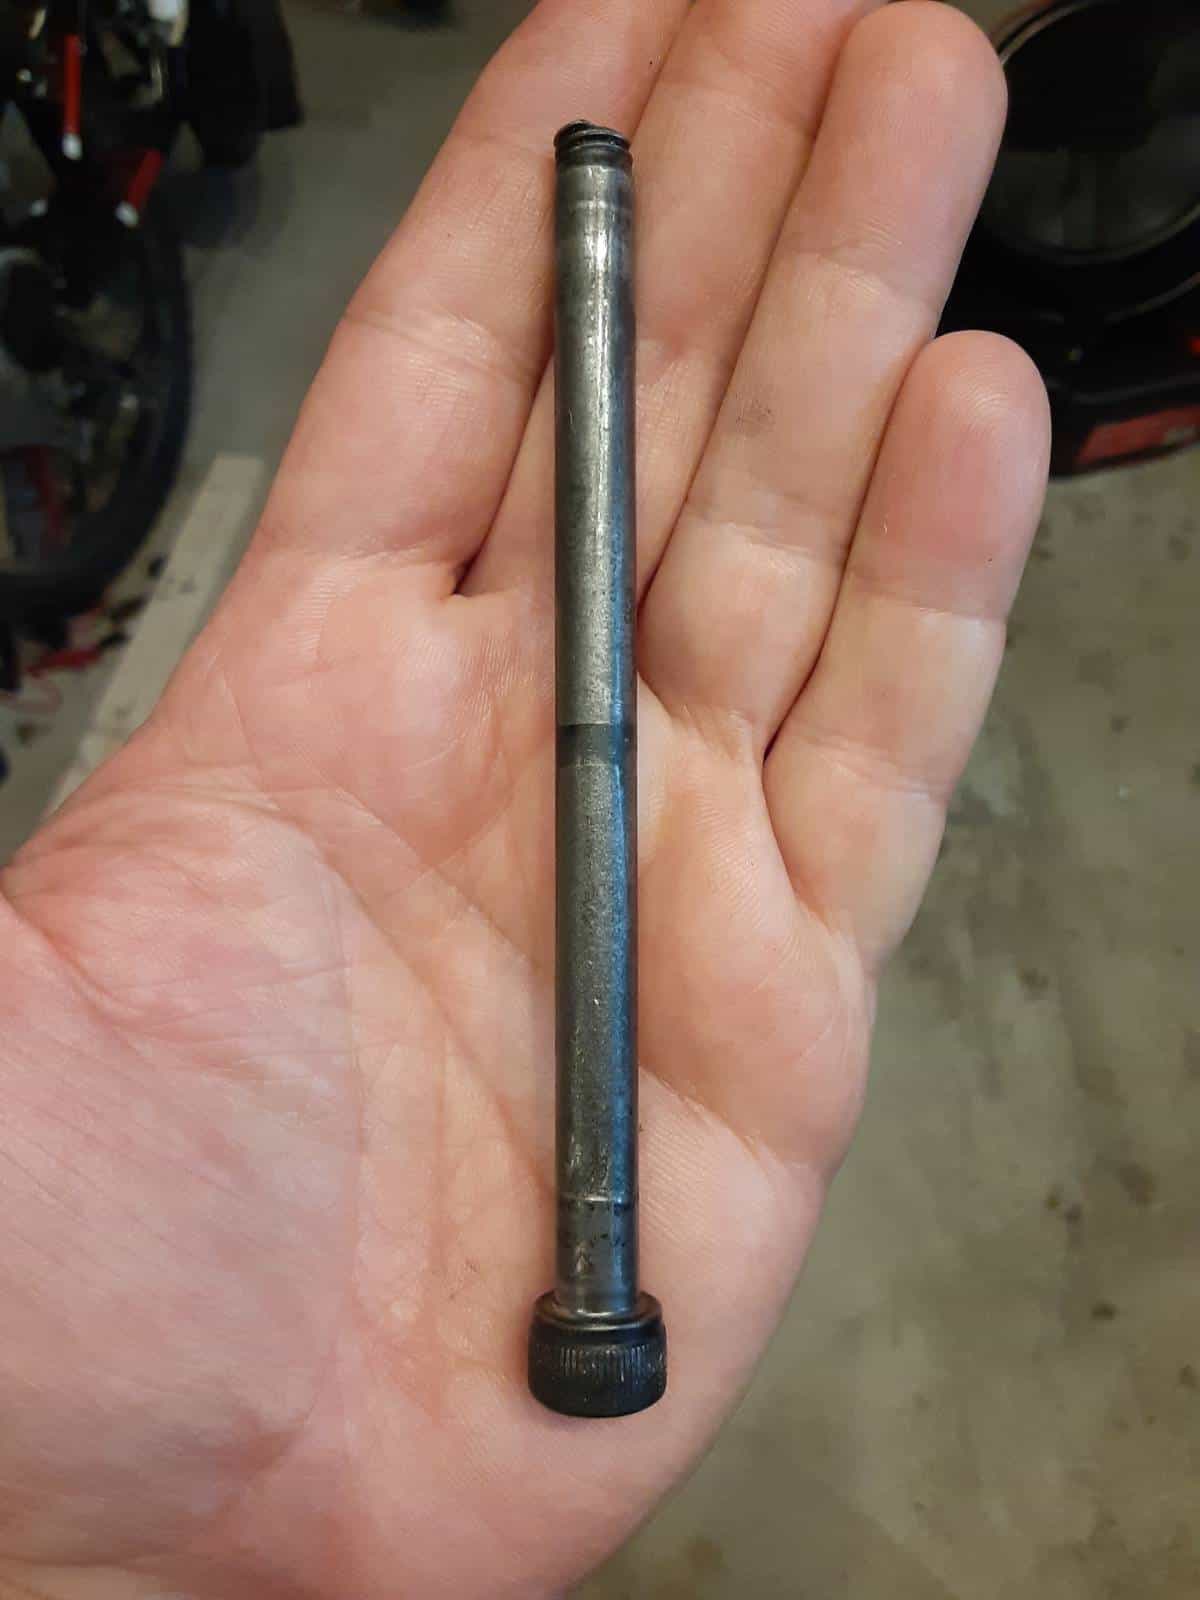
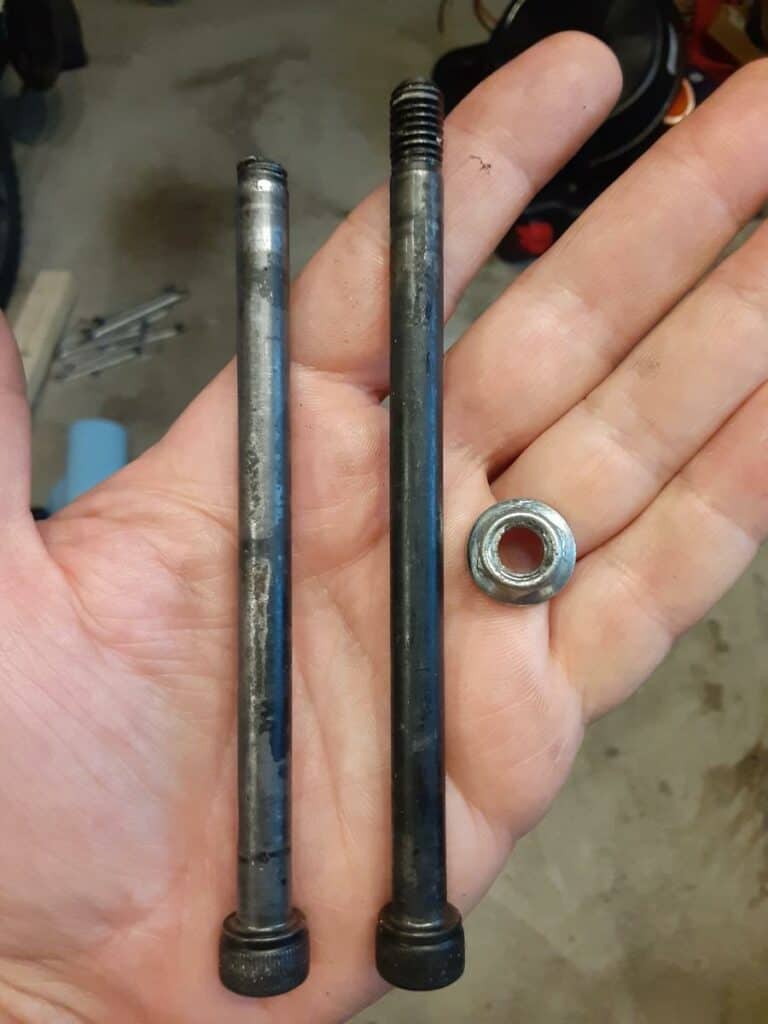
I took the broken engine mounting bolt to the hardware store and found the size of a matching bolt would be:
M8-1.25 x 120mm
What Grade Bolt Did I Buy?
Well, in my research and shopping around, I found Home Depot had a bolt with a head-stamp of 12.9(a very high-grade bolt, I learned) but packaged in a plastic bag with a label stating it was “plain steel.” This was the bolt that was an exact match to the broken Boom Vader motor mount bolt.
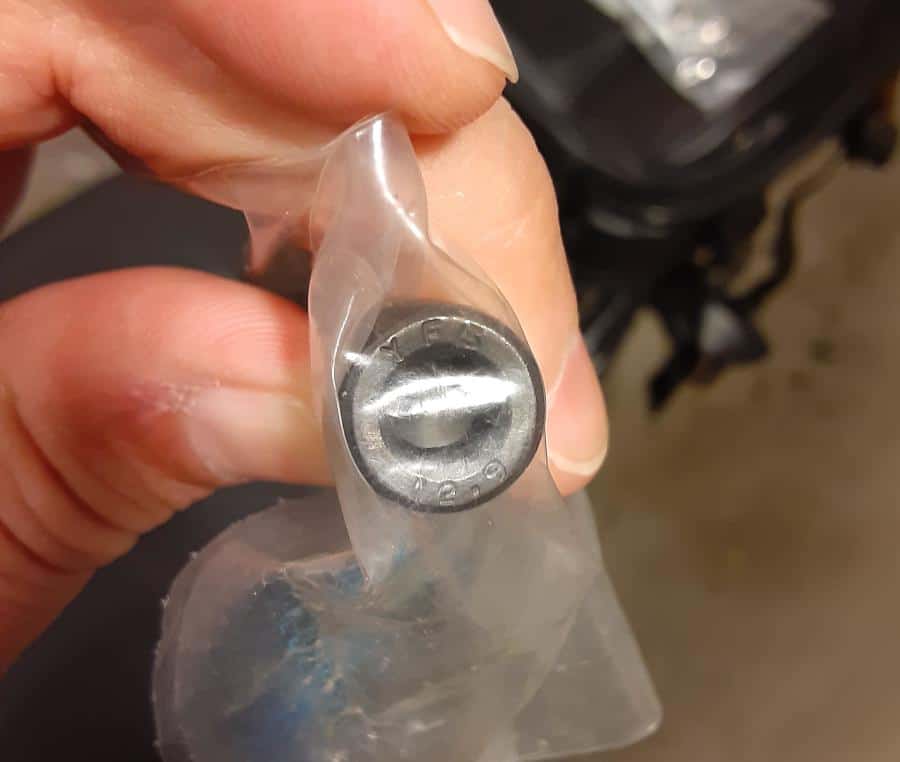
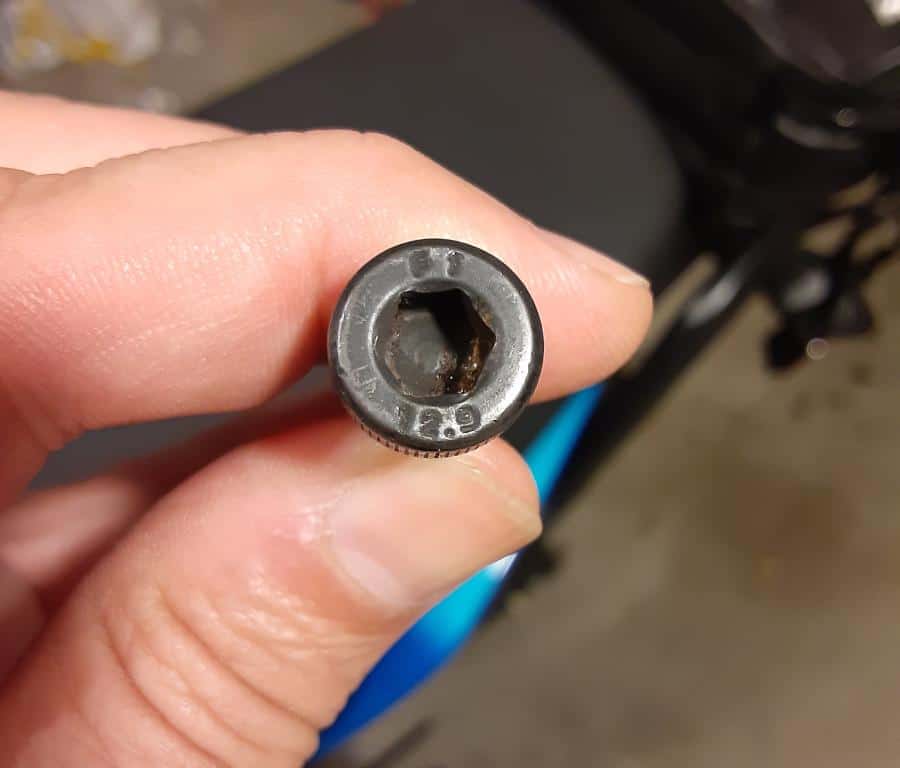
Felt I was trying to avoid a Deja-vu “another broken motor mount bolt” moment and skipped using this bolt. Sad, since the 12.9 on the head is a higher grade number than what I settled for.
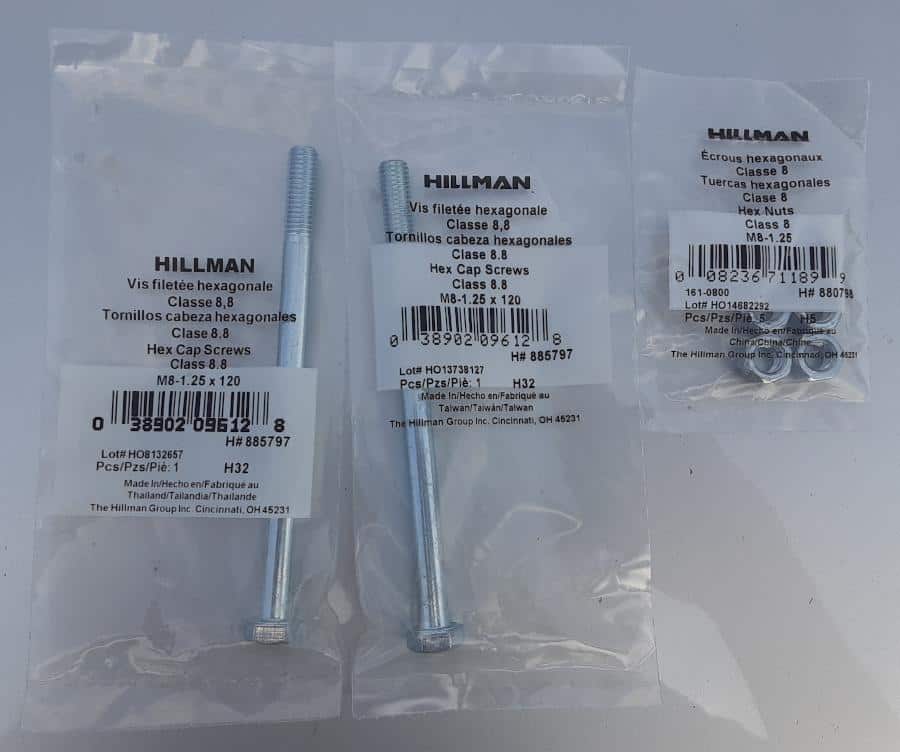
I was in Lowe’s and found a bolt matching the dimensions of the original broken bolt(M8-1.25 x 120mm), and the packaging stated it had a grade of Grade 8.8.
There are some conversions between SAE grade units and Metric grade units. Not getting into it, but you can read more about it here: https://en.wikipedia.org/wiki/ISO_898
I just wanted a quick replacement to get the Boom Vader back on the road.
So I picked up two M8-1.25x120mm Grade 8.8 bolts and a pack of matching M8-1.25 Grade 8.8 nuts.
Now time to make the magic happen…
Replacing The Broken Motor Mount Bolt.
1.- Working Safe.
Having a safe garage is essential to me( My Motorcycle Garage Safety Rules ) with my tools at the ready.
FYI: Building My List of Must-Have Tools For Motorcycle Owners
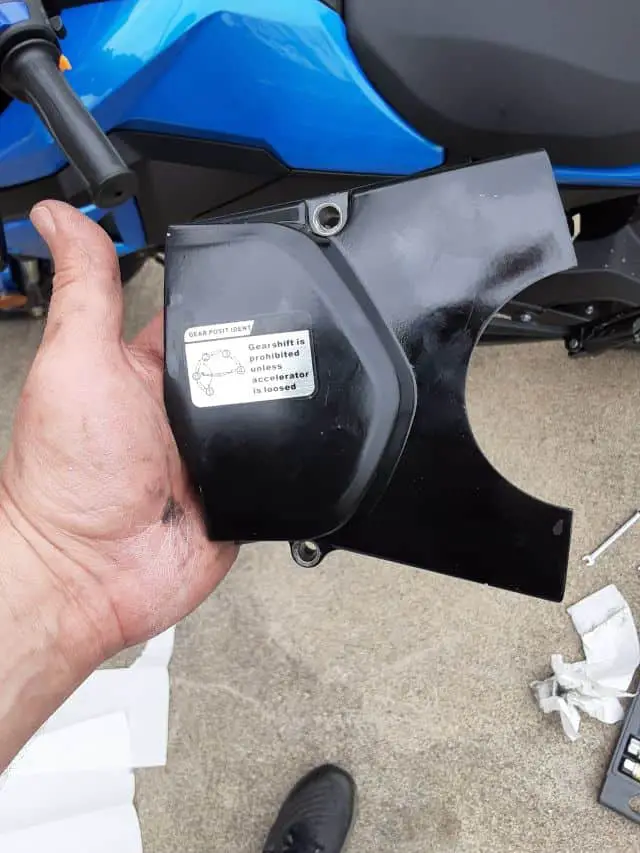
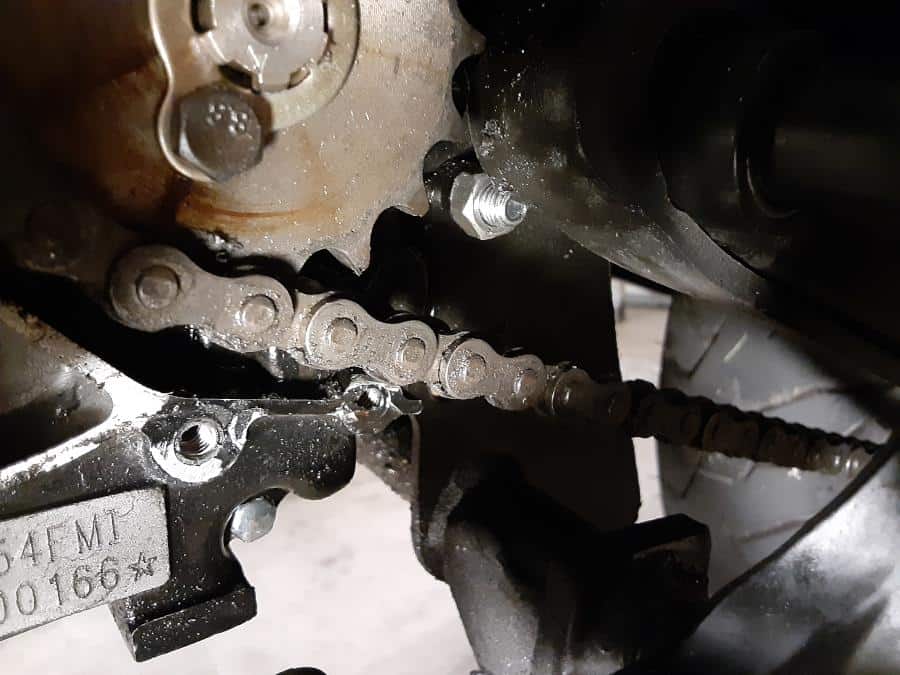
2.- Get Access To Lower Motorcycle Mount Holes.
I removed the front sprocket guard and could see where the engine mounting bolt and nut were used to reside. Only an empty hole now.
3.- Push In New Motor Mount Bolt.
I did not have to remove any motorcycle rear sets and kept this as easy as possible.
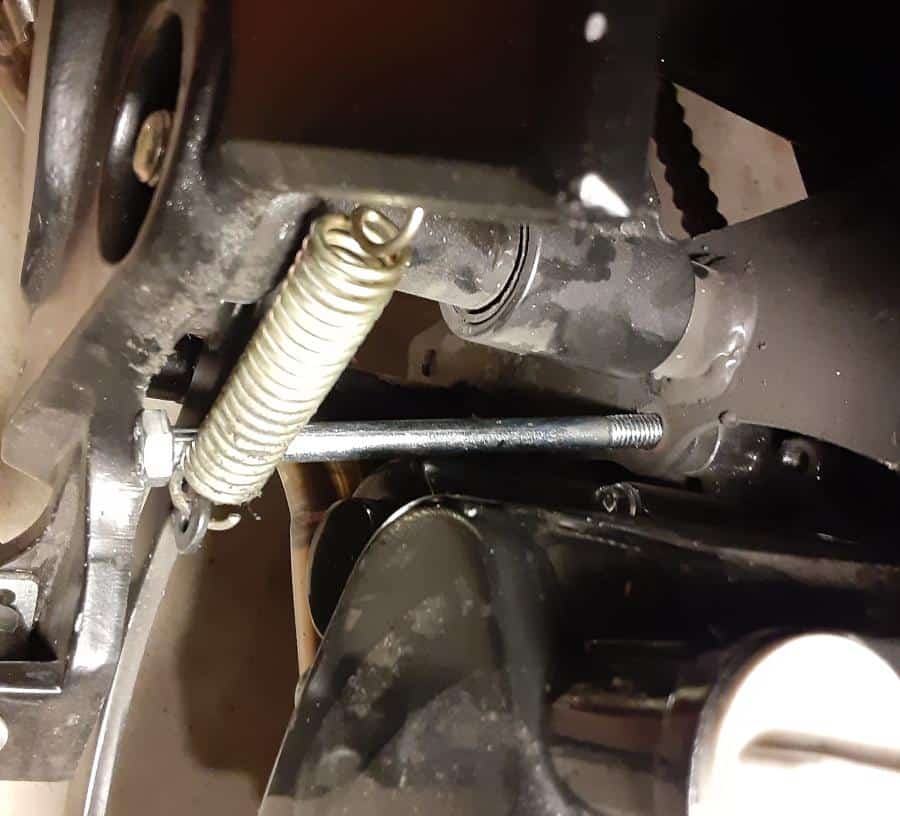
I slipped the bolts past the rear brake spring and into the whole. I didn’t couldn’t fully insert the bolt, so I lifted and wiggled the engine around. Not having enough hands, I employed a helper, my bottle jack.
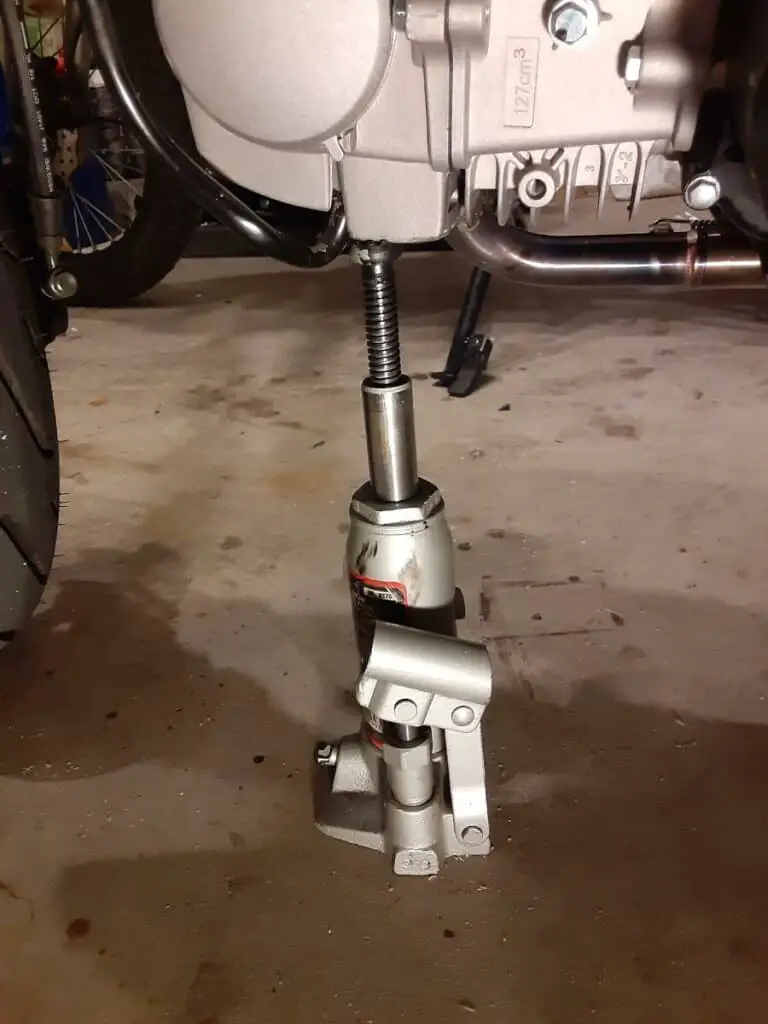
I used my bottle jack to lightly lift the Boom Vader motorcycle engine, such as to align the holes(frame and engine mounting holes), so I could pass the new bolt through.
As I said, I figured out what direction the motorcycle engine had to be tweaked and used the bottle jack. So lightly, I didn’t use a lever to pump it; I just moved the pump by hand. If I had another person, I could have had them lightly lift in areas to better line up the holes, but I was working by myself.
As I got the holes lined up, the new bolt quickly passed through the empty hole. As the bolt emerged on the other side, I held a fresh nut in place and, by hand, turned the bolt head as I pushed it and threaded it on the nut.
4.- Tighten The New Engine Mount Bolt And Nut.
With the nut threaded on, I held the nut in place with an open-end wrench( Must Have Tools For Motorcycle Owners ) and turned the bolt with a socket and ratchet. I had to use an extension, of course, since I left the rear set in place. One tightened by ratchet, and I broke out the torque wrench.
FYI: I do not know the actual torque spec, and I had to guess based on the size of the bolt and what many inconsistent sources stated.
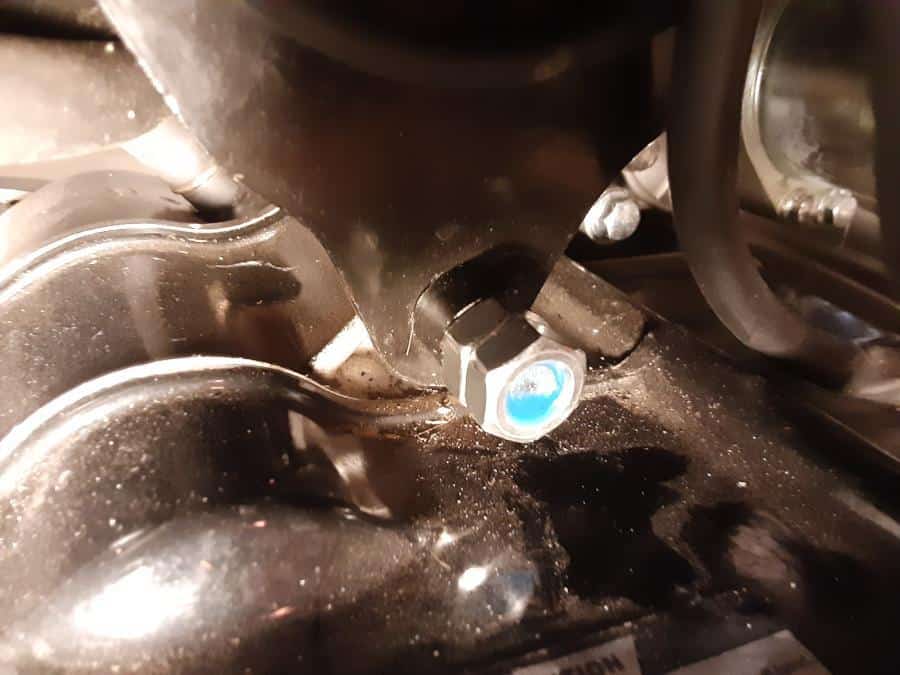
I went with 24 ft-lbs and torqued the bolt while holding the nut with the open-end wrench. This torque value seemed low since I felt little twisting force, but I used my magic juice: thread locker.
Anytime I use any fastener on a Grom Clone, I use something on the threads. Anti-seize or thread locker depends on the application. In this case, I used a blue thread-locker.
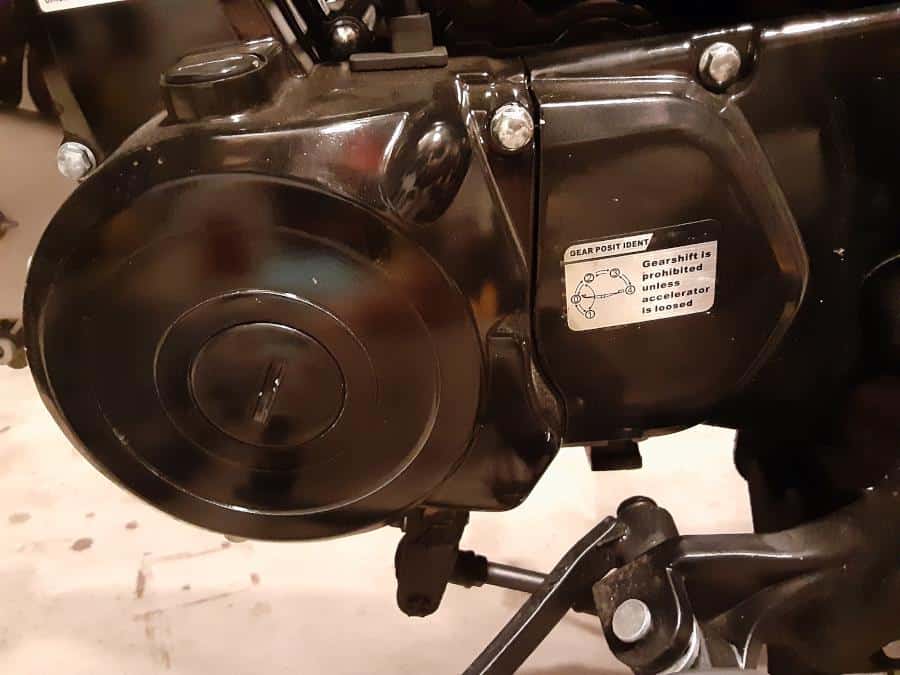
5.- Close Up Front Sprocket Area.
Re-installed the front sprocket cover, again using thread-locker on the bolt threads. Good time to do this, so nothing is introduced to the front sprocket area. I waited till end(both engine mount bolts replaced), but in hindsight should have been done sooner.
Continued With Replacing Stock Motor Mount Bolt.
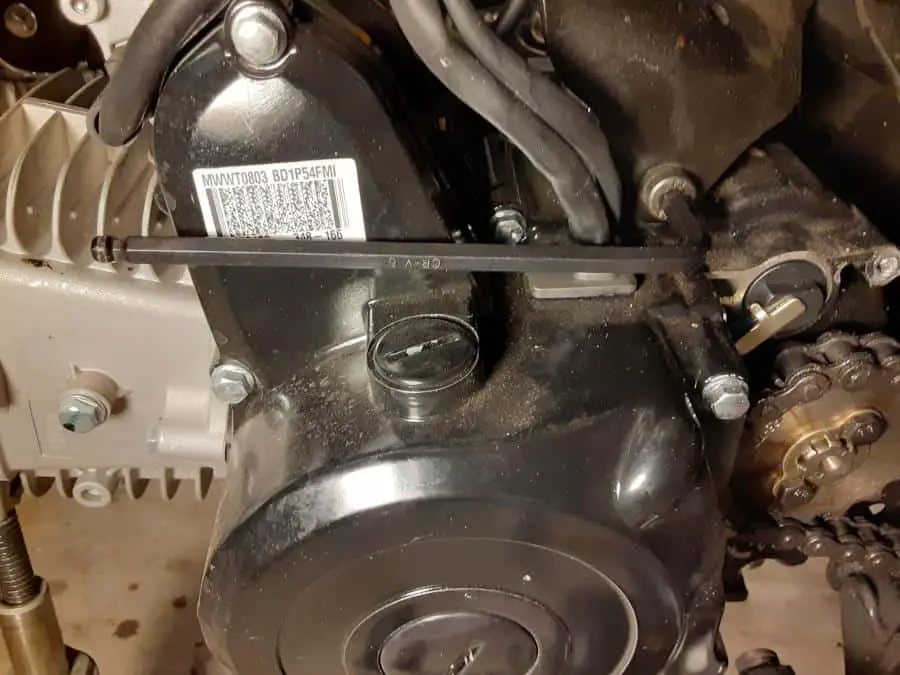
6.- Loosen Upper Motor Mount Bolt.
I loosened and removed the engine mounting nut using an Allen wrench and socket ratchet wrench. I was amazed at how little force it took to remove the nut, so I figured the low torque value used to install the new motor mount bolts was correct.
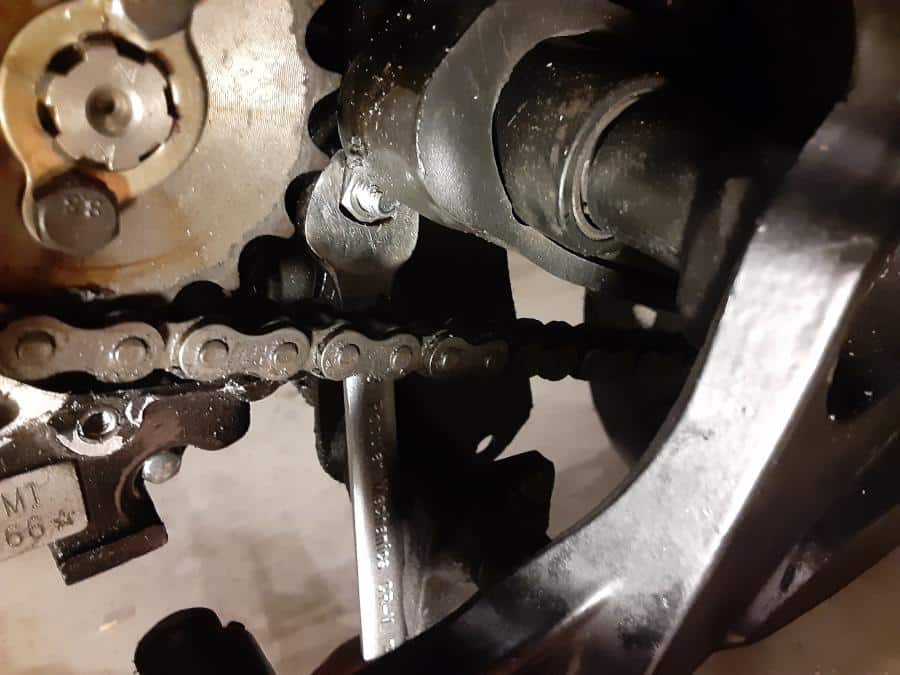
7.- Slowly Push Out Old Motor Mount Bolt.
As I used the bottle jack to support the motor in the right areas, the upper motor mount bolt was easy to push through. Moving from the right side of the motorcycle to the left, I pushed the bolt through using the… you guessed it, the broken bolt.
This way, the motor mount holes stay aligned.
As the stock motor mount bolt fell out, I replaced it with one of the new motor mount bolts. I was pushing from the left side of the motorcycle to the right, and I used the broken engine mount bolt to push it out as a guide.
8.- Tighten The Upper Motor Mount Bolt & Nut(s).
I applied the new nut, tightened it, and torqued the nut. Again, using thread locker.
I saw additional threads on the upper motor mount, so I used an extra nut, again with thread locker, and torqued.
9.- Clean up.
No need to add this step since my garage seems to get messier and messier, but I cleaned up. Tools, wiped down grease on the bike, etc.
10.- Test Road The Bike.
Using bright silver/chrome-looking bolts helped with the next step. Going for a test ride and confirming the bolts/nuts are in place.
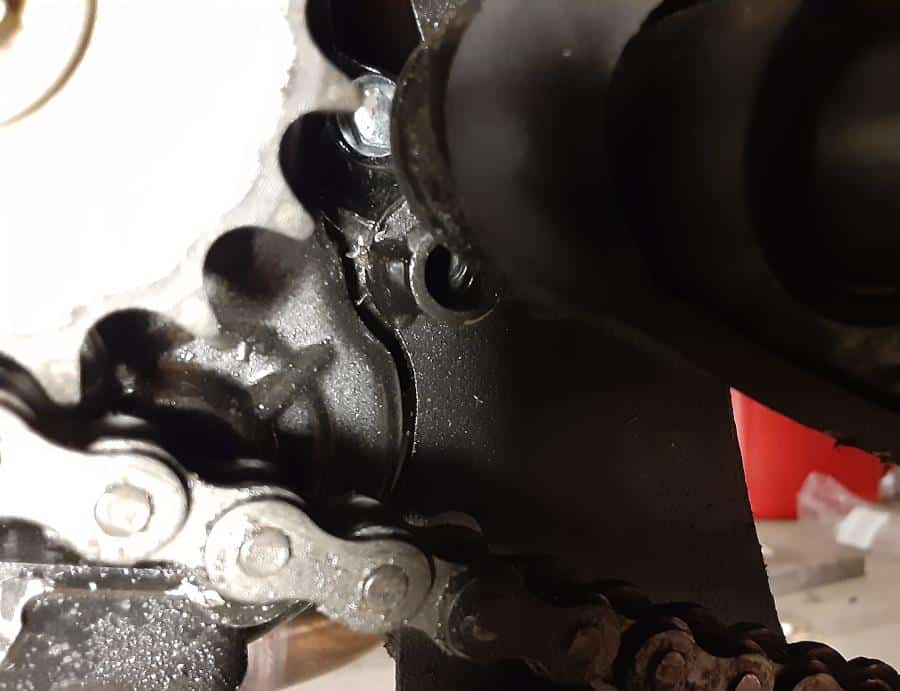
I went out for a ride and checked the condition of the mounts. The upper mount was easy, and it is obvious. The lower mount is only visible on the right side.
As long as the lower motor mount bolt head was pressed against the bike frame motor mount hole, I figured it was still tight.
30+ miles today, with very high RPMs and increased speeds.
It was a good test, and my work, well, worked!
Future Plans For Boom Vader Motor Mount Bolts.
As stated before, I plan to drill out the motor mount holes on the motorcycle frame and increase the motor mount bolts from 8mm to larger bolt. It’s on my My Boom Vader 125 (Grom Clone) Upgrades To-Do List.
Trying to find suitable 8mm bolts was time-consuming, going between big box stores and local hardware stores, so the plan is to order the larger bolts online.
This time allows me to get the highest grade possible for these bolts. I wonder if Stainless Steel is an option, I’ll keep you updated on the upgrade.
In the meantime, I will be riding my Boom Vader more. Summer is coming to an end, and for every moment I get, I hope to be out there either on my Boom Vader Gen 2 motorcycle or my TaoTao TBR7 motorcycle.
Ride Safe, Ride Fun!
Click To See My Recommended
Boom Vader Gen 2 Upgrades
Well, I Finally Did It…. my post update!
I Upgraded My Grom Clone Motor Mount Bolts
After repairing the broken motor mount bolt and replacing the existing motor mount bolt, I thought about my plans for my Boom Vader motorcycle.
I have plans to upgrade the engine. Not a total engine swap to the 190cc or 212cc engines, but to do a Big Bore Kit for my motorcycle.
So, if I plan on pushing this little bike harder, I should start with the best engine foundation for my little Grom Clone. I want to install larger engine mount bolts. So I followed the upgrade advice to replace the stock engine mount bolts and upgrade their size.
Read here, and tell me what you think:
Boom Vader Motor Mount Bolts Upgraded.

Hi I’m Tom, A New Motorcycle Rider and Blog Author.
I am a new rider(Pa Learners Permit at the end of 2020, and I received a Pa Motorcycle License in 2021 after passing a Motorcycle Safety Course).
I bought my first motorcycle, a TaoTao TBR7, at the beginning of 2021 and have been doing upgrades on that motorcycle since.
I added to my motorcycle collection by buying a Boom Vader Gen 2 in 2022, and that Grom-Clone motorcycle has been upgraded by me as well.
I continue to ride my Boom Vader Gen 2 motorcycle as well as my TaoTao TBR7 dual-sport bike.
Read more on my About Me page.
Fun Fact: I’ve only been on one group ride.

Thank you so much!! I broke and replaced with the same stock bolt and yet it broke again so I have to do it all over again but thanks to you I know exactly what size I am so greatful for your blog.Your pictures everything was perfect .I believe I will follow you in any modifications you do because I feel strongly and totally agree with you on everything. This is my first street legal bike barely put 300 miles on it so excited to finally move forward with this and get back on the road!