

I talked before about how I didn’t listen to the typical Grom Clone’s advice to change my Boom Vader’s motor mount bolts as soon as I got the bike.
This resulted in a broken stock motor mount bolt( Broke A Motorcycle Motor Mount Bolt ).
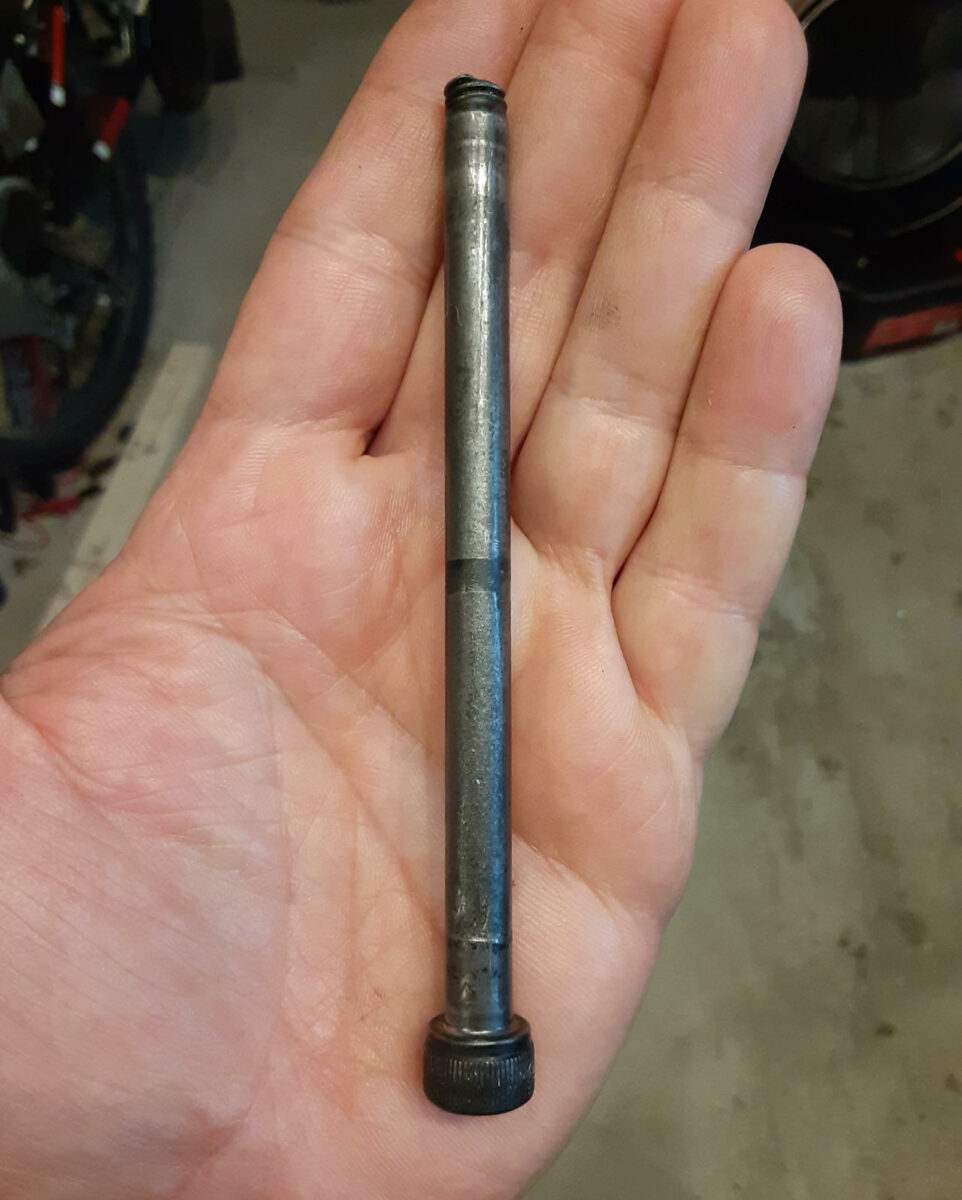
Well, I replaced the remaining and the broken stock Boom Vader motor mount bolts, and now I want to make my Boom Vader Motor Mount Bolts Upgraded to larger bolts.
Now replacing the motor mounting bolts is advice everyone gives. Still, another tier of the advice above is replacing those bolts but upgrading them.
I was told to upgrade my Boom Vader engine mount bolts to thicker ones. Boom Vader, like any Grom Clone motorcycle, seems to have frame mount holes that are very small compared to the engine side mounting bolts.
This gap in the engine side of the mounts means the engine bounces around on the smaller motor mount bolts, which leads to more engine vibration and an uncomfortable ride. The bike is ‘buzzy’ sometimes, but I guessed it’s because I operate it at very high RPMs.
Well, I failed to follow the advice to change my engine mounting bolts, but I have the opportunity to upgrade these bolts. Something I cover in my hind-sight post Boom Vader Reliability Upgrade Parts List.
Boom Vader Motor Mount Bolts Upgrade Plan:
This engine mount upgrade is one of the most straightforward plans: remove existing bolts, drill bigger holes, and install larger bolts. Ta-Dah!
How I Planned My Motor Mount Bolts Upgrade.
To get ready for the upgrade, I needed parts. I have to say, rather than hunt around for replacement parts, I found it convenient to order the parts.
I went online to Lowes.com and ordered my parts, the bolts, washers, nuts, and a longer 3/8th inch drill bit.
Note I ordered washers but did NOT use them. The plan is to return them.
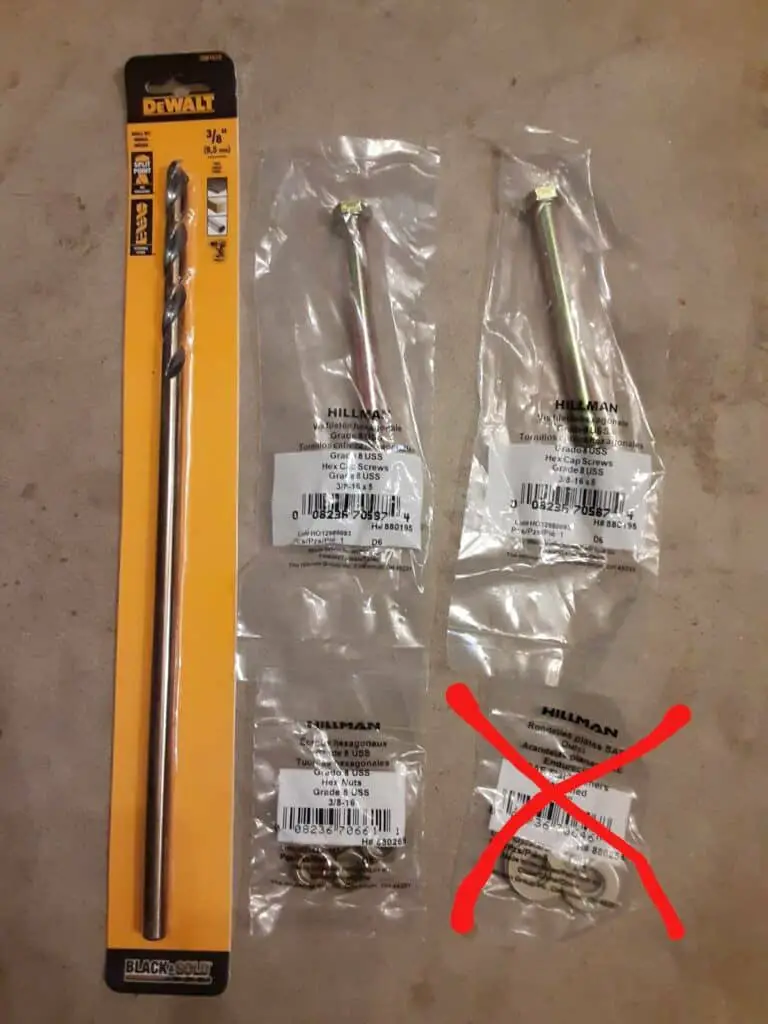
What Parts I Ordered:
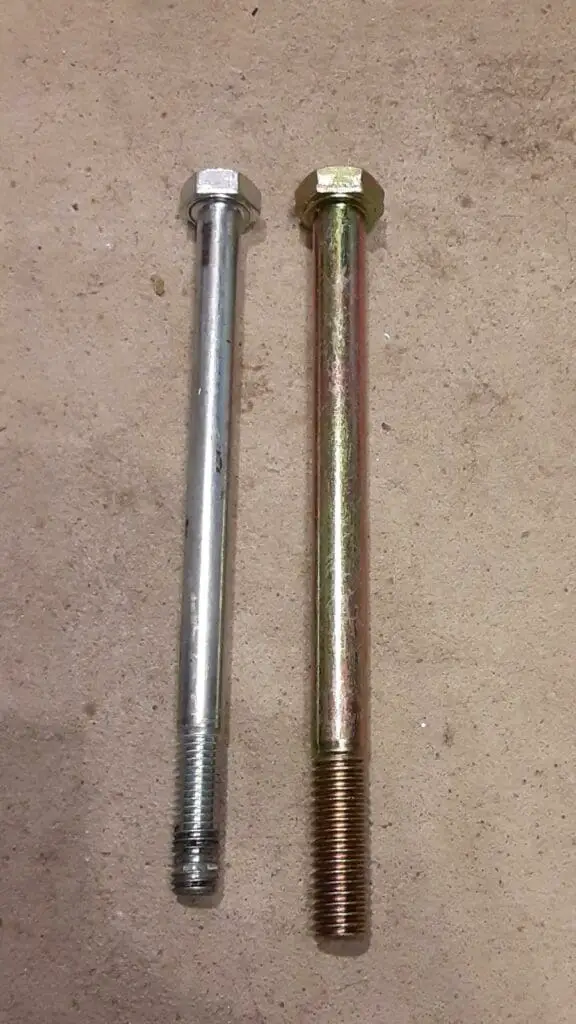
- Two: 3/8-in x 5-in Yellow Dichromate Coarse Thread Hex Bolt
- One: 3/8-in x 16 Yellow Zinc Steel Hex Nut (4-Count)
- One: Black and Gold 3/8-in x 12-in Drill Bit
One: 5-Count 3/8-in Zinc-plated Standard Flat Washers
After reading my list, you are probably asking yourself was the long drill bit necessary. Well, I was wondering the same.
I figured I would drill out the frame engine mount holes and push the new bolt in.
Extra Items I Needed For the Motor Mount’s Upgrade.
Since I was drilling into metal, I flashed back to my shop classes in public school. Drilling metal can generate a lot of heat, and our goal is to cut through the metal, not burn it.
So drilling oil is essential. I used my go-to motorcycle oil( FAQ: Boom Vader Oil Type ) and kept putting a little oil on the drill bit as I drilled. Reusing common items is the Chonda way of saving money.
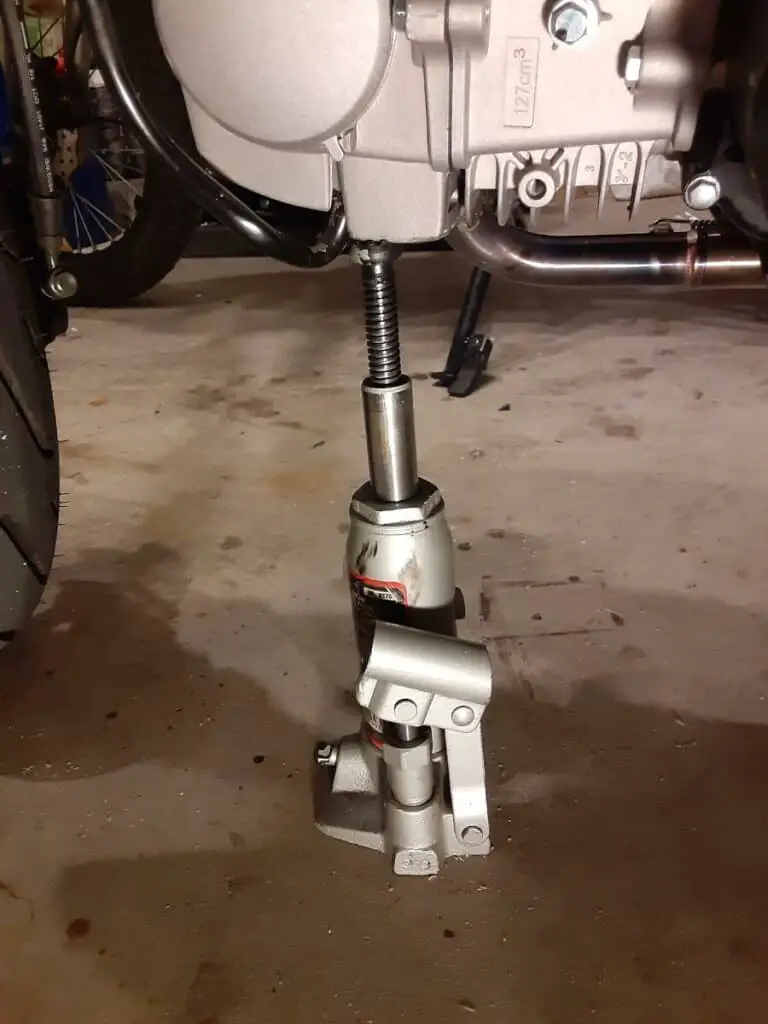
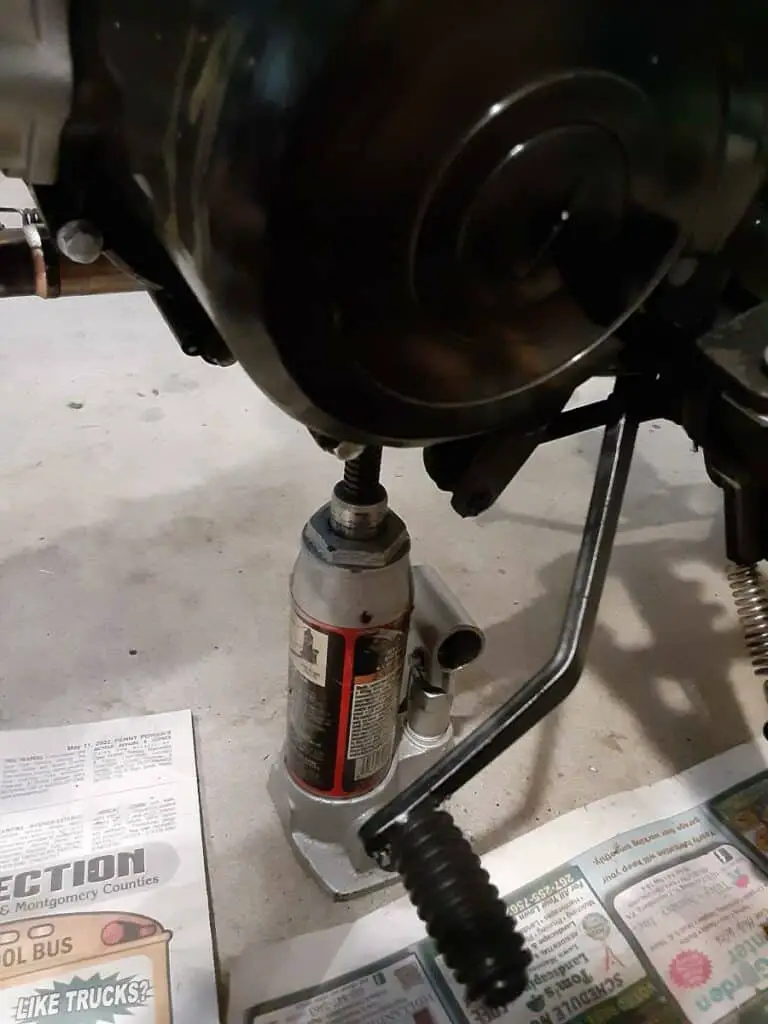
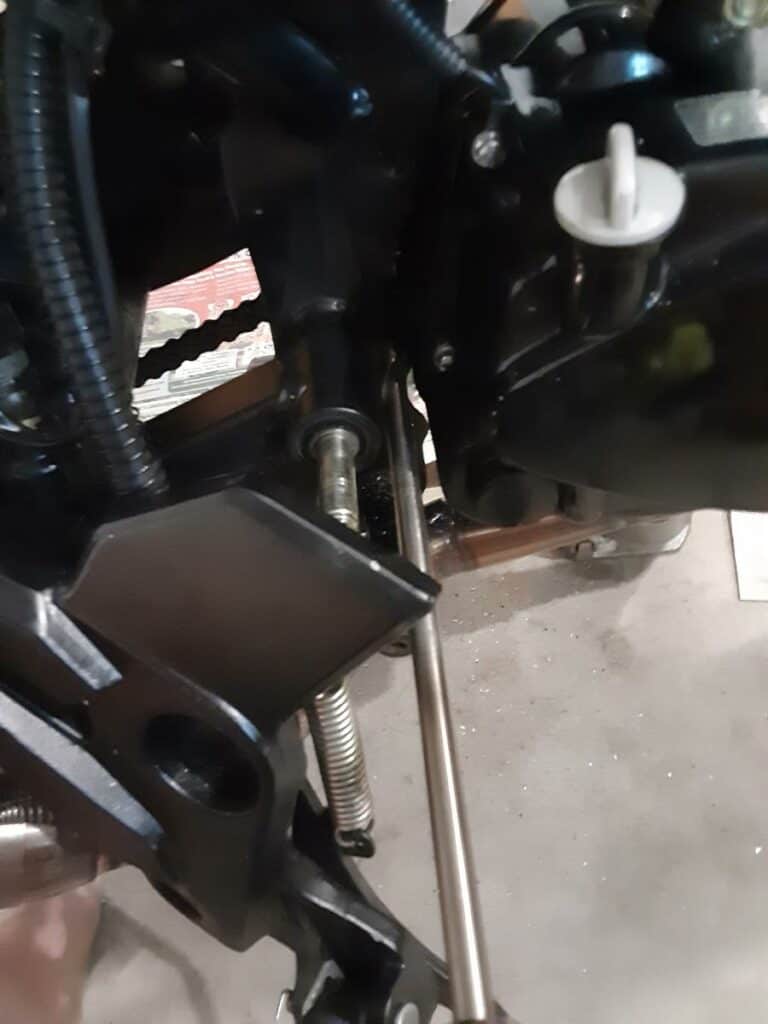
Another item I had to use because I was working alone was a bottle jack. I used the bottle jack to gentile lift the motor in ways that kept the motor mount holes(engine side and frame side) aligned.
I did NOT use a lever or handle in pumping up the bottle jack. I used my hand to move the piston up and down and move the jack around to align the holes carefully.
Motorcycle Safety First!!!
I am working under a gas tank with a tiny motorcycle that can be easily pushed over.
I followed general shop safety techniques ( FAQ: Motorcycle Garage Safety Rules ) and ensured I was wearing safety glasses( Safety Glasses With Readers. ).
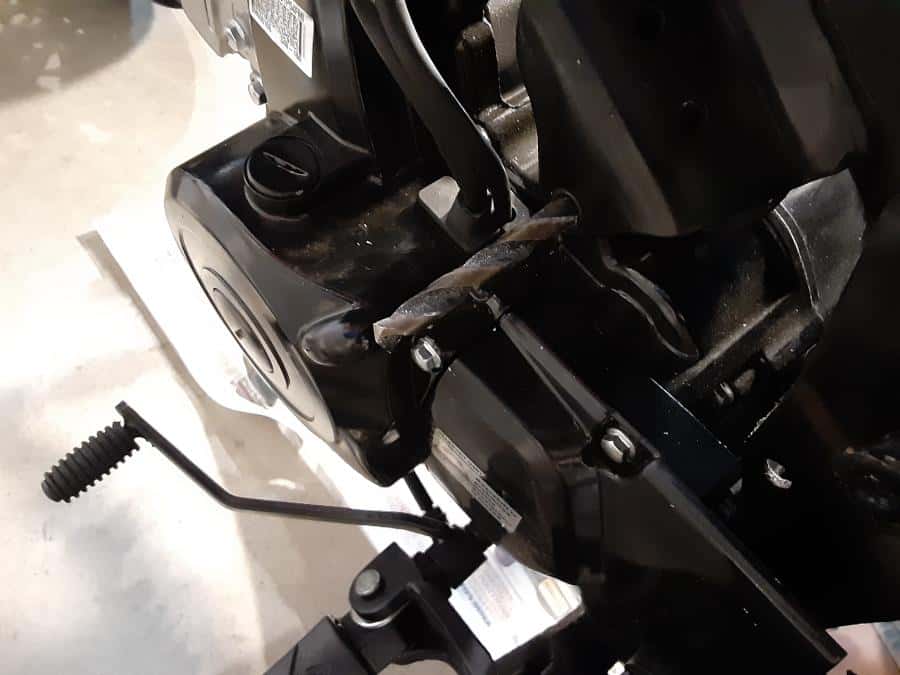
Steps To Drill Out The Upper Motor Mount Holes.
1.- Prep Upper Mount.
I removed the nut(s) on the right side of the bike and positioned the bottle jack so that the bolt was slid back(and the drill bit advanced); the weight of the front of the engine remained on the jack, not the drill bit.
2.- Removing The Old Engine Bolt.
My goal was the keep the bolt in as long as possible, allowing the jack and bolt to support the engine, not the bit. So as I advanced the drill, I pulled the bolt out.
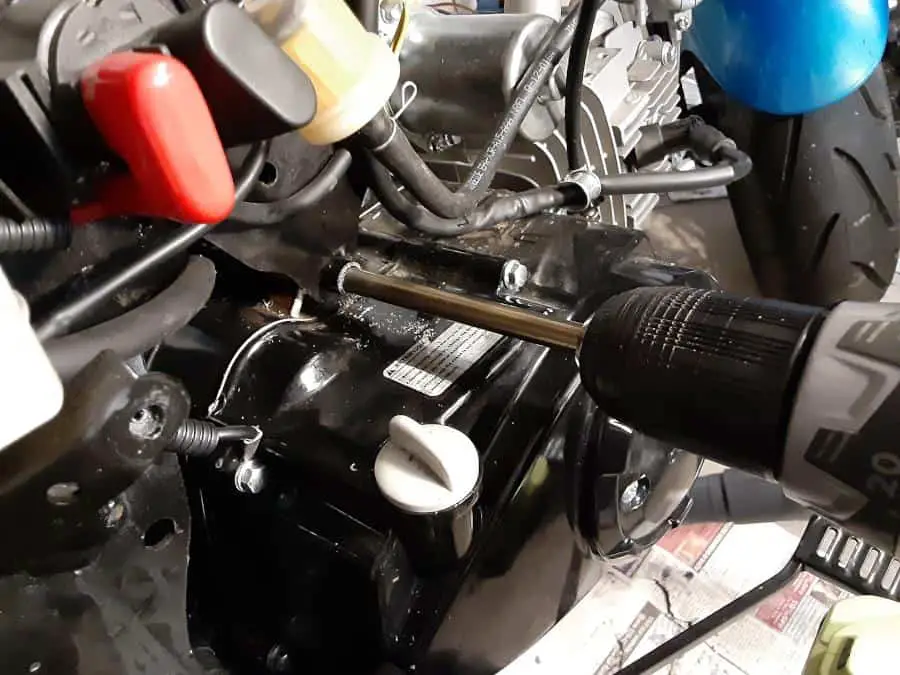
3.- Drilling The Motor Mount Holes.
With a well-oiled drill bit, I centered the drill onto the existing bike frame hole and slowly drilled.
The sad thing is the drill bit made little work of drilling through the steel portion of the motor mount(bike frame part), which saddens me.
Continued drilling as the bit made its way through the engine section of the motor mount. To my surprise, I had more material being removed than expected.
I thought the mount’s engine side holes were already about 3/8ths in diameter. I was wrong with this upper mount, but the drill bit moved forward quickly.
Soon I advanced the drill bit so far. The bolt was completely removed. I peaked in the left side of the upper motor mount hole, and there was still good alignment. So there is no need to adjust the bottle jack.
I advanced the drill bit till the bit exited the left side of the bike. I allowed the drill bit to rotate to help clean out the hole, removing as much loose material as possible.
Clean up as much as possible. Loose metal shavings can harm your engine, especially how close they are to the oil fill cap. I used a vacuum to clean up as I went.
4.- Advancing The New Motor Mount Bolt.
As I withdrew the drill bit, I inserted and advanced the new engine mount bolt.
5.- Securing The New Motor Mount Bolt.
Now I noticed with the original motor mount bolt repair( Replaced Boom Vader Motor Mount Bolts! ), the upper bolt stuck out more threads than the lower mount bolt.
I used this to my advantage.
I installed and torqued a nut onto the bolt using a thread locker. Since more threads were showing, I applied a second nut(with a thread locker) and torqued this bolt.

Now with two bolts, I am sure not to have the upper mount come loose, and it’s an early warning if something is wrong.
6.- Clean up.
I wiped down all the surfaces trying to remove as much dirt and metal shavings as possible.
And now, this part of the project is complete.
Steps I Did To Drill Out The Lower Motor Mount’s Holes.
To warn you, after completing the upper motor mount upgrade, I thought this was an easy-peasy motorcycle upgrade. The lower motor mount, the one that initially broke( Broke A Motorcycle Motor Mount Bolt ), will require additional steps. Be prepared to get a little dirty.
1.- Prep Lower Motor Mount.
The bottle jack was still staged to handle the engine mount hole alignment and prevent the drill bit’s weight. So this is a check.
Getting access to the bolt and having room to position the drill bit to follow the original bolt channel took a few extra steps.
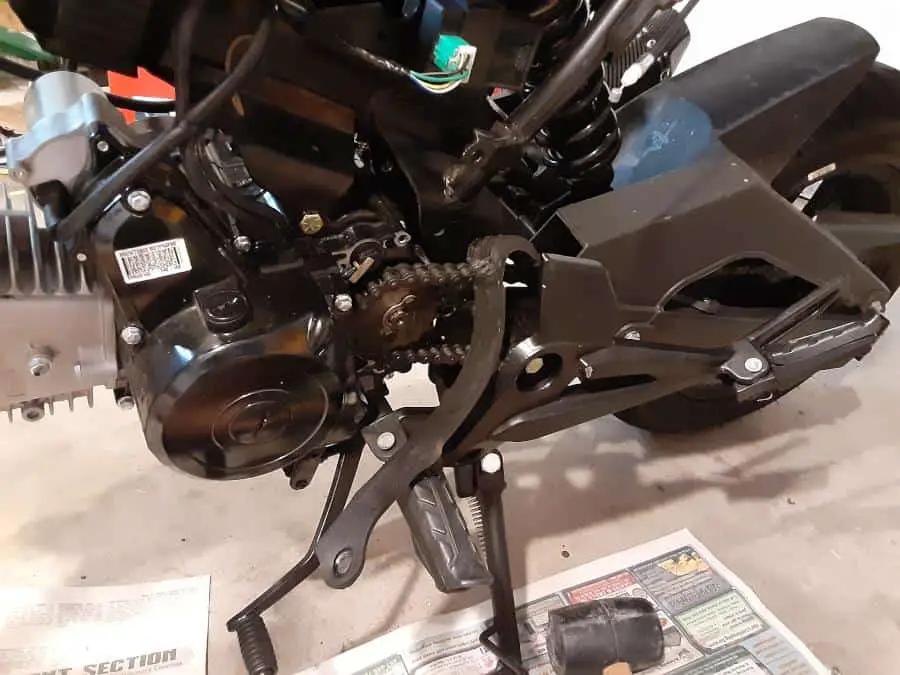
On the left side:
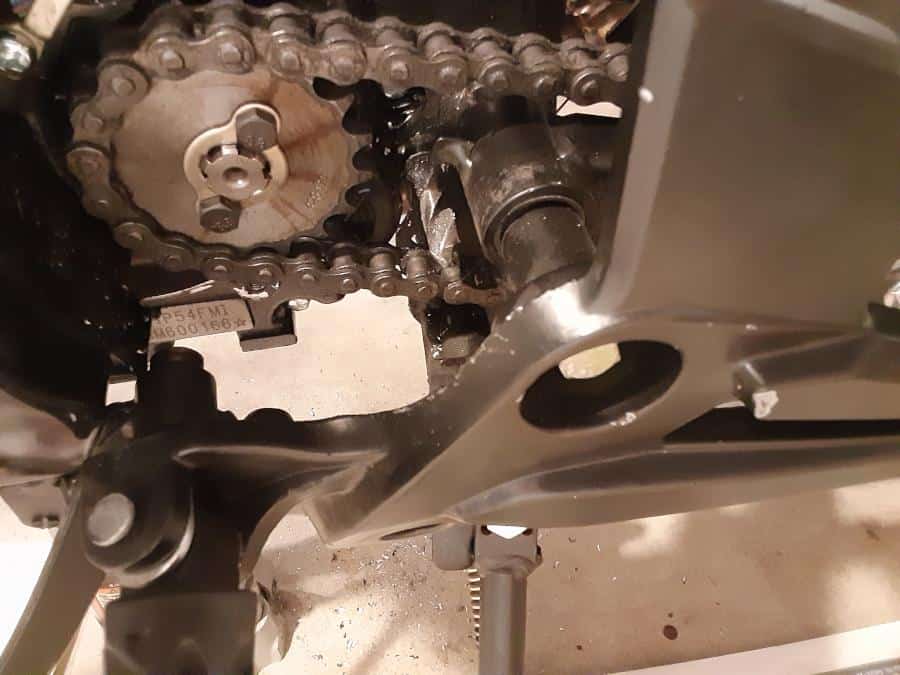
- Remove the front sprocket cover.
- Loosen and remove the swing-arm nut (the nut is on the right side of the bike) and the lower rear set bolt(it looks like it goes into the kickstand).
- Rotate(counter-clockwise) the rear set to create more room to access the lower motor mount bolt nut.
- Remove the swing-arm chain guard lower section and slip over to create more room.
On the Right Side:
- Remove the motor mount nut.
- Altogether remove the right rear set(take off the lower bolt, pull off the rear set off the swing arm bolt, and place it to the side).
Now you access the lower mount bolt.

2.- Removing The Lower Engine Mount Bolt.
My goal again was to keep the motor mount bolt in the hole as long as possible as I advanced the drill bit. However, due to space issues, the bolt was removed from the right side, and I wanted to drill from the right side.
What I did was use the former upper motor mount bolt, and using it, I pushed out the lower mounting bolt—leaving the new bolt in the hole.
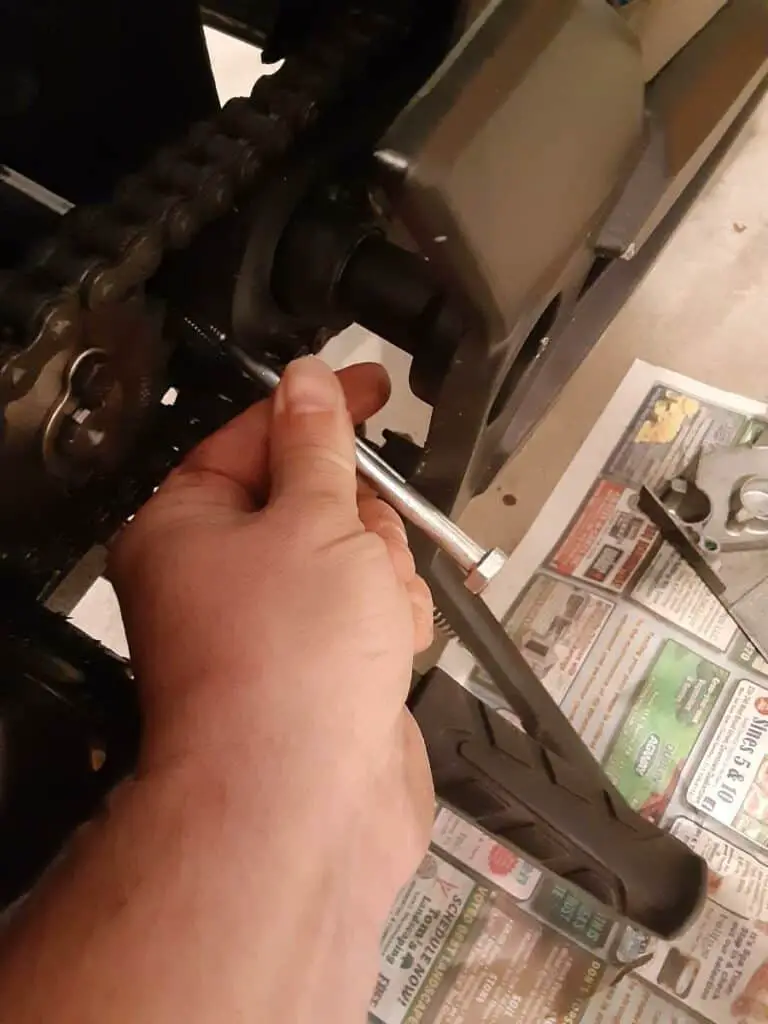
As I drill from the bike’s right side, I can now remove the mounting bolt from the bike’s left side as the drill bit advances.
3.- Drilling A Larger Lower Engine Mount Bolt.
With a well-oiled drill bit, I centered the drill onto the existing bike frame hole and slowly drilled.
The sad thing is, again, the drill bit made little work of drilling through the steel portion of the engine mount(bike frame part), which still saddens me.
Continued drilling as the bit made its way through the engine section of the engine mount.
This time I had very little engine material being drilled through. I believe this lower engine mount hole was already larger. It makes sense, considering how many people, including me, break this engine mount bolt.
Maybe the engine was initially designed to have a thicker bolt in this engine mount.
The drill bit moved forward quickly, and I only paused as I hit the steel parts of the engine mount(the bike frame side).
Soon I advanced the drill bit so far. The bolt was completely removed. I peaked in the left side of the upper engine mount hole, and there was still good alignment. So there is no need to adjust the bottle jack.
I advanced the drill bit till the bit exited the left side of the bike. I allowed the drill bit to rotate to help clean out the hole, removing as much loose material as possible.
Clean up as much as possible. Loose metal shavings can harm your engine, especially how close they are to the oil fill cap. I used a vacuum to clean up as I went.
4.- The New Motor Mount Bolt.
I drilled from the right side, and the original engine mounting bolt was inserted from the right side.
I noticed there was very little resistance moving the drill. So the engine weight was being bared by the bottle jack and the upper mount.
I pulled the drill bit out from the right side. Then insert the new engine mounting bolt from the right side.
In hindsight, I could have inserted the bolt from the left side, but the original bolt was installed in this orientation, so I kept it that way. If you change this, please comment below.
5.- Securing The New Motor Mount Bolt.
I installed and torqued a nut onto the bolt using a thread locker fluid.
6.- Replacing removed parts.
- Reinstalled swing arm chain guard. Notice I needed a little pressure to reposition it since the SAE bolts I ordered to be long enough were a little too long. The bolt-threaded area blocked a portion of this swing-arm chain guard. But, it did fit with some persuasion.
- Rotated back into position and secured the left side rear set with lower bolt(near kickstand).
- Reinstalled the right side rear set and swing arm bolt nut, again thread locker)
- Reinstalled front sprocket cover, can you guess? With thread locker again.
7.- Clean up.
I wiped down all the surfaces trying to remove as much dirt and metal shavings as possible.
And now, the project is complete.
Test Ride After Motor Mounts Upgrade.
I feel some of you will say this is subjective or even not real, but the bike feels better.
The engine feels ‘tighter.’ The amount of vibration reaching the handlebars appears much less.
I still feel the vibration on the foot pegs, but it seems less.
In The Future, Boom Vader Motor Mount Bolts Upgraded And Done!
I will continue testing this new improvement and share my results with you.
I feel these new, improved, larger engine mount bolts will be much stronger than the previous one, including the stock ones, and this upgrade was way overdue.
Also, I am considering installing the Boom Vader 3rd motor mount. I feel this upgrade is the 125cc engine mounting bolts I need for now, and later, I might install the Grom Clone 3rd motor mount. It’s just not time yet.
Ride Safe, Ride Fun!
Click To See My Recommended
Boom Vader Gen 2 Upgrades

Hi I’m Tom, A New Motorcycle Rider and Blog Author.
I am a new rider(Pa Learners Permit at the end of 2020, and I received a Pa Motorcycle License in 2021 after passing a Motorcycle Safety Course).
I bought my first motorcycle, a TaoTao TBR7, at the beginning of 2021 and have been doing upgrades on that motorcycle since.
I added to my motorcycle collection by buying a Boom Vader Gen 2 in 2022, and that Grom-Clone motorcycle has been upgraded by me as well.
I continue to ride my Boom Vader Gen 2 motorcycle as well as my TaoTao TBR7 dual-sport bike.
Read more on my About Me page.
Fun Fact: I’ve only been on one group ride.

How are the larger mount bolts holding up?