
I only own a TaoTao TBR7, but I used oil cooler examples from information shared by Hawk 250 owners. The point is, other fellow Chonda owners can use the information here. I hope you all get value out of this post. Now on to my TBR7’s new motorcycle oil cooler installation.
Note: I had a plain view of the steps I needed to take to install the oil cooler on my TaoTao TBR7 motorcycle, but as I said, they were basic steps. These oil cooler installation steps should apply to fellow Chonda bikes(Hawk 250, Brozz 250, Raven 250, etc.)
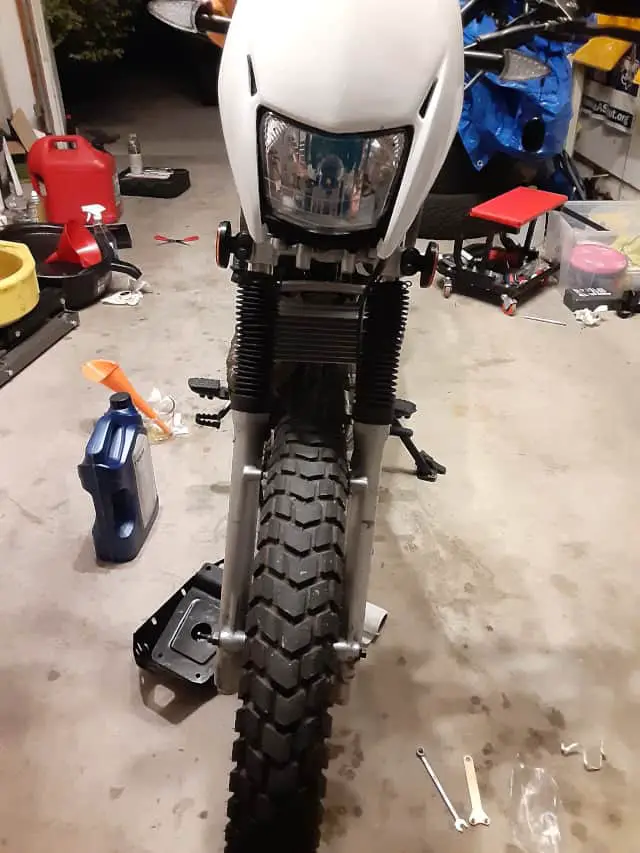
Also note, I removed the front fender to create space for the oil cooler installation( TaoTao TBR7 Front Fender Reinstall. ). Many people run their Chonda’s without the stock front fender, so I didn’t include it in the steps; I just wanted to mention it here. If you have the original front fender, you too should remove it to make the oil cooler installation easier.
The Oil Cooler Upgraded My TBR7 Motorcycle With:
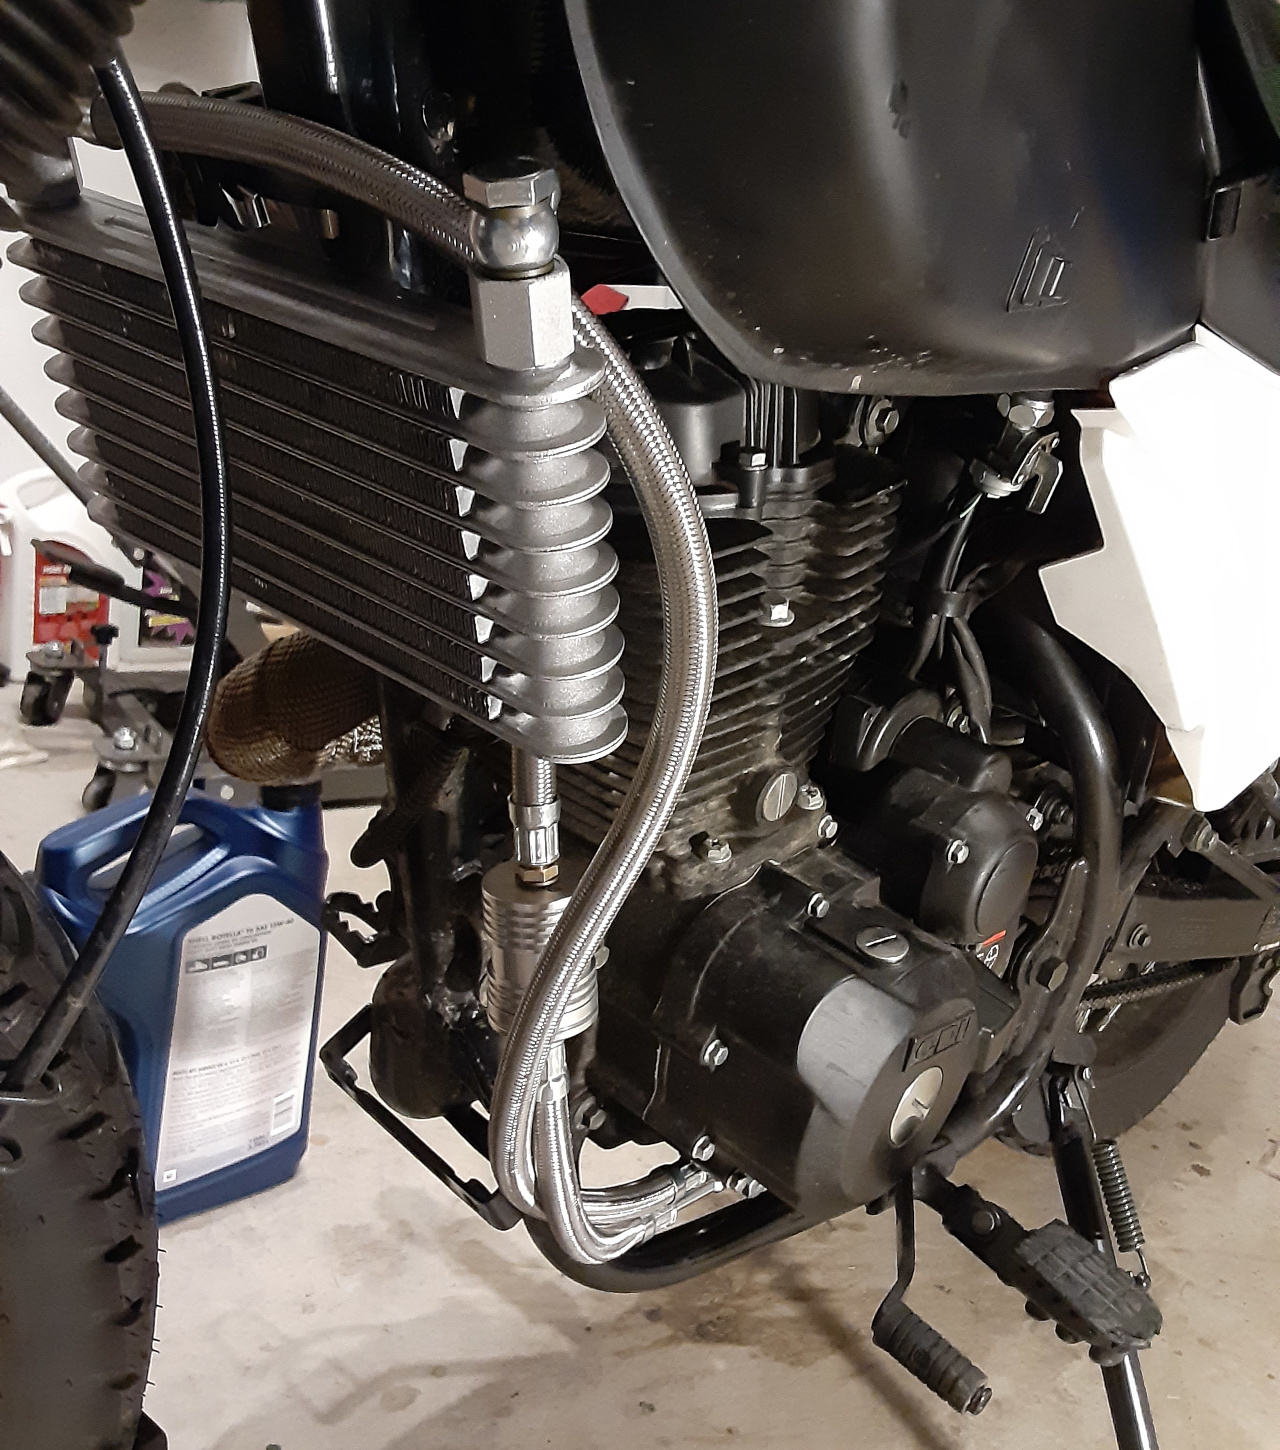
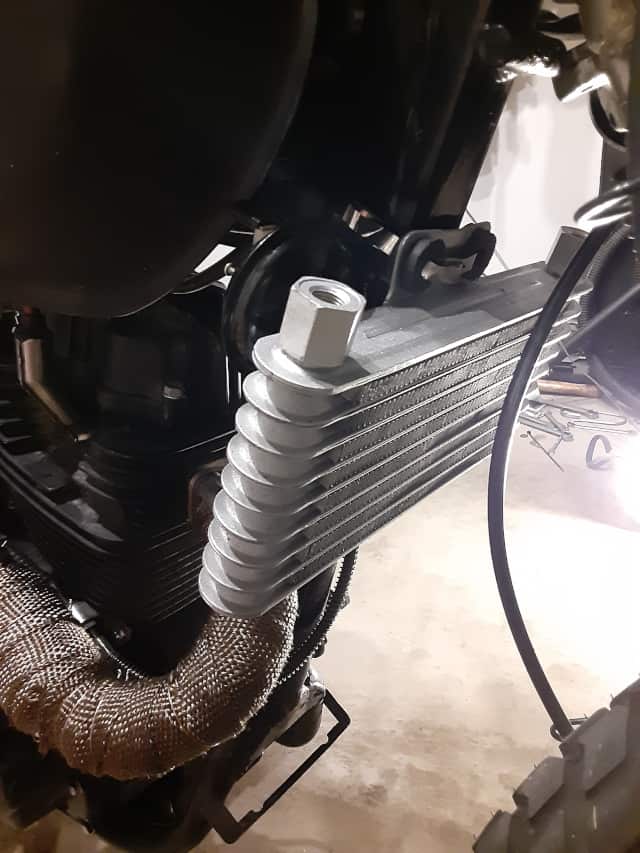
For clarity, this is the motorcycle engine oil cooler I ordered for my TaoTao TBR7 motorcycle. It’s a larger version, but due to continuously pushing my TBR7 with performance upgrades, I wanted to ensure the best oil conditions between oil changes for my motorcycle. Check it out. There are smaller versions available as well.
Author’s Notice: This page contains affiliate links, for which I may earn a commission by their use. As an Amazon Associate, I earn from qualifying Amazon purchases.
Click For: Current Motorcycle Oil Cooler Prices.
Now are the more detailed steps to my installation process:
Remember Safety First: (FAQ: Motorcycle Garage Safety Rules) and have your tools collected, staged and within reach.
FYI: Building My List of Must-Have Tools For Motorcycle Owners
My Steps For Oil Cooler Installation:
1- Prep: Check Installation Parts Inventory.
The instructions are in Chinese, and I couldn’t find an official parts list. Here are the instructions that came with the oil cooler.
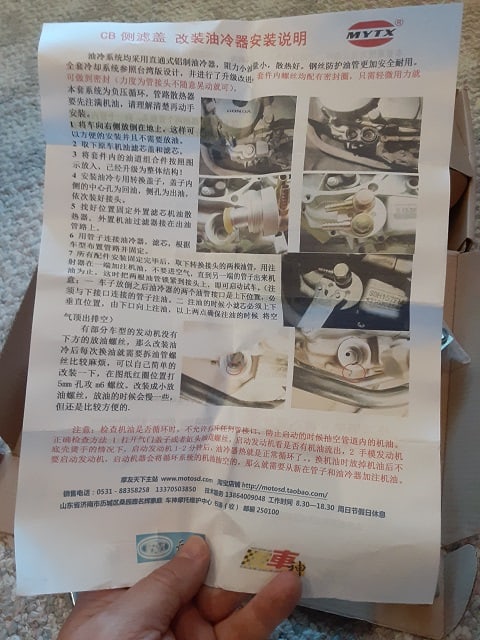
So this is what I found in my motorcycle oil cooler shipment box.
- Three braided oil lines.
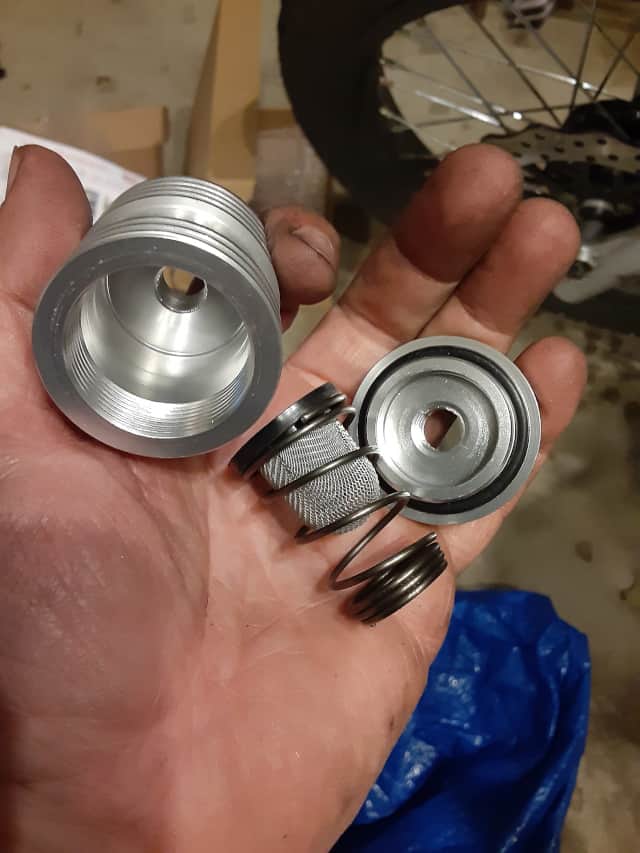
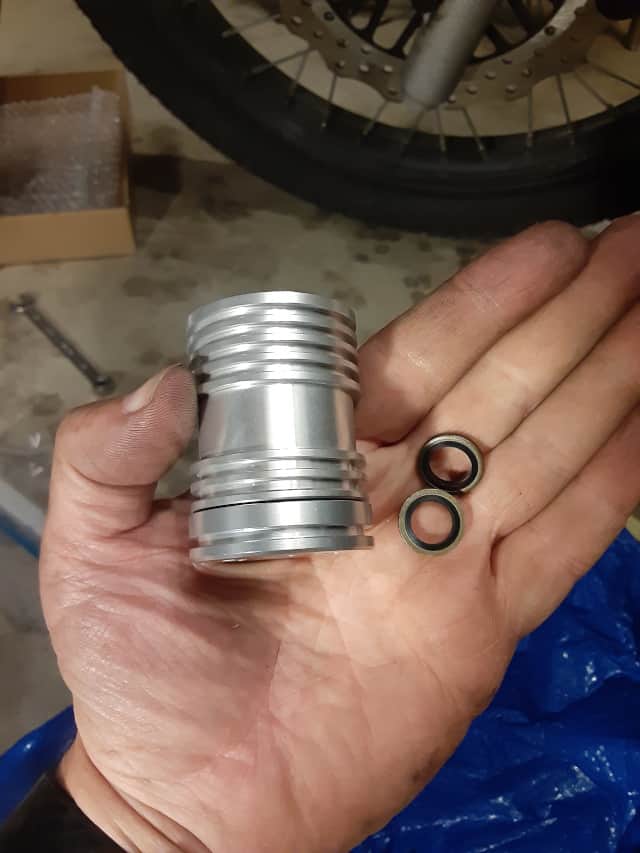
- One two-piece oil screen housing(looks like a can when put together).
- One Oil screen and Spring(looks like original oil screen and spring in bike).
- Six O-rings(brass and rubber washers).
- One spanner wrench.
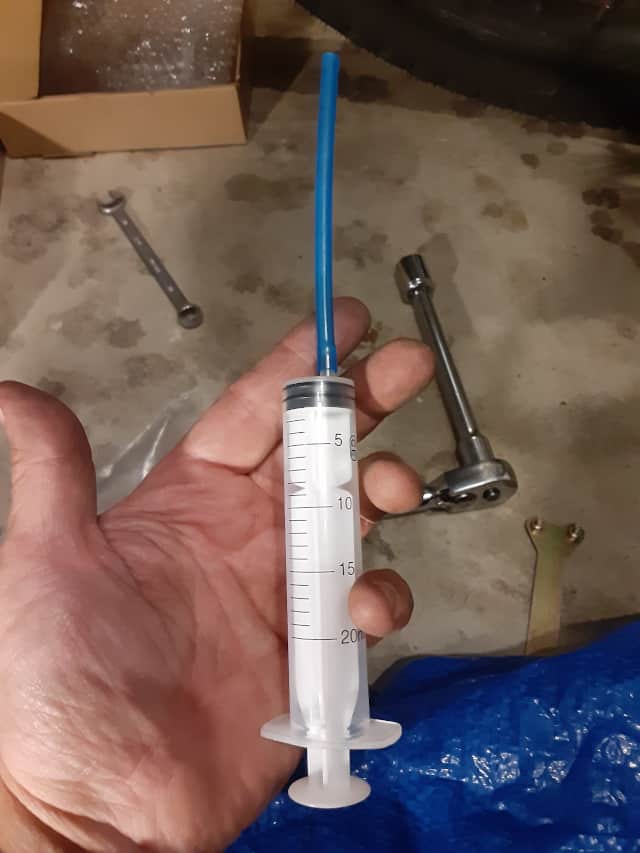
- One syringe and a tiny tube.
- Two sets of clamps for mounting the radiator.
I wish I had an official parts list, so I hope this list helps you out.
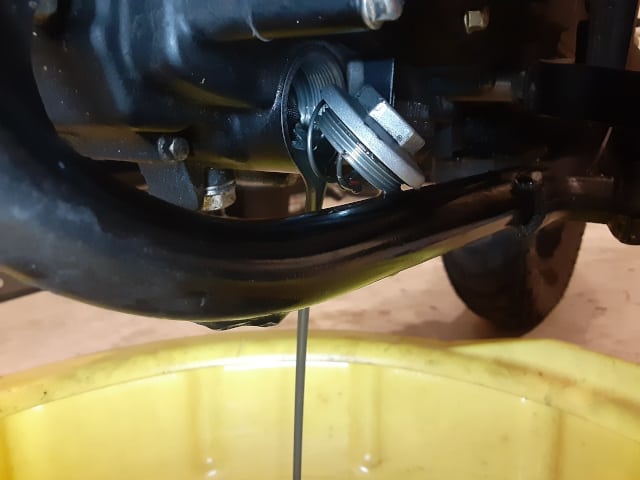
2- Oil Cooler Prep: Drain Engine Oil.
As I posted in the past, I drain my oil out of the strainer housing, which is excellent for this upgrade since I have to remove the old screen strainer, spring, and cap. My Previous Post: Steps I Take To Do My TBR7 Oil Changes.
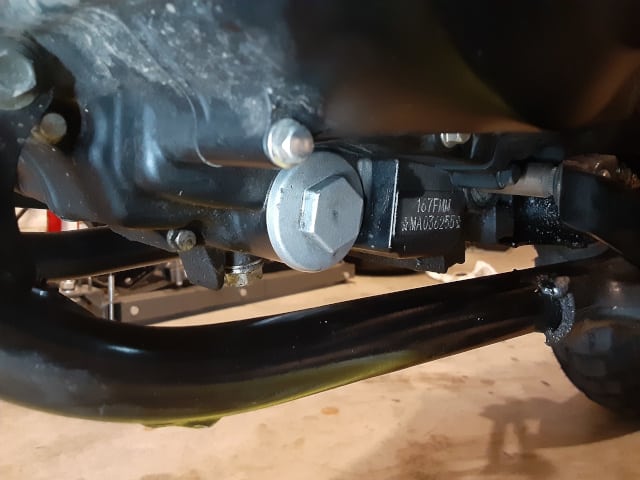
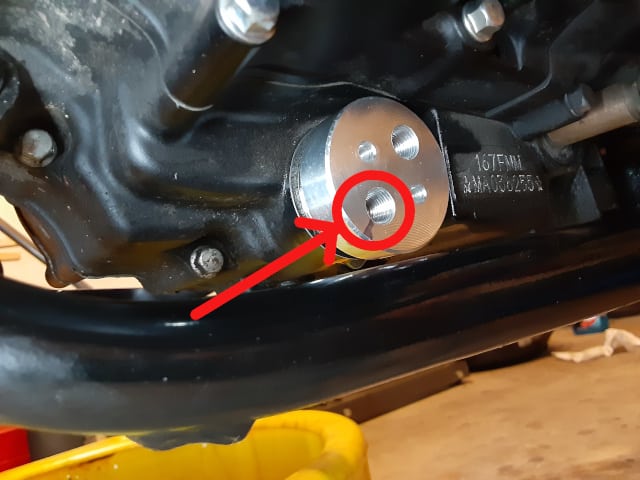
3.- Oil Lines Prep: Mark oil flow through the oil flow hub.
The original oil strainer pointed out(the wire strainer bowed outward) and collected debris only on one side. Based on this pattern, oil flows out of this hole.
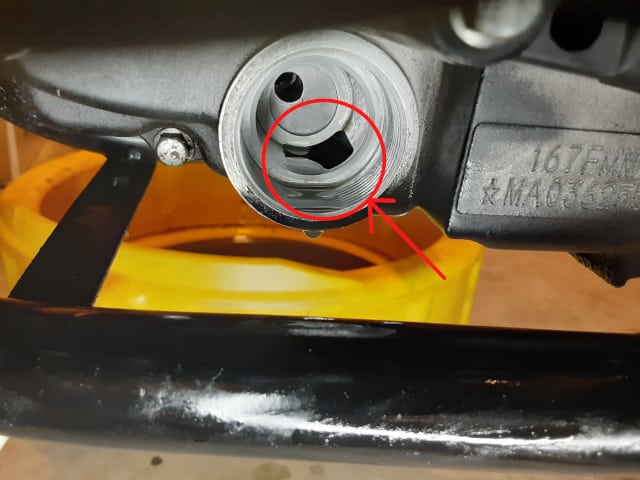
Oil would flow through the oil strainer and out this hole.
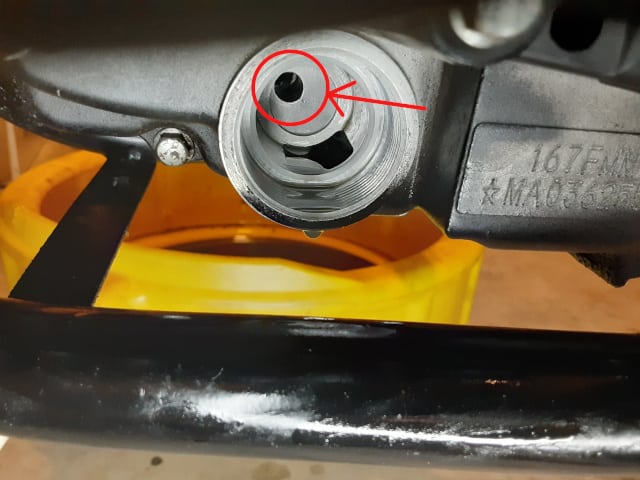
So I marked the port on the oil hub that lined up with the side of the strainer housing, the outlet. This way, I can use the engine oil outlet(cooler inlet flow) line to go to the new oil strainer first and hopefully keep the oil cooler clear of debris.
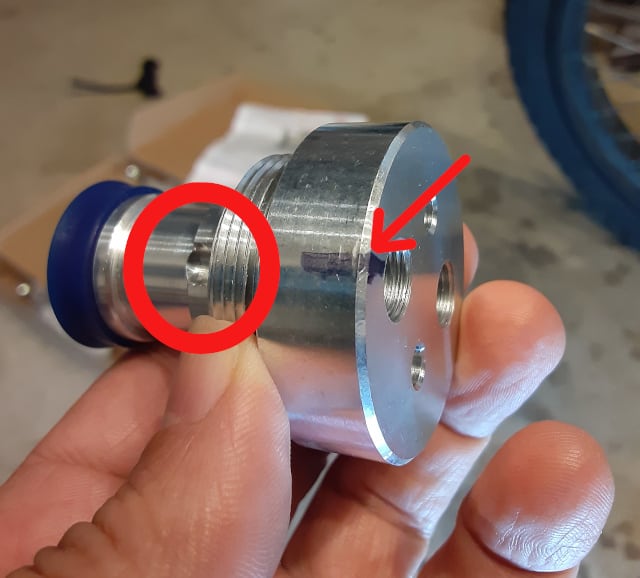
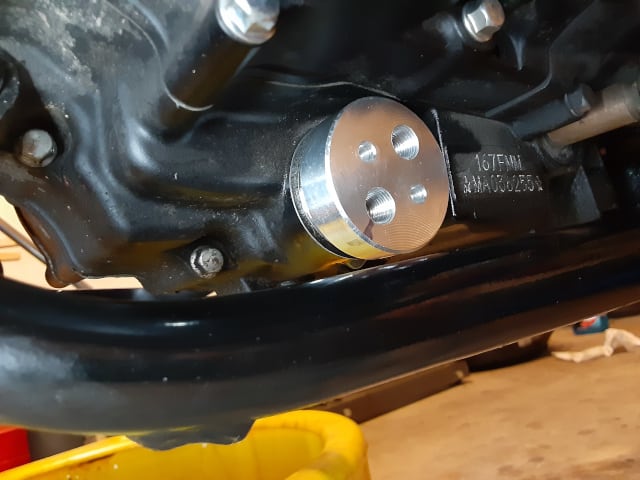
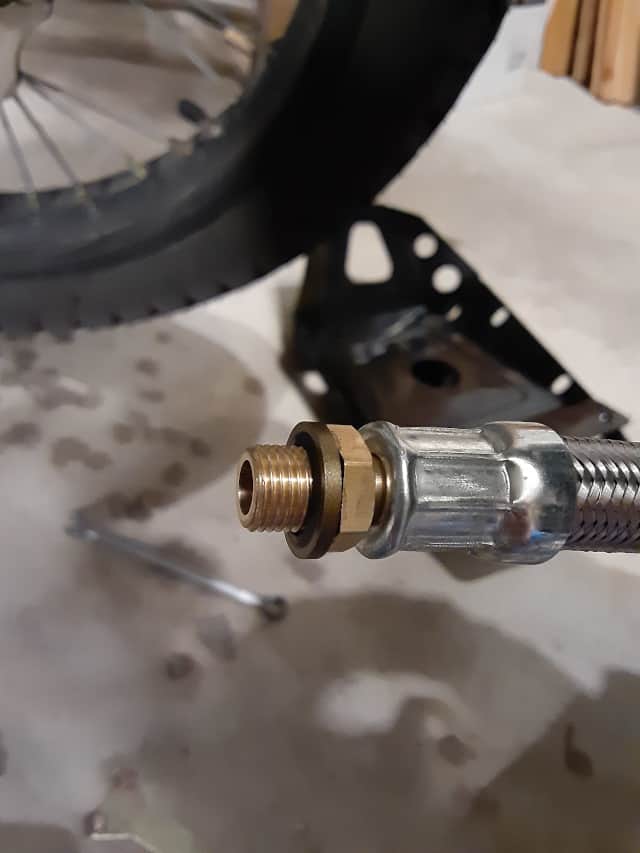
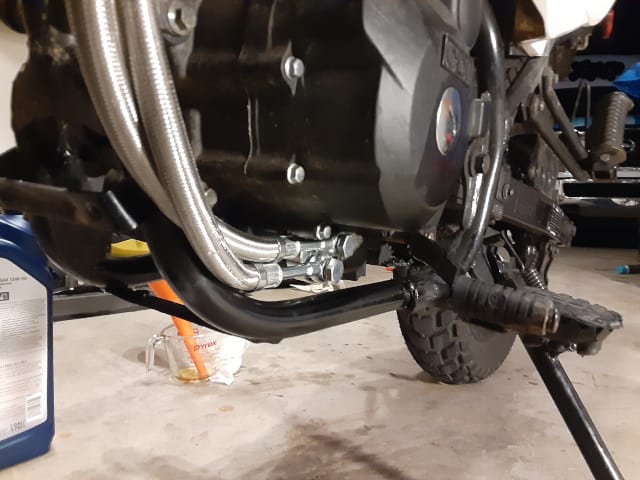
4.- Oil Cooler Installation: Install The Oil Flow Hub.
4a.-I first applied clean oil to all the surfaces and o-ring.

4b.-I used the provided tool to turn the oil flow hub until it was nicely seated. I tried my best to get the holes to line up top and bottom, so no oil line had to cross over the other.

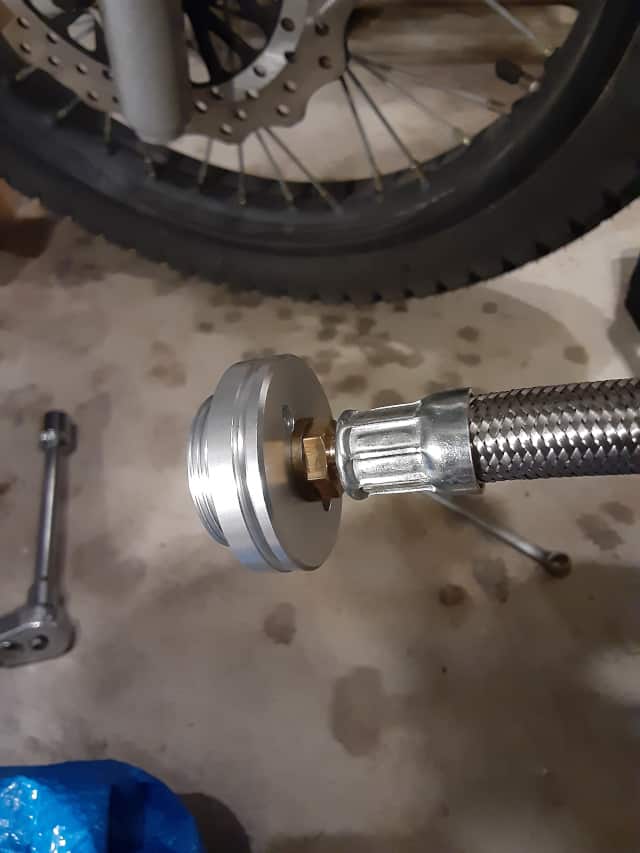
5.- Oil Cooler Strainer Line Installation: Setup Oil Line and Size Cooler Mount.
5a.- Place the oil strainer and spring into the oil strainer housing.
5b.- Connect The Oil Lines.
Take the two shortest oil lines and screw the straight connections into the oil strainer. My goal was to have the oil flow through the oil strainer match the original oil strainer. The oil flow would pass over the outside of the metal screen cup, through the oil screen cup, and then out the center of the oil strainer.
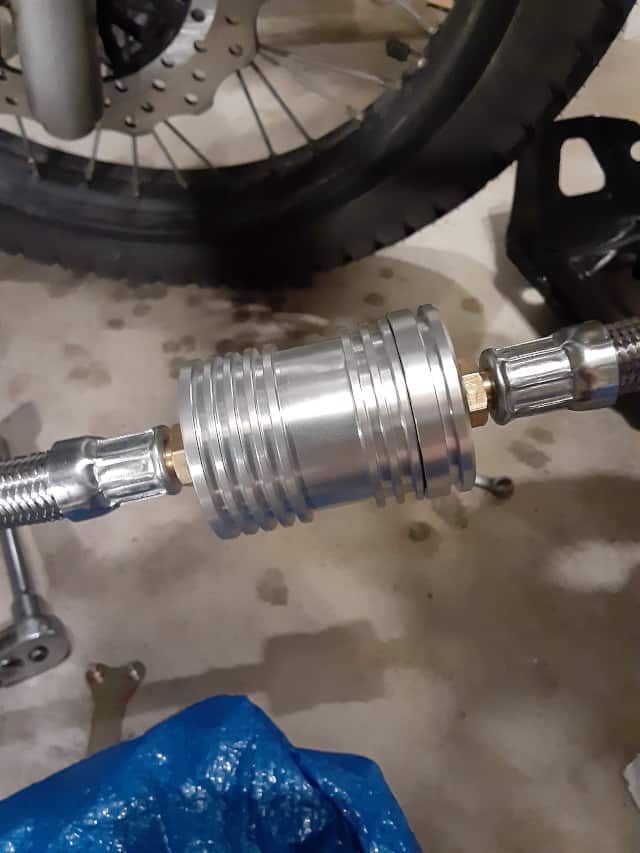
Note: I completed building the new oil strainer(screen, spring, and closed the housing). This completed strainer helped me conceptualize setting up the oil flow to the radiator. I did have to take the new strainer apart to attach the new oil lines and verify I was properly installing the new strainer and its shorter oil lines. So you will see photos with it taken apart, but for my understanding, you can keep the new oil strainer you just built together.
This oil flow plan of mine means the larger oil strainer housing(big metal cup) will be on top(further from engine oil flow), and the shorter piece(metal cap) will be on the bottom(closer to engine).
Moment to think about your lines. The bottom port of the oil flow hub(what was screwed into the old strainer housing) is where the oil is coming out. This port is where the oil is coming from, and going to the new oil strainer is coming from. Since the lower port doesn’t have the oil line making a sharp turn upward, the angled banjo connection(looks like a metal loop on the end of the oil line) will go to the lower port.
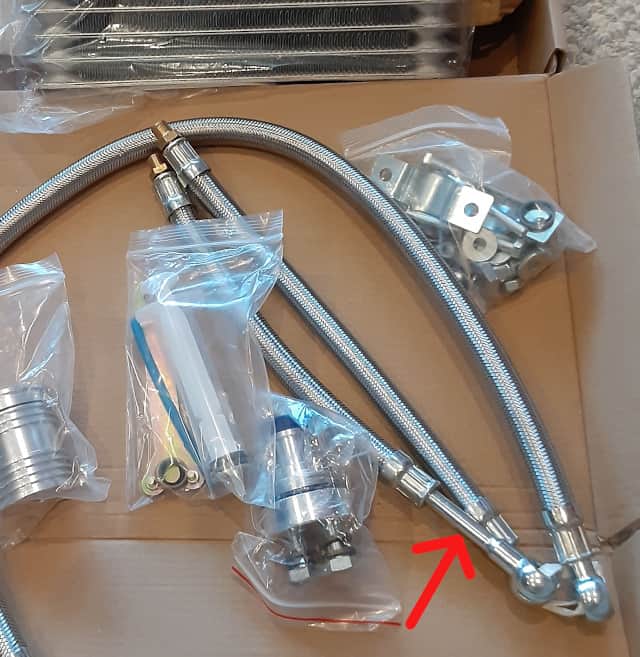
Recap: Of the two shortest oil lines, one had a long solid pipe on end. This longer piped end will go on to the oil flow hub outlet(for my installation, I marked the port with a marker, and it’s the lower port). Meaning, this is the line that oil flows to the new strainer.
The other short oil line will exit the oil strainer and go into the oil cooler’s radiator.
Be sure to install the o-rings(brass/rubber washers) on the ends of the threaded lines into the strainer to prevent leaks.
You can screw all the parts together(like I said, I retook the strainer apart to help visualize what I was doing, if you did so, time to put it all back together). Once all the parts(the two short oil lines and the oil strainer) are together, you use this line to determine the proper mounting position of the oil cooler radiator.
Hold the oil cooler radiator in place, and check if the completed radiator inlet line(line with oil strainer on it) will extend from the radiator inlet to the oil flow hub. If it does, and you like the position of the oil cooler radiator, time to mount the radiator.
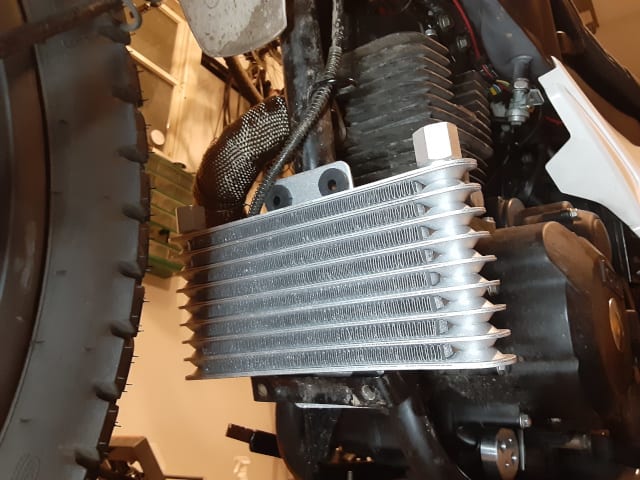
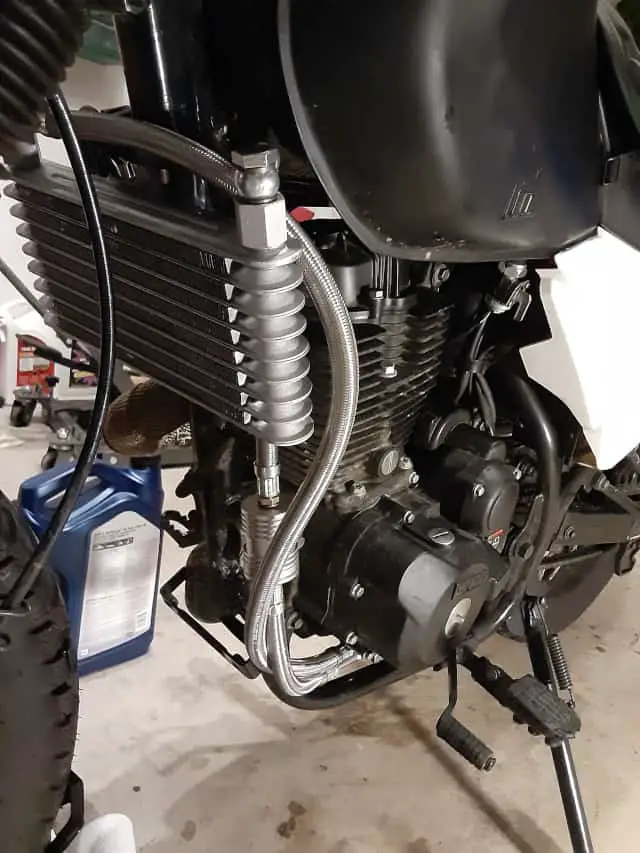
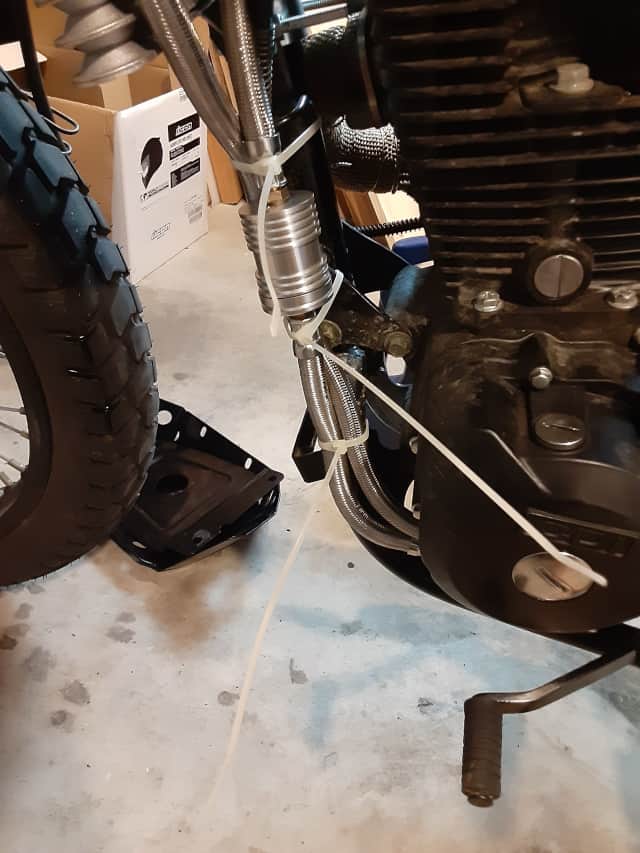
6.- Oil Cooler Installation: Mount The Oil Cooler Radiator.
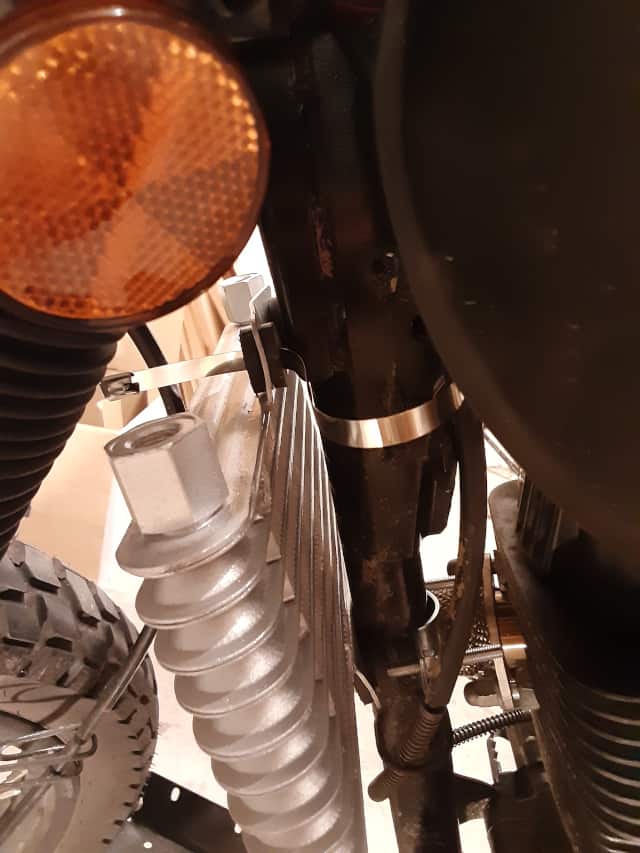
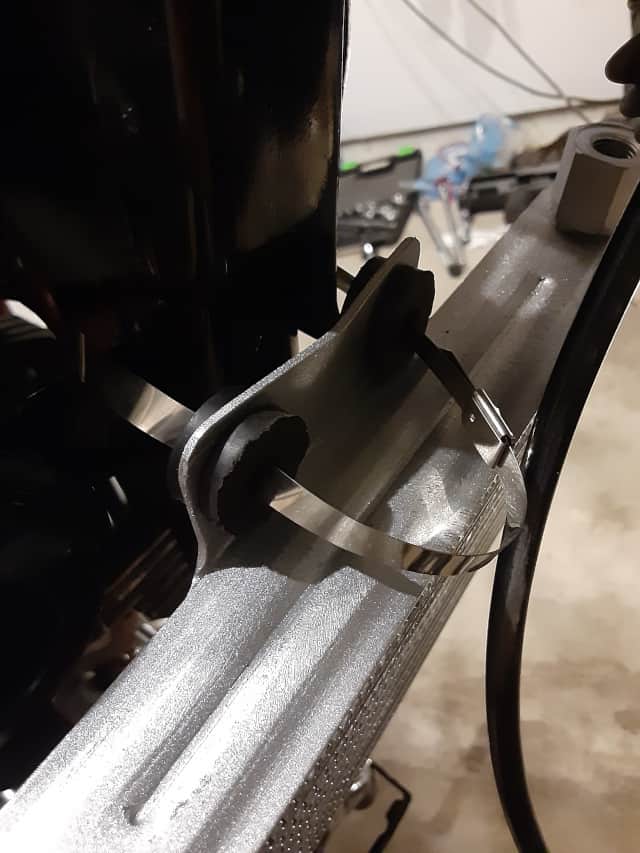
Mounting the oil cooler radiator is where I had problems. As I showed in the earlier picture, I wanted to go low, but it was too low for me. So I opted to mount the radiator higher on the motorcycle, but as you get higher, the motorcycle frame changes. There were welded braces where the upper clamp should go.
I had two sets of radiator mounting clamps that looked like they were designed to be installed on round tubes. As I pointed out, I couldn’t use the upper clamp by mounting the radiator higher. If you select a smaller version of the oil cooler, you might not run into this problem.
I found I had to use a metal wire tie from an earlier exhaust wrap upgrade ( My Motorcycle Exhaust Wrap Installation (TBR7 / Hawk 250 / etc). ) to hold the upper portion of the oil cooler radiator and used a clamp on the bottom part of the radiator mount. Not the most ideal installation, but we Chonda-owners make things work!
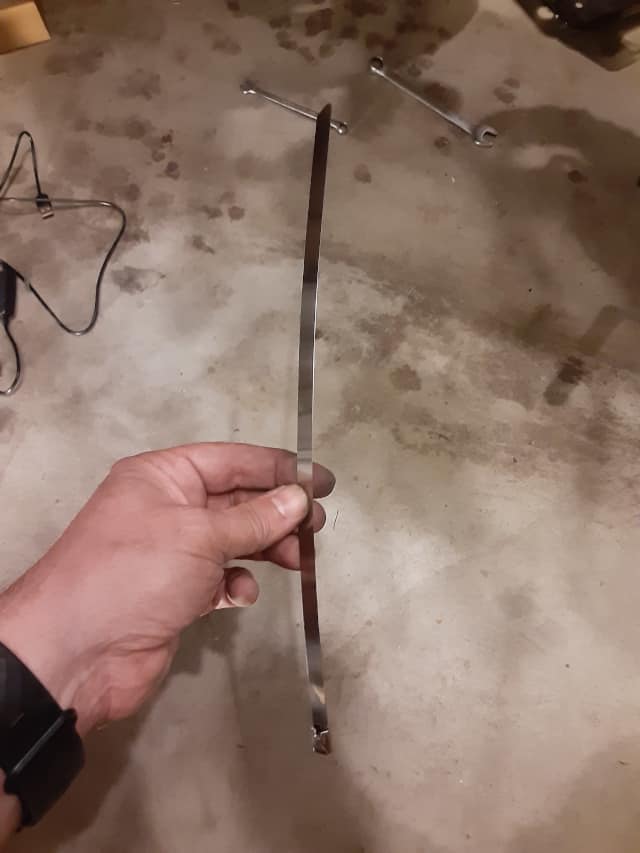
Once the wire tie was tightened, and the lower radiator clamp was installed and tightened, I could move on to the next step.
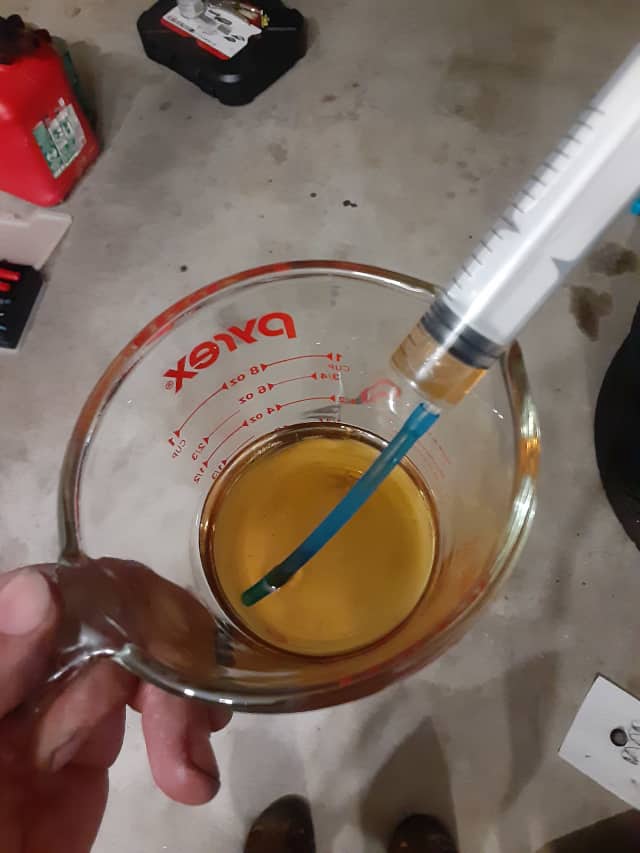
7.- Oil Cooler Prep: Fill Oil Cooler With Oil.
My kit included a weird syringe and tube. I put them together, drew up new oil, and injected it into the radiator.
This step was an excellent idea since the oil cooler was (advertised) 125ml in capacity, which was 1/8 of the engine oil sump capacity. This means it could take a while before the radiator is full and delay oil return to the engine, not a good idea to have no oil flowing in the engine while it’s running.

After I topped off the new radiator, it was time to move on with the next steps in the installation.
8.- Oil Cooler Installation: Install the oil lines.
The oil strainer line for me was shorter than the non-oil strainer line. So I made this line go to the nearest port on the radiator, and this port became my oil cooler radiator’s inlet port.
The longer oil cooler line would go to the remaining oil cooler radiator port, and this port will become my radiator’s outlet port.
The trick to installing these banjo (angled) connections is remembering the o-rings. The brass/rubber washers are like those used when completing the oil strainer/line installation.
One o-ring does below the banjo fitting and above like this:
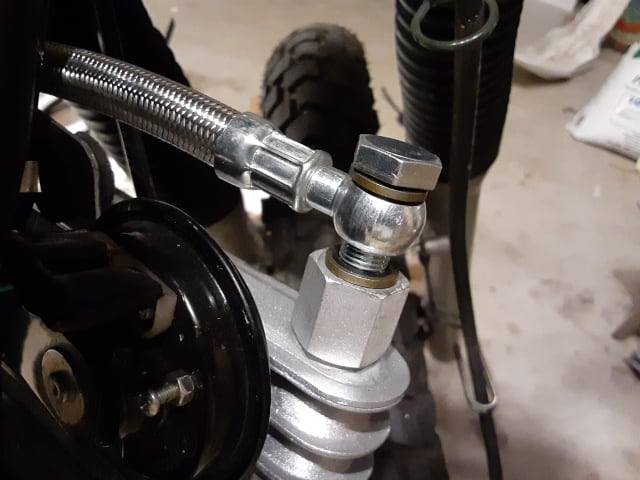
I snugged up all the fittings(, ensuring they were tight and lined up correctly. My marked port on the oil flow hub went into the oil strainer line, and the unmarked oil flow hub received the oil cooler outlet flow line.
Note: I don’t read Chinese; not sure which dialect the instructions are even written in, so I could be sure what torque-specs the fittings were to be tightened to. So I just ‘snugged’ them up. If you have more information, please leave a comment below.
Once all the oil lines were tight, I could move on to the next step.
9.- Oil Cooler Installation Wrap Up: Clean up the oil lines.
I used wire ties to secure the oil lines to the frame. Less stress on the oil line connections, and less likely the lines would be ripped off by being snagged on something.
10.- Oil Cooler Installation Wrap Up: Refill Engine Sump With Oil.
Now you know my best motorcycle oil; see my earlier post: What TBR7 Oil Type Do I Need?, Shell Rotella T6 engine oil. Once you have enough oil, I guess the same amount I use per oil change, 1 quart. You are ready to test your installation.
11.- Oil Cooler Test: Start The Engine.
Start the engine and check for leaks. Focus on the lower, underside areas of the connections and lines since tiny oil leaks will collect there.
12.- Engine Safety Step: Stop The Motorcycle Engine.
After a few minutes of checking for oil leaks, once clear, stop the engine. Recheck the oil level. Initially, the oil lines were empty, and now they should be full, and any space in the radiator that had air in it—top off the oil level.
13.- Oil Cooler Test: Go for a ride!
There is no reason to stay in the garage all day; get out and test your installation. As you ride and the motorcycle warms up, you should notice the oil cooler radiator is getting warm. Hot, in fact, for my motorcycle.
I thought this was a good sign. The radiator is getting hot, which means that oil is flowing through it; fast enough, it’s not exiting the radiator cold, just cooler than when it entered. I was afraid an oil cooler would prevent good oil flow, but these signs led me to believe my fear was incorrect.
Oil Cooler Installation Complete.
Now that I tested the oil cooler, I still feel the heat coming off the engine when I am riding, but I know I am doing more to keep the engine cooler running than I did before.
Do I Still Have Over Heating Problems?
I still am very cautious when riding in stop-and-go traffic, and I will kill the engine if I stop at a long light. The oil cooler only works if the airflow moves over the radiator, so the motorcycle needs to be moving.
Air-Cooled Engine Overheating Symptoms?
The best benefit I noticed is when riding on long higher-speed roads. When I took a highway exit or came to a stop after a long ride, there used to be so much heat built up that I felt the engine was going to overheat immediately. I think the engine doesn’t heat up as much with these longer higher-speed rides with the oil cooler.
I am still concerned about coming to a complete stop and the engine continuously running, but now I don’t panic. I feel shortstops are now OK after a long ride.
What Next?
I will continue to test my work, looking for oil leaks, checking(feeling) the radiator for temperature changes, and seeing how the motorcycle engine behaves. I plan to update you on my progress and hope you check back later.
To all my fellow Chonda owners, I hope I helped you understand what is involved with installing an oil cooler on your motorcycle. Whether a TBR7 like mine or the famous Hawk 250s or a Raven 250 or whatever you are riding. Ride Fun, Ride Safe!
Click To See My Recommended
TBR7 Upgrades
Author’s Notice: This page contains affiliate links, for which I may earn a commission by their use. Also, as an Amazon Associate, I earn from qualifying Amazon purchases.
A great comment made by one of this Blog’s readers asked what oil cooler I used for my TaoTao TBR7. Wow, what a great question!!!! I don’t think I ever linked to the oil cooler I ordered, so here it is:
Click For Oil Cooler Current Prices

Hi I’m Tom, A New Motorcycle Rider and Blog Author.
I am a new rider(Pa Learners Permit at the end of 2020, and I received a Pa Motorcycle License in 2021 after passing a Motorcycle Safety Course).
I bought my first motorcycle, a TaoTao TBR7, at the beginning of 2021 and have been doing upgrades on that motorcycle since.
I added to my motorcycle collection by buying a Boom Vader Gen 2 in 2022, and that Grom-Clone motorcycle has been upgraded by me as well.
I continue to ride my Boom Vader Gen 2 motorcycle as well as my TaoTao TBR7 dual-sport bike.
Read more on my About Me page.
Fun Fact: I’ve only been on one group ride.

what oil cooler did you use
Hi John!
Glad you stopped by and even happier you made a comment. I did forget to put a link to where I bought the Oil Cooler from. I put the links in the blog post, and remember, I went with a larger version. I wanted extra cooling and extra capacity. My thoughts are this will allow the oil to stay in excellent condition for the motorcycle. I push my TBR7 too much at times.
Thanks for stopping by, and I hope the links help you and others. Thanks Again!
Nice step by step instructions! Thank you. Do you think you could swap out the screen for a paper element filter or some oter style that would do more filtering?
Good question!
I thought a better oil filtration device would be excellent. The oil screen only captures large items, and the way the oil cooler is set up inlet and outlet at the top of the cooler, I thought gunk would be trapped in the lower sections after time.
So I thought, why not a better oil filter for my TBR7’s oil cooler?
Then I had to humble my thinking that the screen is doing what it’s precisely designed to capture large particles. Smaller particles on the TBR7 (and its Chonda cousins: Hawk 250, Raven 250, etc.) are held in suspension and cleaned out with frequent oil changes.
I also thought the original oil cleaning device was an oil screen, so the original oil pump might not even have the power to pump oil through a paper filter.
So many what if’s, so I thought that the stock TaoTao TBR7 has an oil screen, so I’ll use the oil screen that came with the oil cooler.
Also, the oil cooler screen isn’t very easy to clean once installed. I worked it through my head, and it seems I have to disconnect the upper banjo nut to the oil cooler inlet to allow for rotation of the oil screen housing/cap to gain access to the oil screen.
These steps make it not so convenient to clean out a paper oil filter more often.
I rambled, but I love your question since it too ran through my head, and I always overthought it and just went with the original design.
The oil cooler added additional oil capacity to the TBR7’s engine, and keeping with regular oil changes(my old TBR7 oil changing way: Steps I Take To Do My TBR7 Oil Changes. ), I can keep the engine cleaner longer.
Thank you for your comment. It was a good question about the oil cooler and how we can improve it. This is the Chonda-Way.
😀