
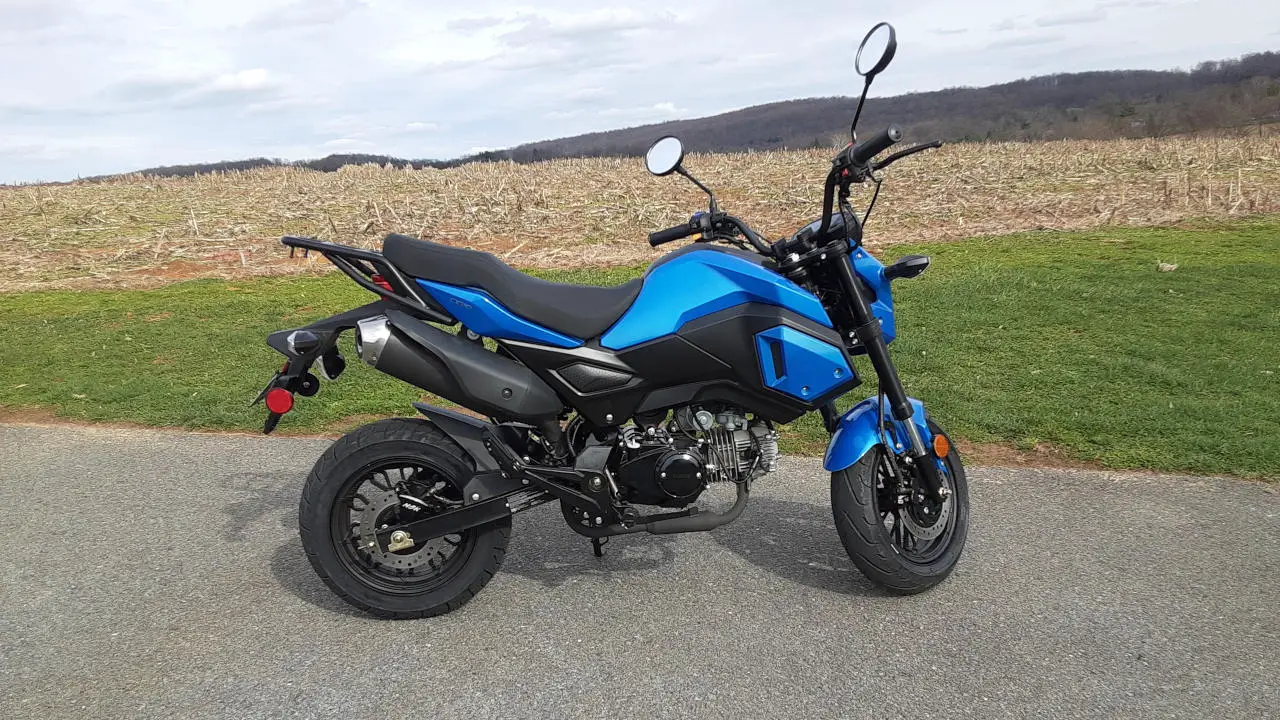
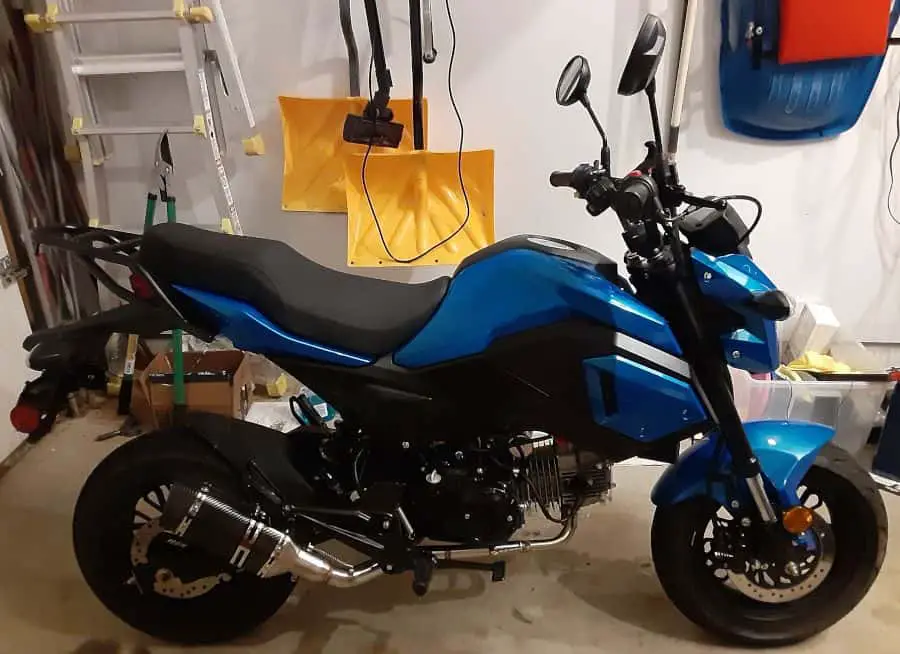
As for a modification to my new Boom Vader Gen 2 motorcycle, I would say this new exhaust upgrade wakes up my little 125cc engine’s sound. I was looking for a basic Boom Vader aftermarket exhaust mod install setup, and this BASIC complete exhaust system upgrade seems to work well.
But, I couldn’t find any instructions to do the actual mod installation, and even a PDF version for download couldn’t be found online. So I formulated my exhaust modification installation process in my mind and went forward, creating these steps I used.
I’ve never done a Boom Vader motorcycle exhaust upgrade before, and I’m not a motorcycle mechanic, so I’m just sharing what I did.
Results: Boom Vader Exhaust Upgrade Sounds
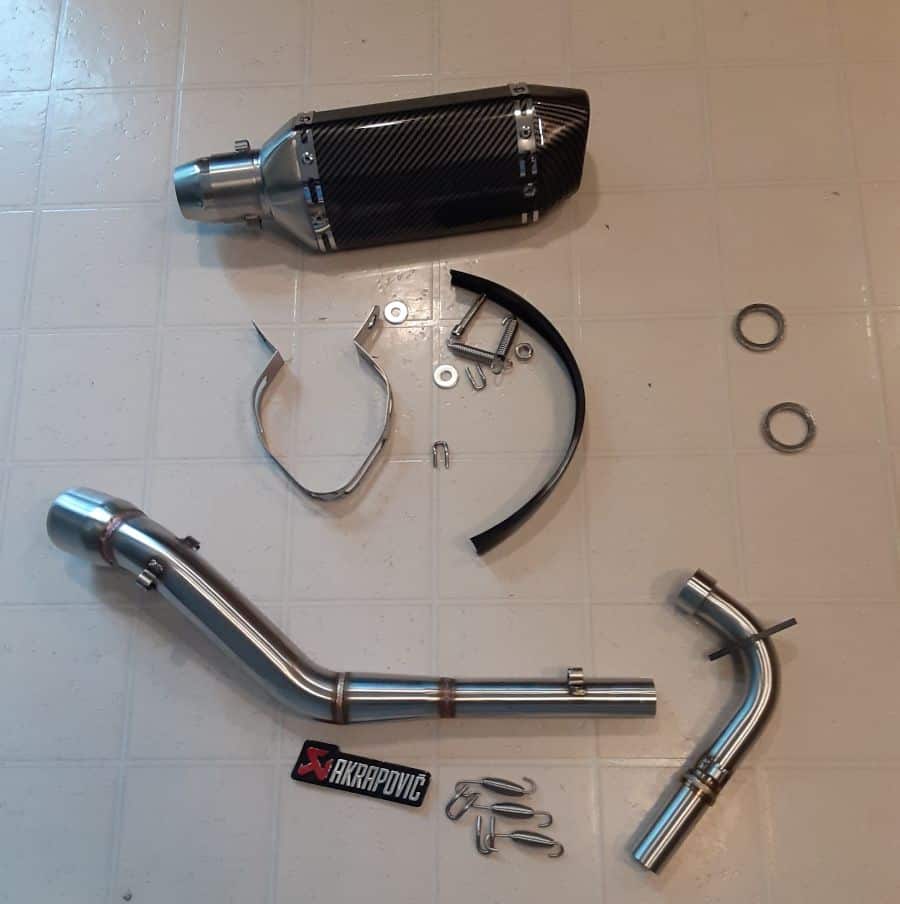
From my setbacks ( Ordered My Boom Vader Exhaust Upgrade Parts (A Dummy) ) from the start of this upgrade project, I’ve had extra time to figure out how to do this new exhaust upgrade, but the only way to know is to try. But I did finally receive the upgraded exhaust piping: Boom Vader Exhaust Piping Upgrade Has Finally Arrived!
You figure out what your Grom Clone motorcycle needs and get help where you need to do your exhaust mod.
After this post, I plan to make other posts about ‘bloopers’ and ‘hindsight’ thoughts that could have made this exhaust upgrade go well. Nonetheless, my little engine on my Boom Vader Gen 2 motorcycle sounds way better. I hope you follow along with my DIY install instructions I followed and think about upgrading your Grom Clone too.
Enjoy, and more importantly, be safe while doing this Boom Vader Exhaust Upgrade.

How I Installed My Boom Vader Exhaust System(Muffler and Piping).
1.- Boom Vader Exhaust Upgrade Prep Work.
This step is the step I always manage to go over and over with all my motorcycle upgrades. Setup your worksite(motorcycle, tools, and materials) so that success is your only option. If you read about my antics in this blog, you will know my evaluation of success is subjective. Ha.
*- Shop Materials Needed:
-A new Grom Clone exhaust gasket that fits your Boom Vader. ( FAQ: Boom Vader Exhaust Gasket Size )
-Thread locker( I like the blue type), a mainstay for us Chonda Owners.
*- Garage Tools Needed:
-Flat Head Screwdriver – Or any long tool that allows you to get those exhaust springs installed. You’ll see how I used mine, and maybe a long awl will work, or another means, for you.
-Philips Screw Driver for some body panels and muffler cover.
-Combination wrenches. Typical open-ended and closed-ended metric wrenches.
-Ratchet Set, I have a cheap 3/8th’s set that has metric sockets
FYI: Building My List of Must-Have Tools For Motorcycle Owners
*- Motorcycle Exhaust Parts needed:
Author’s Notice: This page contains affiliate links, for which I may earn a commission by their use. Also, as an Amazon Associate, I earn from qualifying Amazon purchases.
Boom Vader Exhaust Upgrade Shopping List
| MSX Motorcycle Exhaust Pipe System(Muffler Sold Separate). | Click For Current Prices |
| Universal Slip-On Motorcycle Exhaust Muffler | 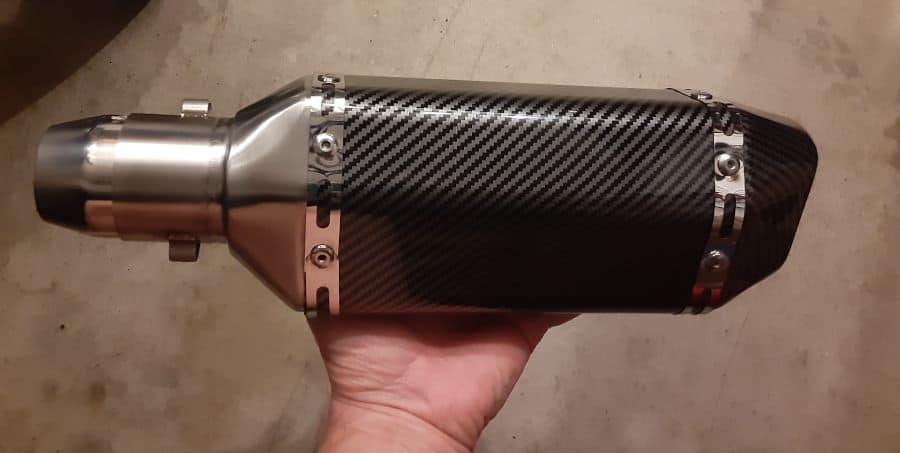 Click For Current Prices. |
| Exhaust Crush Gaskets (32×24.5mm) | 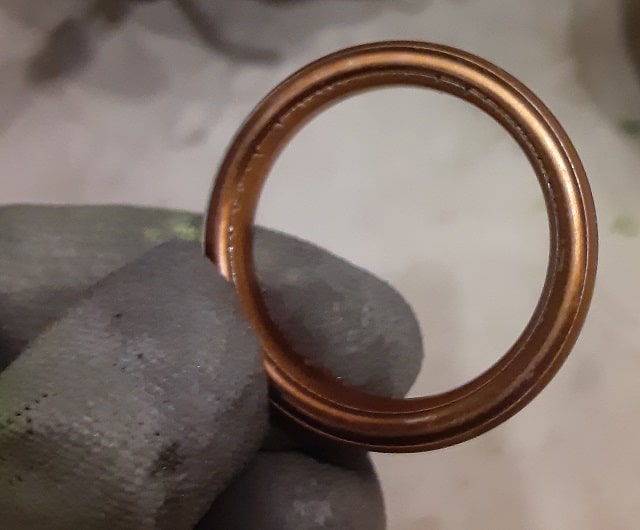 Click For Current Prices. |
– New Muffler: The one I chose is pretty sweet looking and appears to have tunable qualities. Read about the out-of-box review here: Boom Vader Gen 2 Slip-On Muffler Review. Simple motorcycle muffler well suited for the Boom Vader motorcycle.
– Exhaust Gaskets: I will go more into this since this is an exhaust upgrade blooper. My own fault, but for these upgrade installation instructions, let us assume you have the right gaskets. Oops, now you know my exhaust upgrade blooper.
– New Boom Vader Motorcycle Drop-in Exhaust: This exhaust part took the longest. I wanted an upgraded exhaust(low resistances, high flow) that was a simple drop-in for my Boom Vader Gen 2 engine and motorcycle, which took a while to get.
*-Motorcycle Work Safety Steps
– Fire: I am working on a machine containing more than a gallon of flammable and explosive gasoline, and I take steps to protect myself against extreme failure. Being summertime, I worked in a ventilated garage. Also, it had no open flame close by. And had my trusty fire extinguisher within reach(an excellent addition to all garage spaces).
– Burns: I will only work on a cool engine. Some people feel if they were gloves, they could do anything. No. I will be assembling exhaust parts and want them cool and easy to handle and assemble. I am working on a cool-to-touch engine.
– PPE: Where needed, gloves and safety glasses. Working with springs that can snap back, gloves are an option to having my hand struck by an exhaust spring. Safety glasses are not an option, and because I wear eye contact, I need readers to cancel out my contacts while working close-up with parts ( Safety Glasses With Readers ). Protect your eyes, I do.
FAQ: Motorcycle Garage Safety Rules
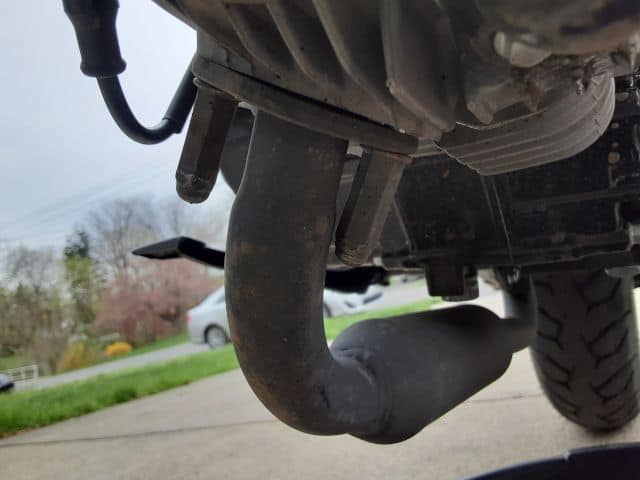
2.- Remove The Boom Vader’s Stock Exhaust.
Note: While items are loosened, they could fall off the motorcycle. Test as you loosen parts and slowly remove them. The Boom Vader’s stock exhaust piping looks small but has weight. So I was careful.
*- Loosen and remove exhaust nuts on the engine outlet.
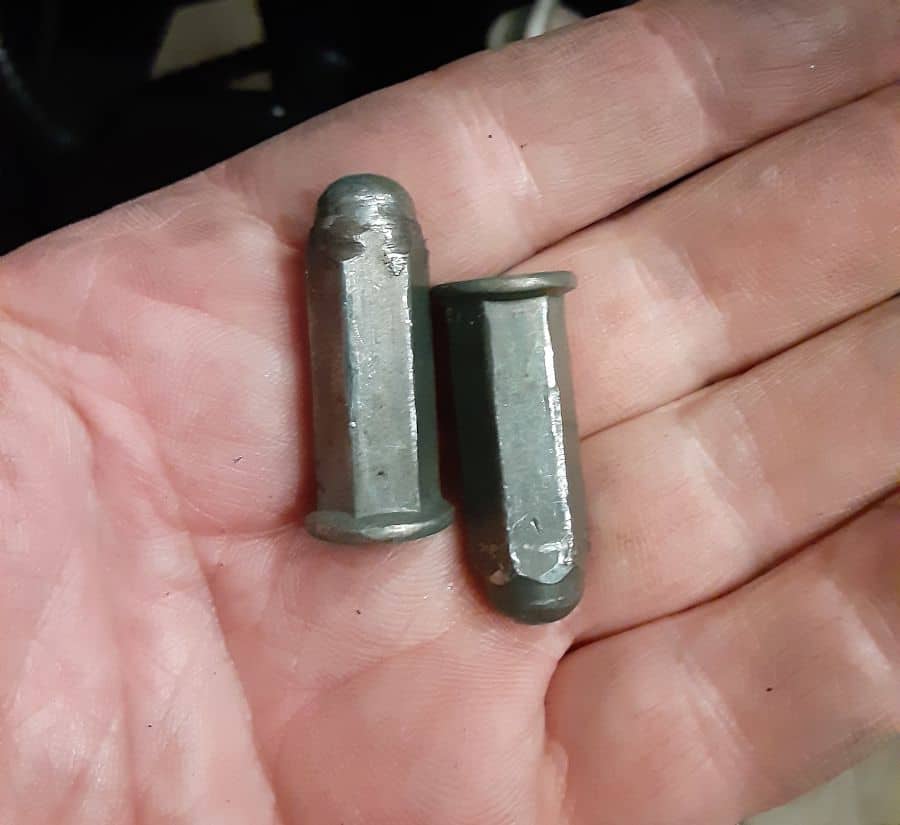
Safely store nuts(I used a magnetic parts tray during motorcycle repairs and upgrades); these nuts are reused for the upgraded exhaust system. Losing these bolts could be an issue since these bolts hold up the exhaust piping flange/pipe and cover and protect the exhaust studs’ threads from damage and debris.
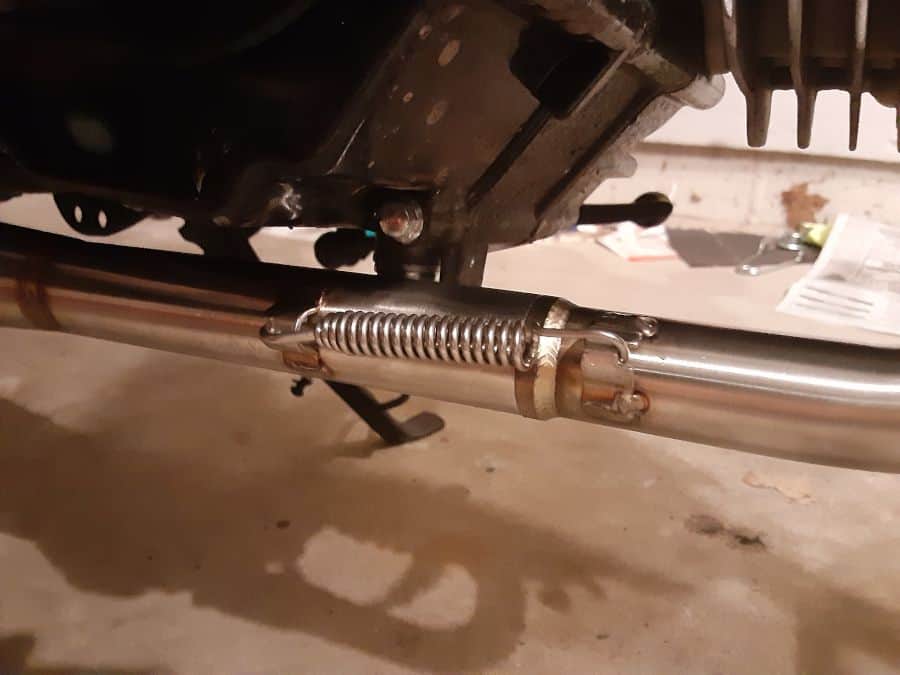
*- Remove the hanger bolt under the Grom Clone’s engine.
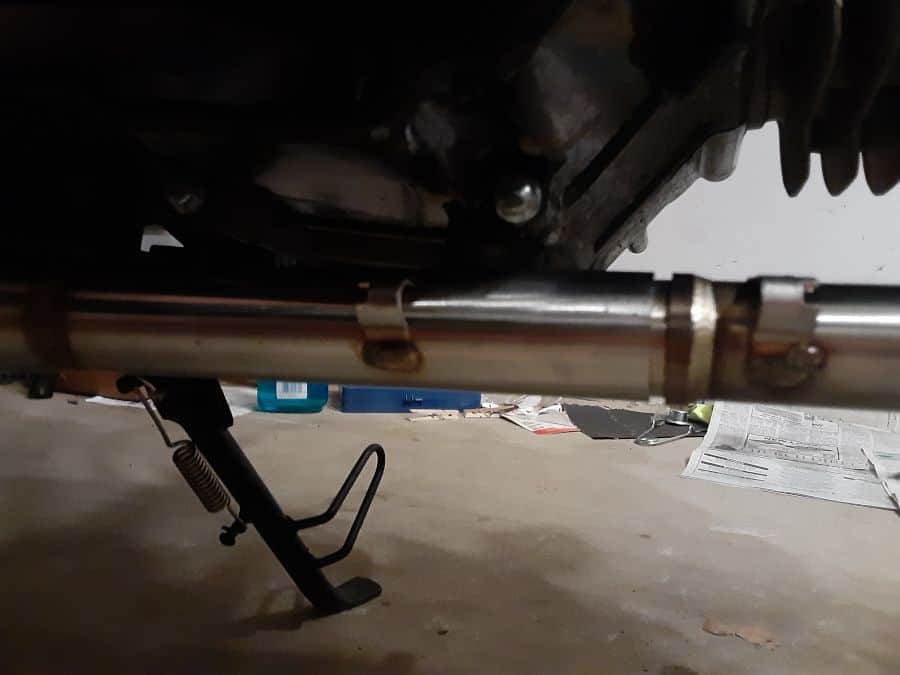
*- Loosen the midway motorcycle exhaust clamp.
This step might allow the first section of the exhaust piping to come free. Test and remove piping sections carefully.
*- Remove The Boom Vader’s Stock Muffler.
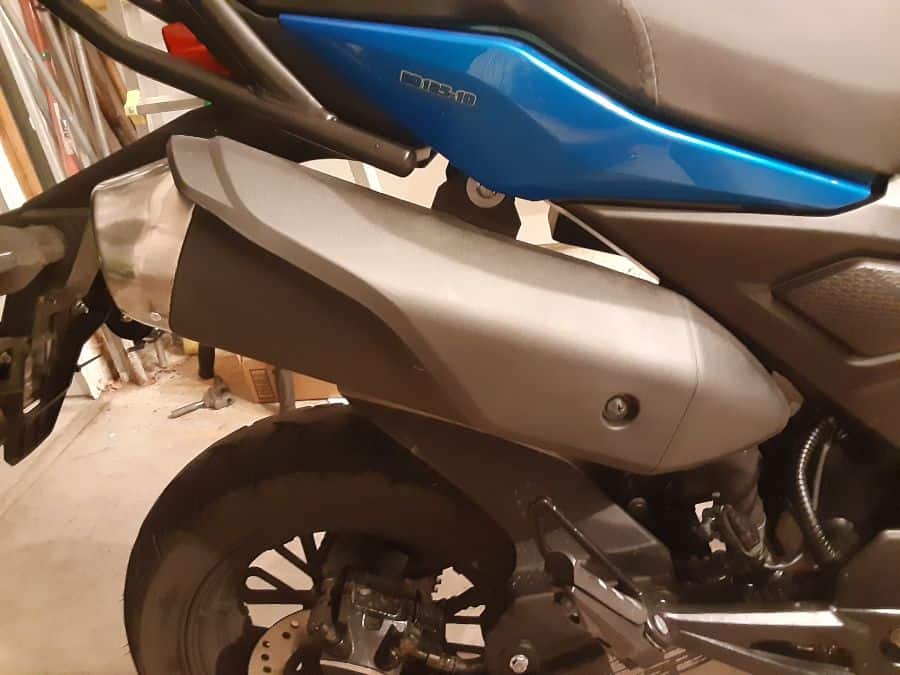
-Remove the plastic body over
Remove the rearward(easy to get with a ratchet and extension) and forward(had to pop off part of the right side motorcycle body panel but got to the bolt with an extension and socket) muffler mounting bolts. I used my fingers to hold the nut on the inner side, but a wrench might make more sense. 😀
Warning: As you remove bolts, the muffler or connected parts can fall. These parts have metal edges and feel heavier than expected. Be careful they don’t fall or strike you.
Now the first section might be removed by this point, but if not, slide the muffler up and away. This stock muffler has some weight to it, be careful, and now the lower/first section of the exhaust piping might fall. Be cautious of this happening too.
Having only two hands seems like a limitation at times.
*- Removed The Old Exhaust Gasket.

These exhaust gaskets are crush-type, meant for only one-time use. Have enough fresh gaskets ready for the new exhaust system mod.
*- Remove Any Remaining Stock Exhaust System-Hardware.
If not done already, with the help of gravity. All piping and mounting hardware should be removed. Ensure no gasket material is left in the exhaust port(using a flashlight and mirror are an option, but I used my fingers).
3.- Dry-fit New Boom Vader Exhaust Upgrade Piping.
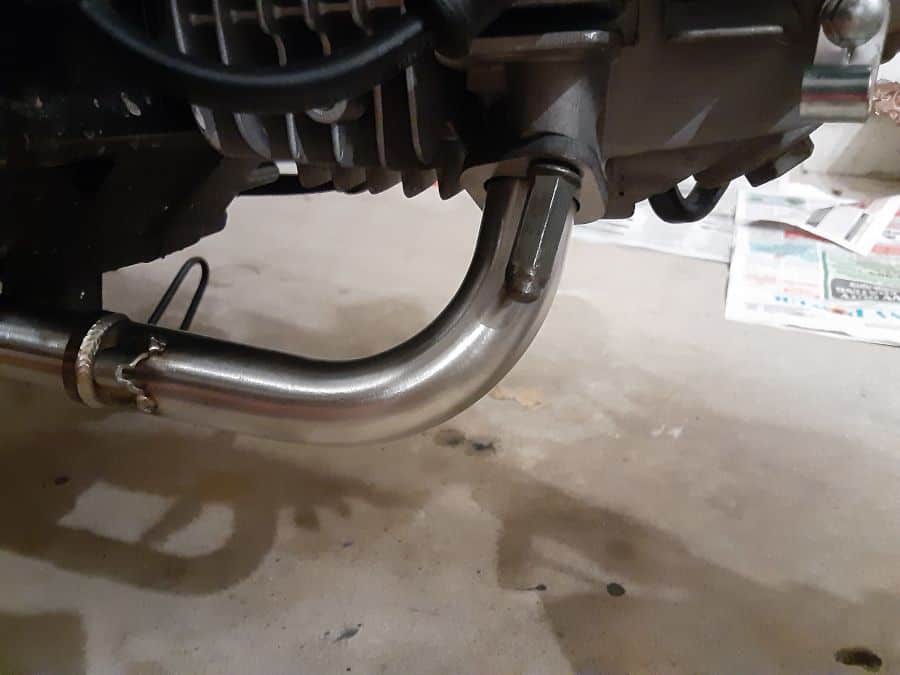
*- Position the new exhaust piping.
Slip both parts of the new exhaust piping together, creating one long exhaust piping. Fish new exhaust piping such that the exhaust flange end is near the engine exhaust port and the wider end is resting near the right side rear set.
*- Insert new motorcycle exhaust gasket(Do not crush yet!).
Remember, the Boom Vader uses a one-time exhaust gasket, so do not crush it until ready to complete the installation. The crushing step comes at the end of the installation steps.
*- Dry-fit old exhaust flange nuts (Only hand tighten, do not crush exhaust gasket yet!)
I am using the exhaust nuts to hold the new exhaust piping inlet over the Boom Vader’s engine exhaust outlet. Lightly hand tightening only.
Installation Step Tidbit: this drop-in new exhaust piping exhaust flange was adequately sized for my Grom Clone motorcycle. This finding was a welcome feature I did not have with my TaoTao TBR7 Exhaust system upgrade( My TaoTao TBR7 Exhaust Upgrade ), so count your blessings, Chonda-owner!
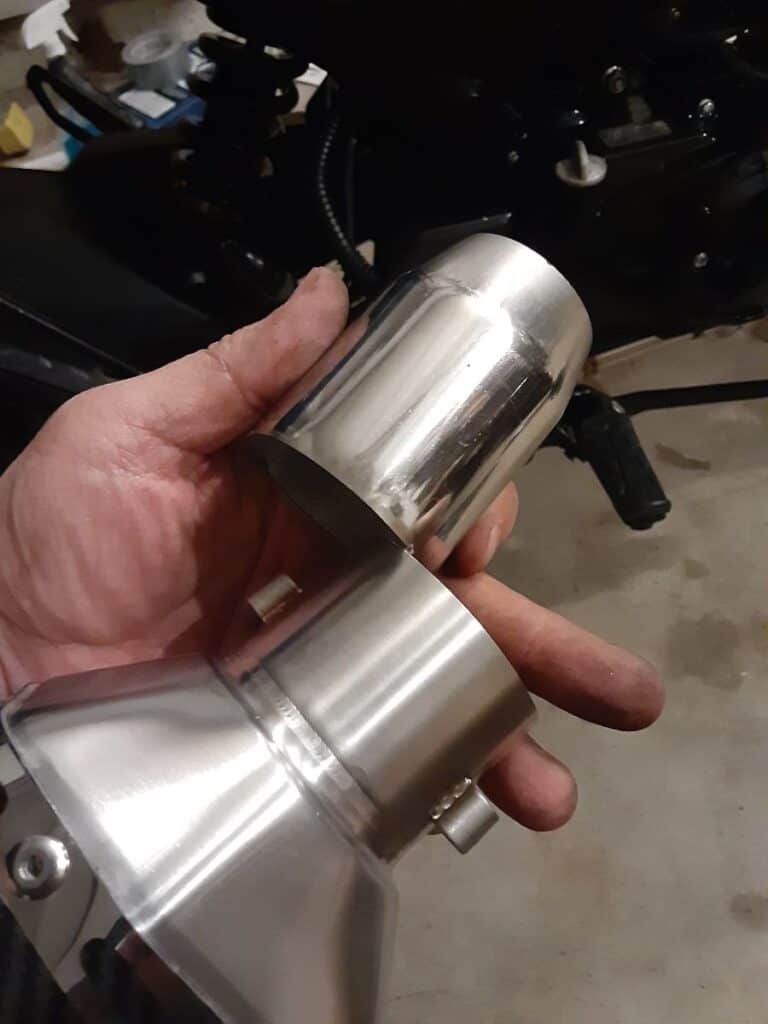
4.- Prep New Boom Vader Muffler Upgrade.
Since this muffler recommendation came to form a Grom clone motorcycle-focused source, with owners of different versions of Grom Clones, this muffler seems to have two inlets. Of course, I am guessing the adapter is for different types of Grom Clone motorcycle exhaust setups.
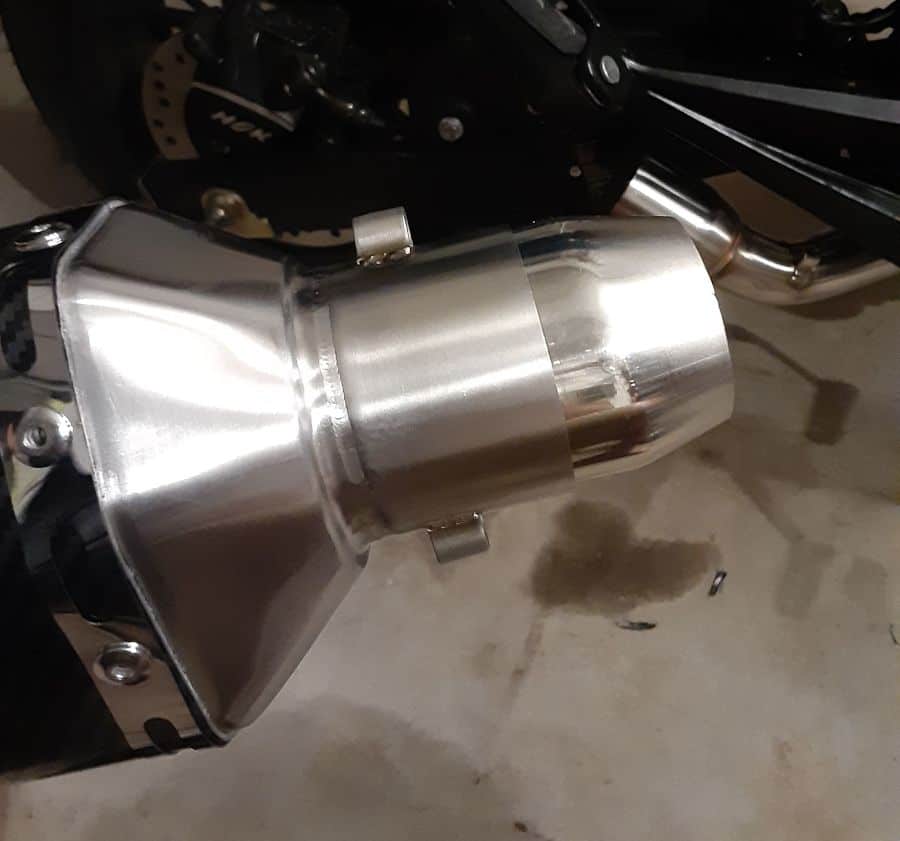
I removed the new muffler inlet adapter for my Boom Vader Gen 2 125 motorcycle because I was using this new drop-in exhaust piping. Different types of Grom clone motorcycles or other types of exhausts might need to keep the preinstalled muffler adapter, always test first.
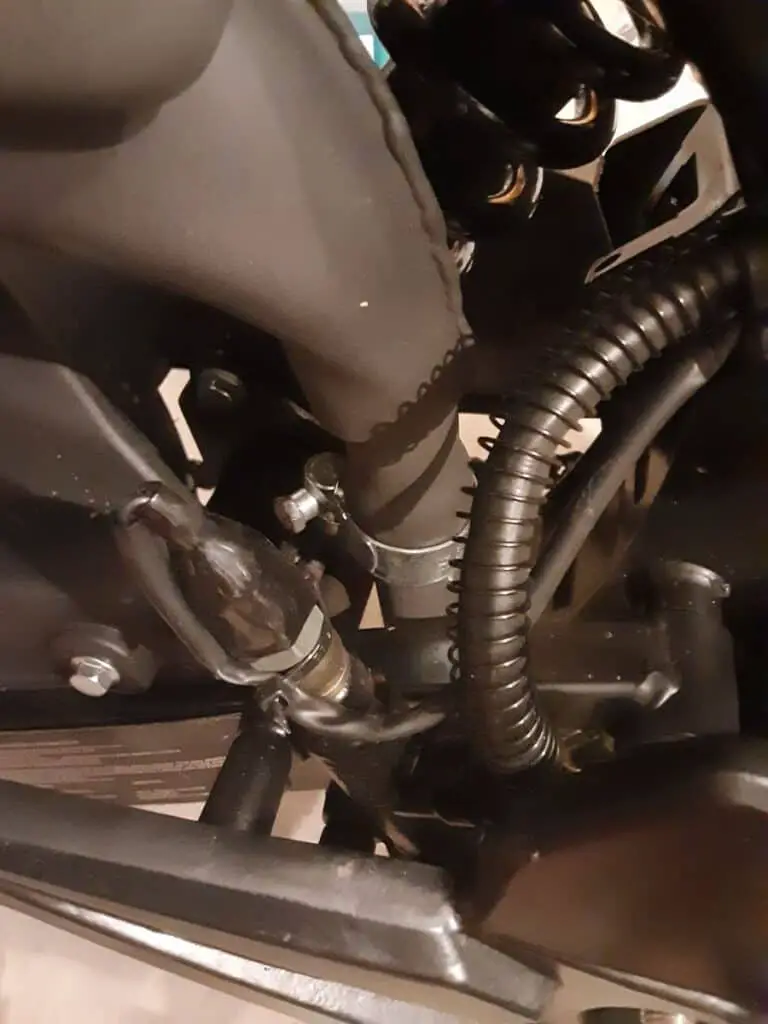
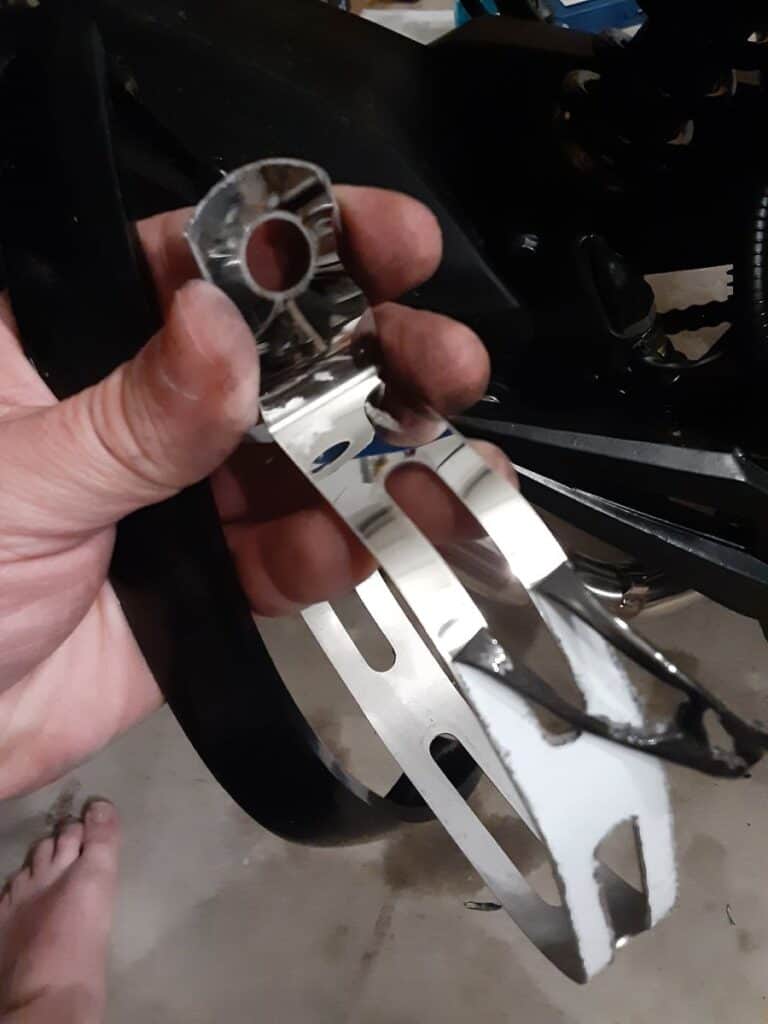
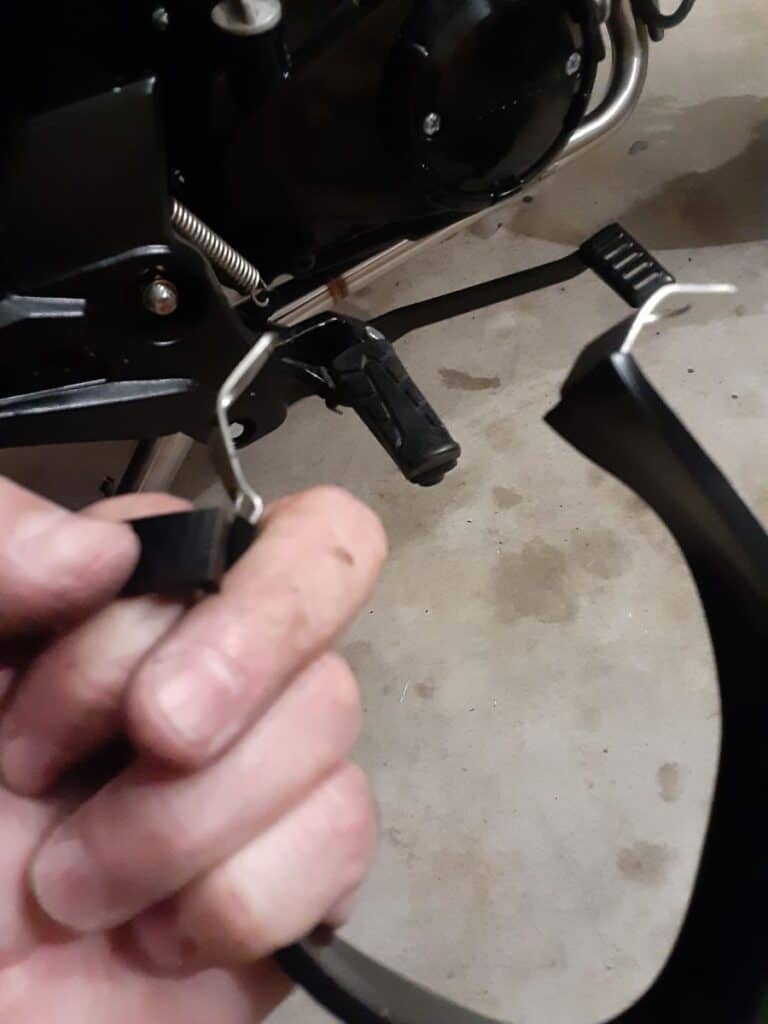
*- Setup New Motorcycle Muffler Hanger Hardware.
I received a metal band with a plastic coating and a separate rubber strip.
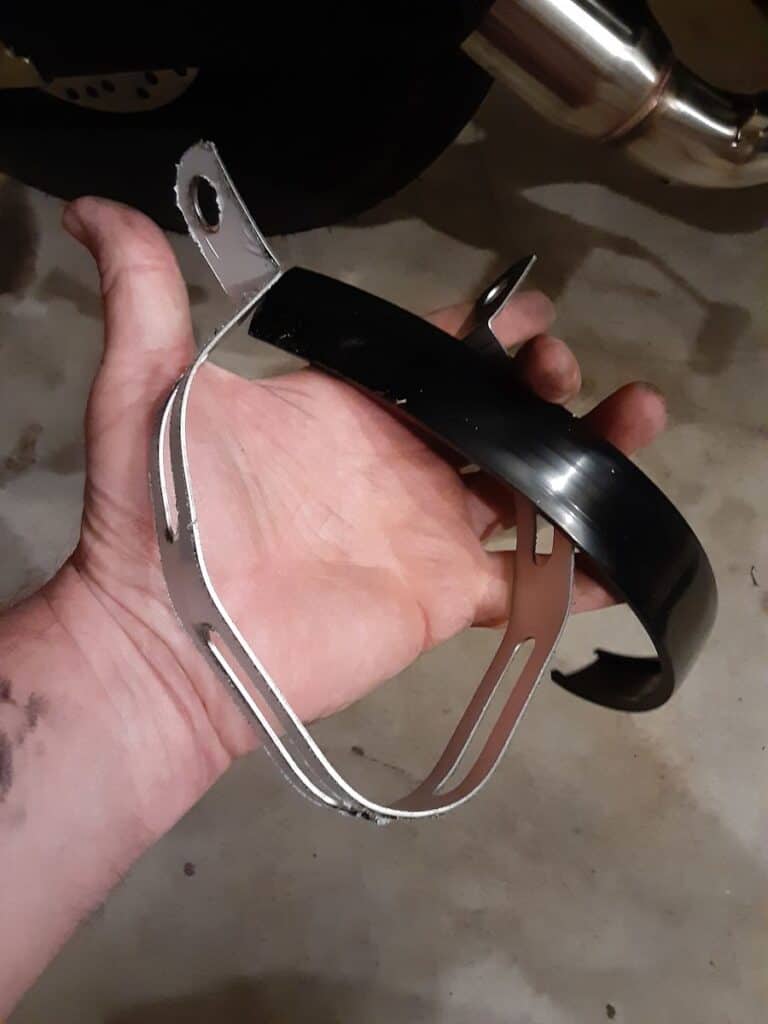
I removed the plastic film coating the hanger.
Slid the rubber strip/sleeve on the inner side of the new muffler hanger
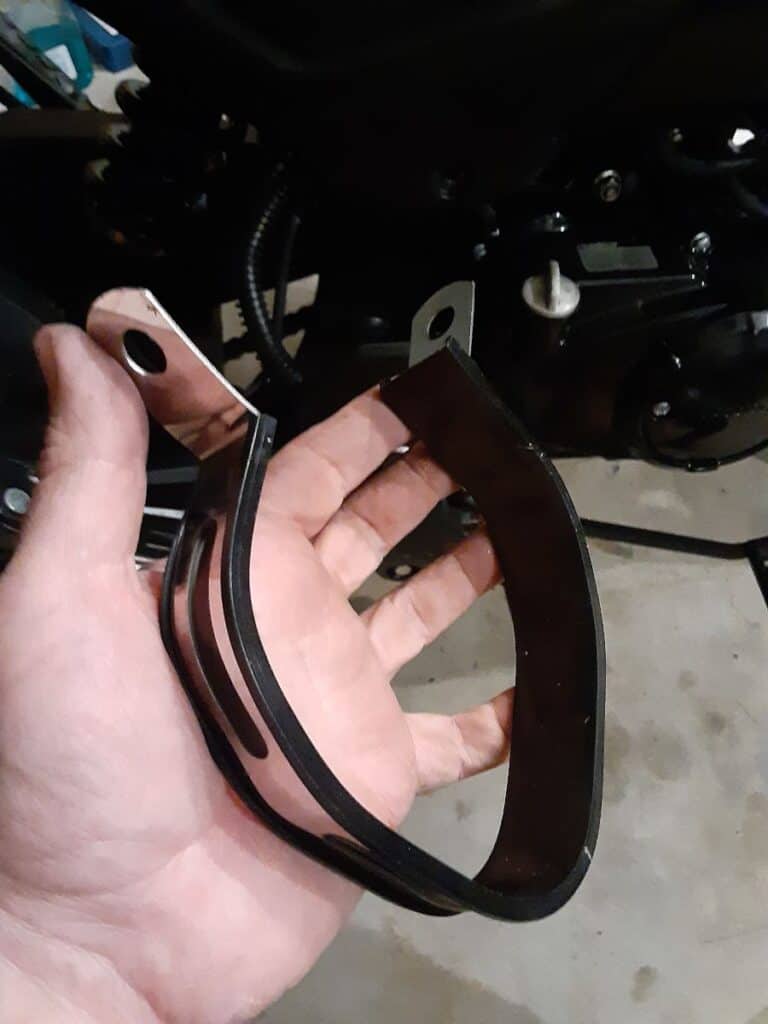
I finalized it by trimming off the excess rubber strip.
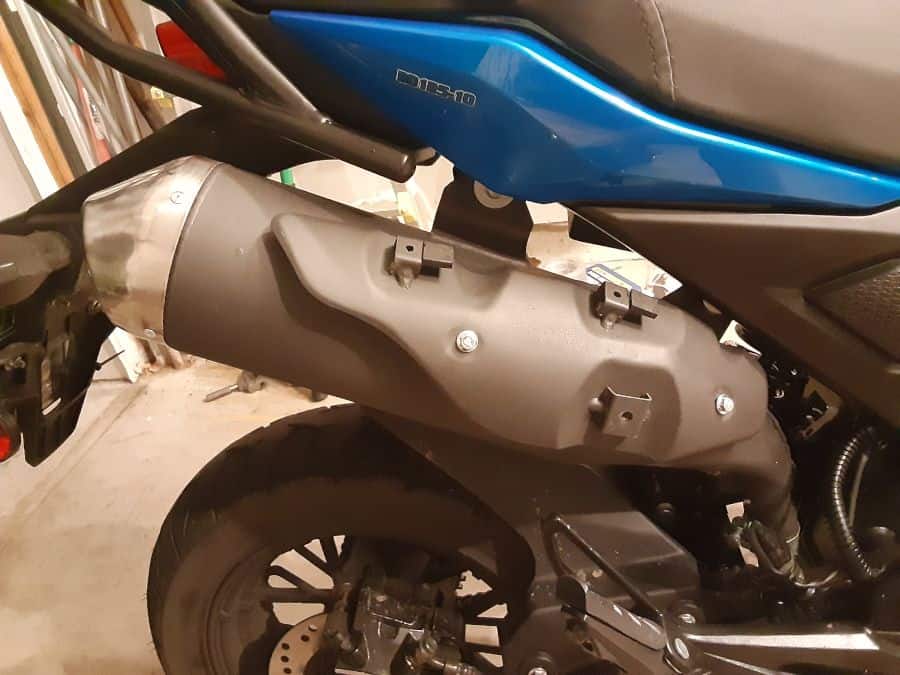
5.- Hang The New Boom Vader Muffler.
NOTE: I found no instructions for this muffler installation, and I did find online pictures of the muffler hanging off a hold that might exist in some Grom Clone motorcycle, but not my Boom Vader Gen 2 BD125-10 version.
One picture showed an “L” shaped metal piece you used to connect the new muffler hanger to the right rear passenger peg, but my kit didn’t come with one. So I came up with my own muffler hanger mounting point. Take with a grain of salt; I am no motorcycle mechanic.
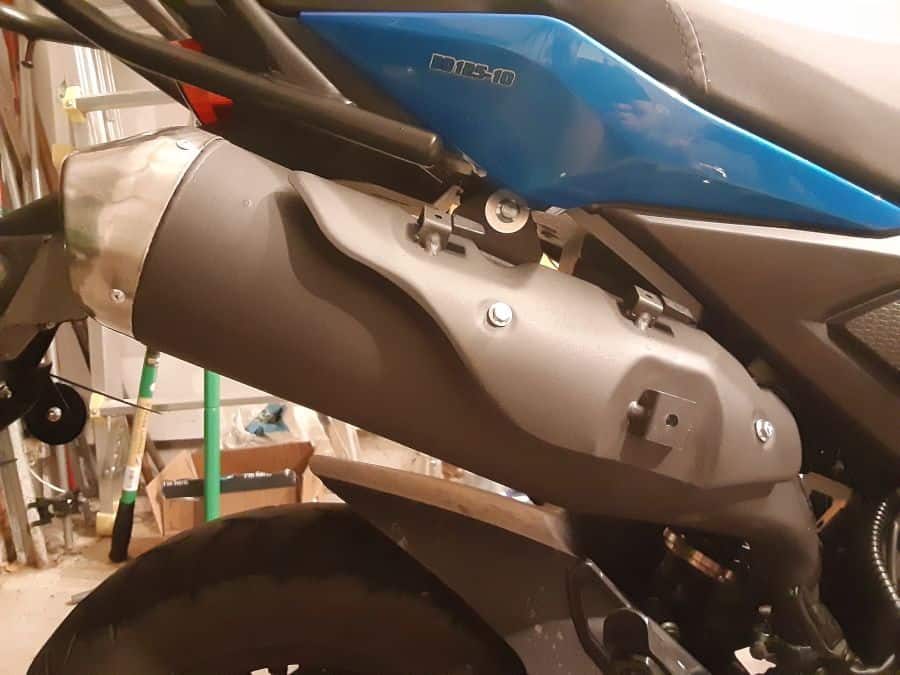
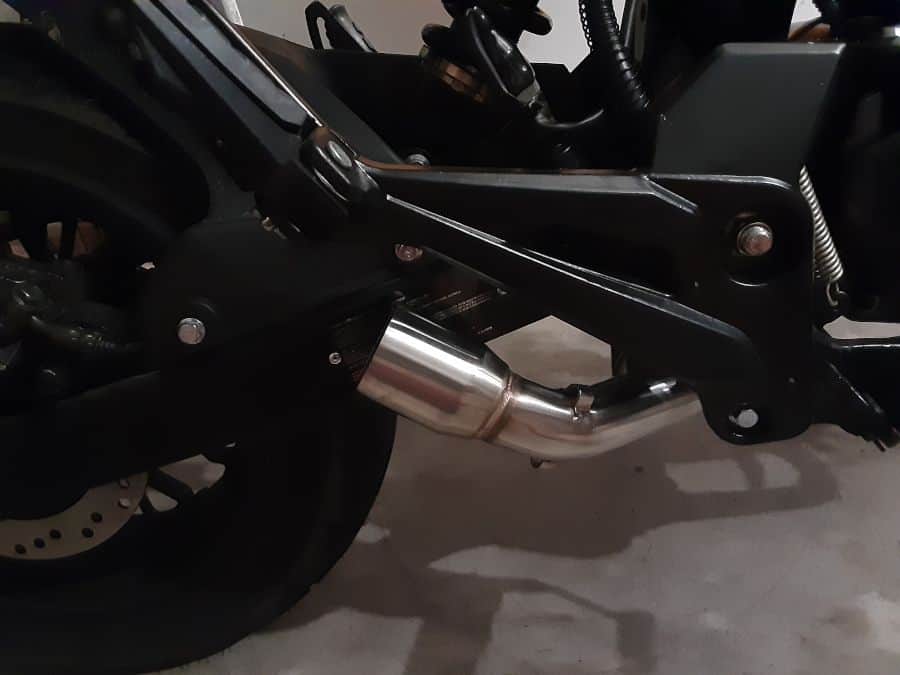
*- Insert the new muffler slip-on inlet end onto the end of the new drop-in exhaust piping end.
*- Wrap new muffler mount about muffler and close ends around motorcycle’s rear set.
*- Using the two washers, long bolt, and nut that came with the new muffler, mount the muffler hanger loosely. Just dry fit it and check the position of the muffler.
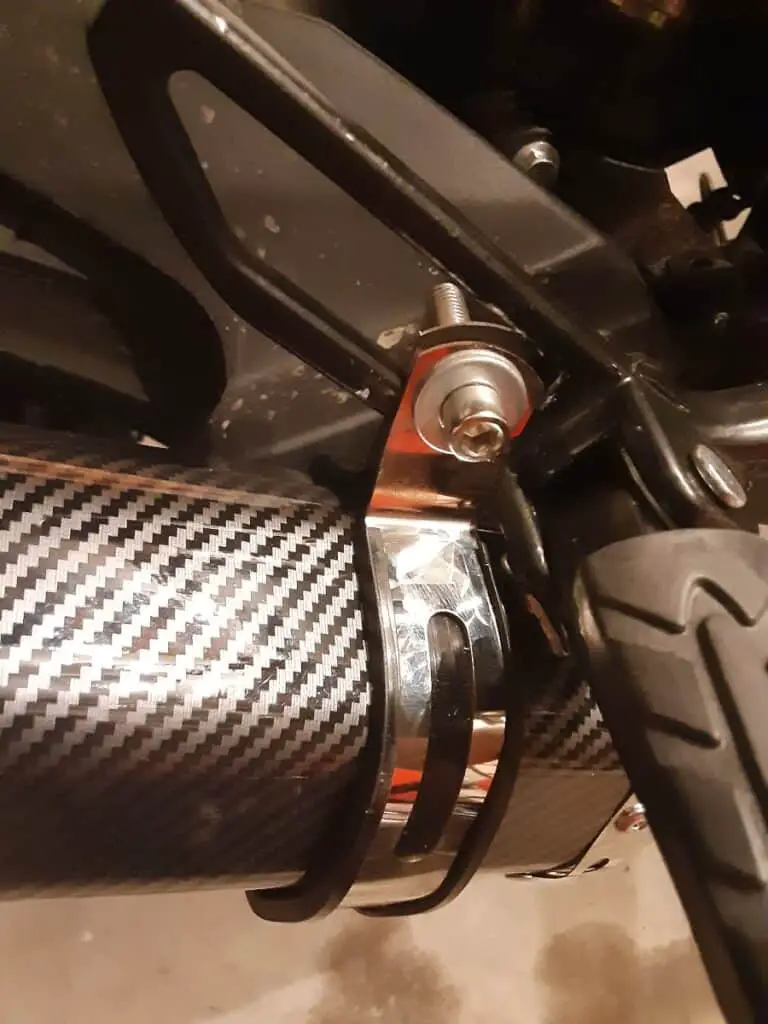
Does it clear the swing arm if the swing arm was moved upward? If not, rotate the muffler body outward and away from the motorcycle’s swing arm; once the muffler is clear of any other moving motorcycle parts, time to finalize the new exhaust system installation.
6.- Tighten Up The New Exhaust System Mounting.
*- Tighten the exhaust flange, engine outlet, and bolts.
Eventually, apply tightening force to both sides of the flange by equally turning each bolt. Once tight enough to keep gases in, move on.
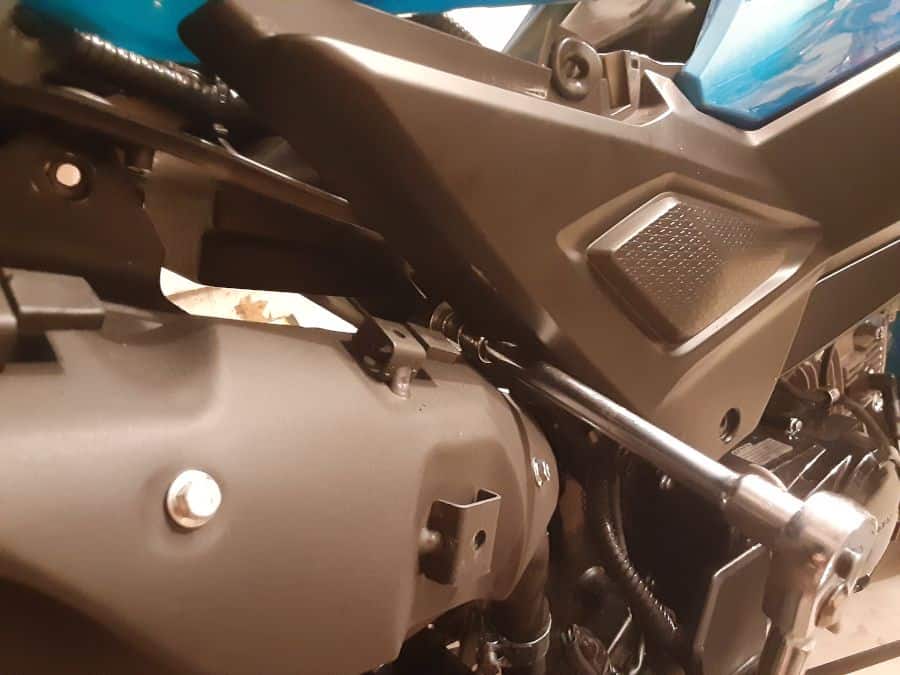
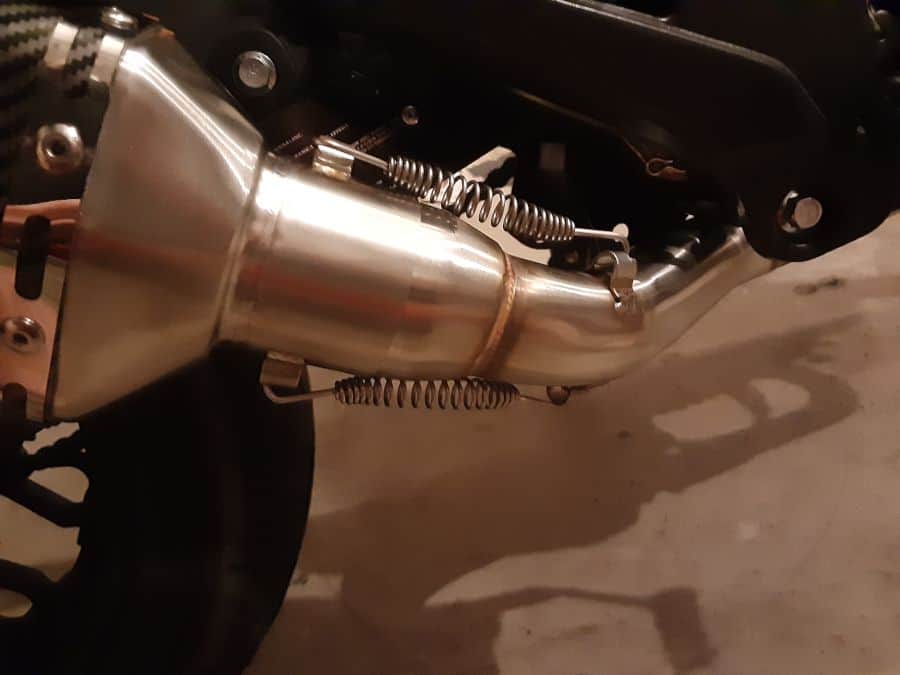
*-Mount motorcycle exhaust piping springs.
There are two muffler springs and one midway exhaust piping spring. WEAR SAFETY GLASSES!
What I did: I extended the spring as much as possible, hocked on end to a spring mounting holder. With a screwdriver, I placed the screwdriver tip onto the remaining spring mounting holder, hooked the free end of the spring onto the shaft of the screwdriver, and fulcrum the screwdriver from the spring. The spring will be stretched, and the hook will slide down the end of the screwdriver and onto the spring mounting hole.
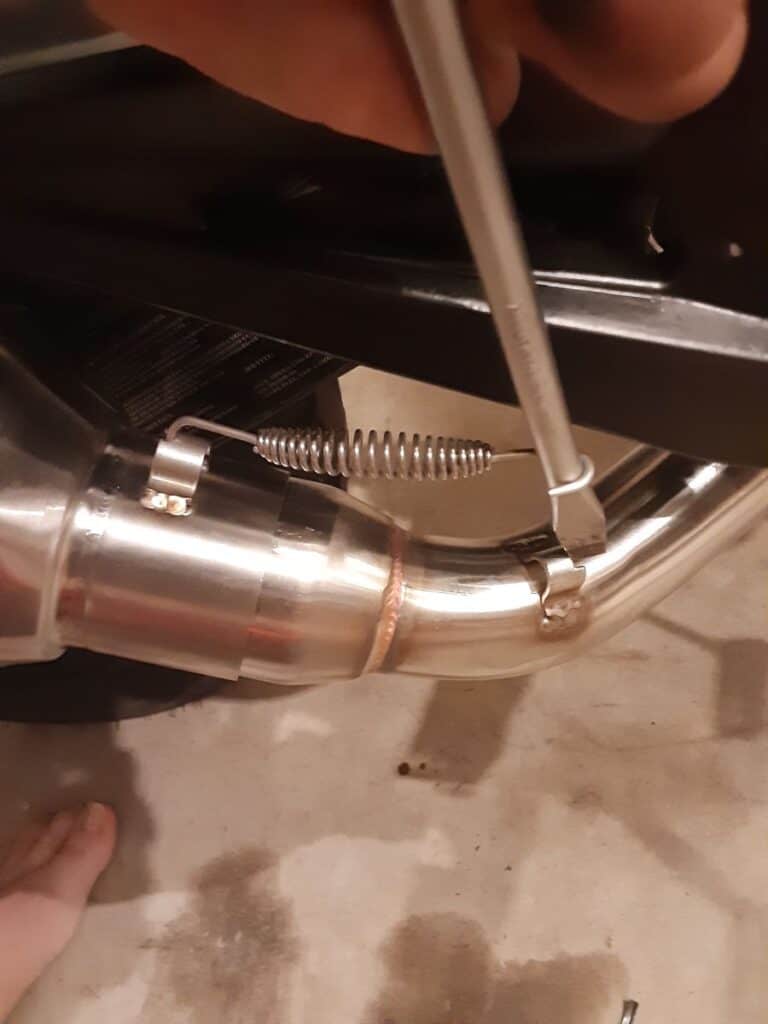
Once mounted, adjust the spring hooked ends to be inside their prepared grooves.
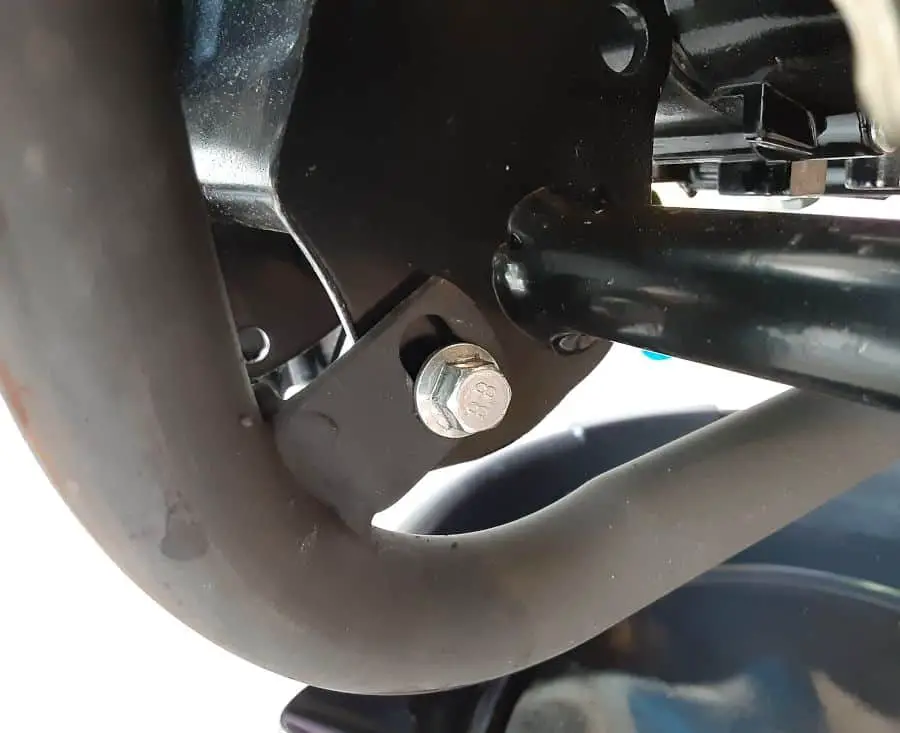
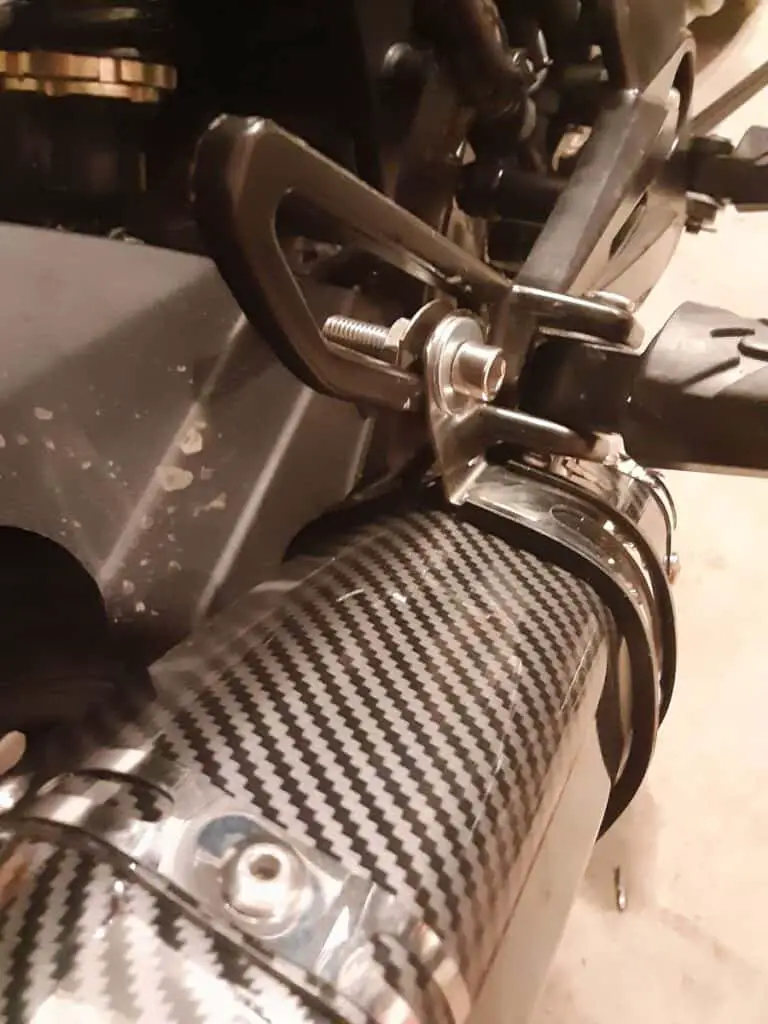
*- Tighten the new muffler hanger bolt.
I used a blue thread locker on the threads and tightened the bolt till it felt it would not move(later, I found this was a very good step; wait for that post).
7.- Test Your Boom Vader Exhaust Upgrade!
I pulled and grabbed a section of the new muffler and exhaust pipe and ensured it was snug without rubbing any of my Boom Vader motorcycle parts, and then the actual test.
I started the motorcycle. The Grom Clone came to life with a bass sound it never had before. My Boom Vader motorcycle had a low rumble and bass sound. Once warmed up, I adjusted the idle speed lower(a good sign to me, it says the engine is working less hard to exhaust engine gases).
Of course, I revved the engine repeatedly to enjoy the new sounds. I’m sure you would too. 😀
Final Boom Vader Exhaust Upgrade Instruction:
The new drop-in exhaust and slip-on muffler are on, and the Boom Vader exhaust upgrade is finally complete.
However, I didn’t tune it right away and did some new muffler sound testing. With my ears and a decibel sound phone app. Trying to find a happy balance of power(which I only measured by idle rpm changes, not very scientific), sound(very subjective since I was tuning for how much my neighbors might hate me, and actual decibel changes from:
Full Baffle, Baffled but inlet cap removed, and no baffle.
New Boom Vader Exhaust Upgrade with full baffle:
New Boom Vader Exhaust Upgrade with Partial Baffle:
New Boom Vader Exhaust Upgrade with NO baffle:
I plan to give my final decision and results later, but for now, these installation steps got me a new Boom Vader exhaust upgrade with a pretty good-looking and sounding muffler.
Your Boom Vader Motorcycle Experiences?
- Did you do this type of exhaust and muffler upgrade?
- Was your new exhaust and muffler upgrade precisely like this?
- What were your final new muffler sounds?
- Did you later upgrade to the 141cc Big Block Kit on your Grom Clone motorcycle? If so, did your exhaust fit?
Please leave a comment below to share your upgrade experiences too. There are many types of Grom Clone motorcycles, not just asking about doing the Boom Vader Gen 2 125cc motorcycle (BD125-10) upgrade.
Ride Safe, Ride Sounding Good, Ride Fun!
Click To See My Recommended
Boom Vader Gen 2 Upgrades
Author’s Notice: This page contains affiliate links, for which I may earn a commission by their use. Also, as an Amazon Associate, I earn from qualifying Amazon purchases.
Boom Vader Exhaust Upgrade Shopping List
| MSX Motorcycle Exhaust Pipe System(Muffler Sold Separate). | Click For Current Prices |
| Universal Slip-On Motorcycle Exhaust Muffler | Click For Current Prices. |
| Exhaust Crush Gaskets (32×24.5mm) | Click For Current Prices. |
Boom Vader 125cc Exhaust Upgrade Bloopers.
Yes, I created a post about my bloopers associated with this exhaust upgrade and wanted to be sure you got to read it. It’s both funny and informative, and I hope if you learn from my mistakes, you will not repeat them. My Post:
Boom Vader Exhaust Upgrade Bloopers

Hi I’m Tom, A New Motorcycle Rider and Blog Author.
I am a new rider(Pa Learners Permit at the end of 2020, and I received a Pa Motorcycle License in 2021 after passing a Motorcycle Safety Course).
I bought my first motorcycle, a TaoTao TBR7, at the beginning of 2021 and have been doing upgrades on that motorcycle since.
I added to my motorcycle collection by buying a Boom Vader Gen 2 in 2022, and that Grom-Clone motorcycle has been upgraded by me as well.
I continue to ride my Boom Vader Gen 2 motorcycle as well as my TaoTao TBR7 dual-sport bike.
Read more on my About Me page.
Fun Fact: I’ve only been on one group ride.

Did you use one or two crush gaskets?
Hi Kenny,
Good question, I’ve seen somepeople ask this in the forums, with weird answers. Well can only speak for myself, for my motorcycle exhaust gasket replacement it was smooth minus the tiny bloopers I went through( My Boom Vader 125 Exhaust Upgrade Bloopers ).
Once I figured out my mistake, I only used ONE motorcycle exhaust gasket in my replacement.
Now I can imagine, since Grom-Clone aftermarket parts might not be up to spec, two gaskets might be needed, but I would be afraid how much you crush these gaskets. They can’t squeeze outward so they might squeeze inward and restrict the exhaust gas flow.
Tell me what you did. Again, I only used one motorcycle exhaust gasket.
Tom